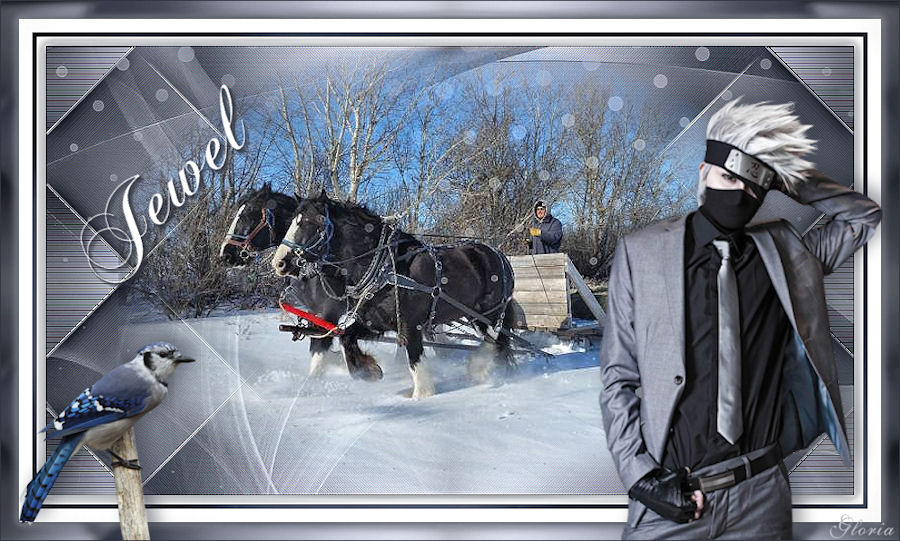
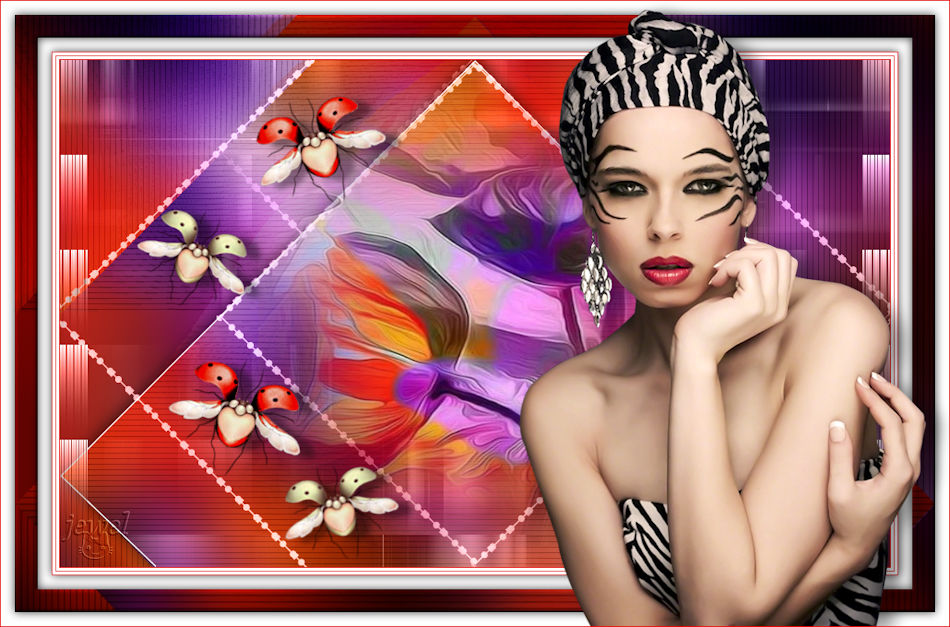
-


Colybrix, thank you very much for your permission that I may translate your tutorials

Tutoriel original ici
***

***
Plugins
Filters Unlimited – Bkg Designer Sf10I
Carolaine and Sensibility
Alien Skin Eye Candy 5 : Impact
Simple
***
Foreground color #4f0310
Background color : #fcd1d0

***
1 - Open Alpha layer – Window / duplicate
We work on the copy
2 - Radial Gradient
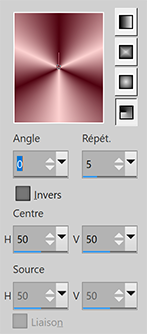
Fill with the gradient
3 - Adjust – Blur – Gaussian blur 15
Layers - Duplicate
Filters Unlimited – Bkg Designer Sf10I – ALFs Border Mirror Bevel (by default)

4 - Image effects – Seamless Tiling – by default
Opacity 85%
Merge - Merge down
5 - Selections - Load - Save selection - Load Selection 1 from Alpha Channel
Layers - New layer
Background ........... white color
Fill with white color
Selections - Modify - Contract 3 pixels
Erase
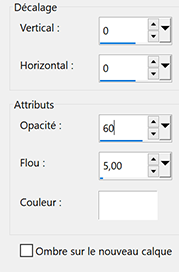
6 - Flood Fill opacity 50
Fill with the gradient - Background white color

Selections - Select none
7 - Image effects – Seamless Tiling – by default
Blend mode Overlay
8 - Selections - Load - Save selection - Load Selection 2 from Alpha Channel
Flood Fill 100
Layers - New layer
Fill with white color
Selections - Modify - Contract 3 pixels
Erase
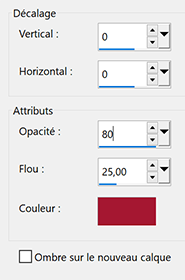
8 bis - Flood Fill opacity 50
Fill with the gradient
Selections - Select none
9 - Image effects – Seamless Tiling – by default
Layers - Arrange - Move down
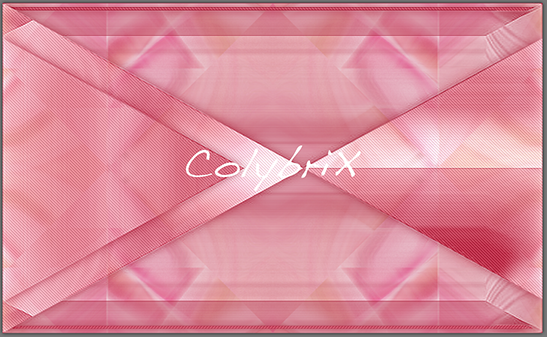
Result

Flood Fill 100%
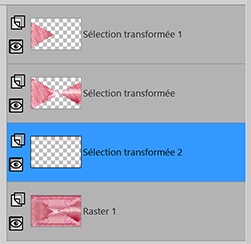
10 - Stay on the middle layer (Raster 3)
Effects - Carolaine and Sensibility – CS-LDots by default
11 - Move on the top layer (raster 2)
Effects - Carolaine and Sensibility – CS-DLines by default
Merge - Merge visible
12 - Selections - Load - Save selection - Load Selection 1 from Alpha Channel
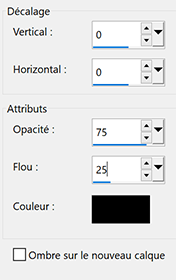
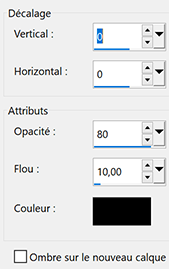
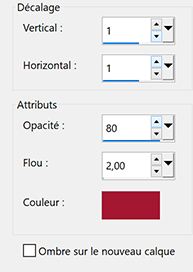
Effects – 3D effects – Drop shadow
13 - Selections - Load - Save selection - Load Selection 2 from Alpha Channel
Effects – 3D effects – Drop shadow (same settings)
Selections - Select none
14 - Layers - New layer
Flood Fill 100%
Fill with white color
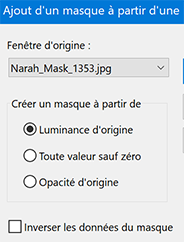
Layers – New mask layer from image – select Narah Mask 1536
Effects - Edge effects - Enhance
Layers - Merge group
Blend mode Luminance (Legacy) - Opacity 75%
15 - Open "Fleur 86 Coly"
Edit - Copy
Edit - Paste as a new layer
Image - Mirror
Image - Resize 70 % - resize all layers not checked
16 - Tool select (K)
Effects – 3D effects – Drop shadow (same settings)
17 - Effects – Alien Skin Eye Candy 5 : Impact – Perspective Shadow
Choose the preset Perfectharmony-coly
or these settings

18 - Copy and paste as a new layer "Déco 1"
on my second version - I modified the color with the Brush tool - Change to Target
Tool select (K)

Blend mode Luminance (Legacy)
Adjust - Sharpness - Sharpen
19 - Layers - Duplicate
Image - Mirror
Image - Flip
Layers - Arrange - Move down 2 times (to place it under the flower tube)
20 - Move to the background layer (Merged)
Layers - Duplicate
Arrange - Bring to top
Effects - Geometric Effects - Circle - transparent checked
21 - Effects - Geometric Effects - Spherize

22 - Image - Resize 10 % resize all layers not checked
Tool select (K)

23 - Alien Skin Eye Candy 5 : Impact - Glass
Choose the preset PerfectHarmony Glass Coly
24 - Effects Simple - Top Left Mirror
Opacity 70%
For my second version, I moved this layer under the flowers
25 - Copy and paste as a new layer the "texte titre"
Image - Resize 73 % - resize all layers not checked
Image - Negative image
26 - Tool select (K)

Effects – 3D effects – Drop shadow (foreground color)

27 - Move to the background layer (Merged)
Edit - Copy
28 - Image – Add borders
1 pixel – dark color
3 pixels – white color
1 pixel – dark color
3 pixels – white color
1 pixel – dark color
30 pixels – white color
1 pixel – dark color
3 pixels – white color
1 pixel – dark color
3 pixels – white color
1 pixel – dark color
40 pixels – couleur blanche
1 pixel – couleur foncée
29 - Magic Wand Tool – Select white border (40 pixels)
Paste into the selection (background in memory)
Adjust – Blur – Gaussian blur 15
30 - Promote selection to layer - blend mode Multiply
Effects – Carolaine and Sensibility - CS LDots by default
Effects – Carolaine and Sensibility - CD DLines by default
31 - Merge - merge down
32 - Selections - Select all
Selections - Modify contract 41 px
Effects – 3D effects – Drop shadow

33 - Keep the selection
Selections - Modify contract 39 px
Effects – 3D effects – Drop shadow (dark color)

Selections - Select none
34 - Open "Transparent Butterfly Psd" - Layer "papillon 1" - Copy
Paste as a new layer
Image - Resize 55 % - resize all layers not checked
Tool select (K)
35 - "Transparent Butterfly Psd" Layer "papillon 2" - Copy
Paste as a new layer
Image - Mirror
Image - Resize 40 % - resize all layers not checked
Tool select (K)
36 - Effects – 3D effects – Drop shadow color 4

Add your watermark
Layers - Merge - Merge all
38 - Image - Resize to 950 pixels - Resize all layers checked
Save Jpg
If you want, you can send me your version
If you have problems, or you find a not worked link, write to me

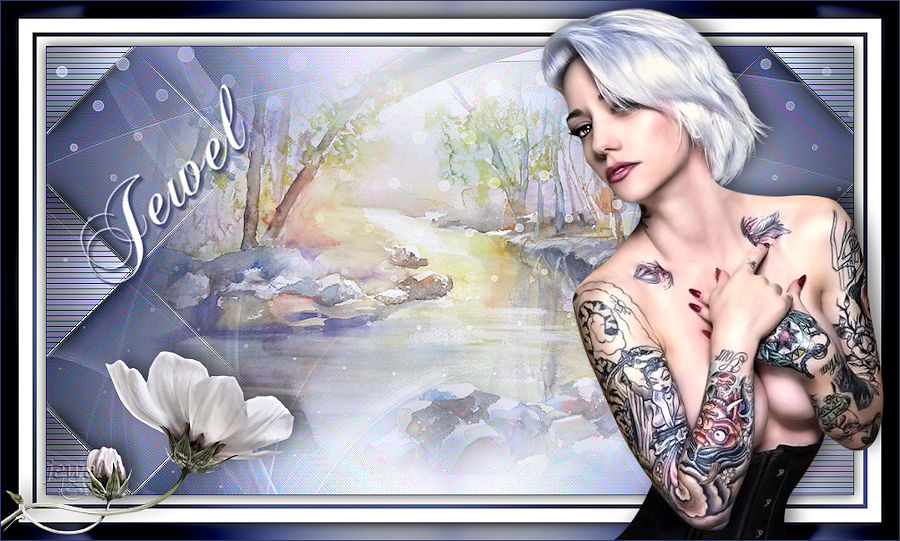
Une autre version avec un tube de Tine

 votre commentaire
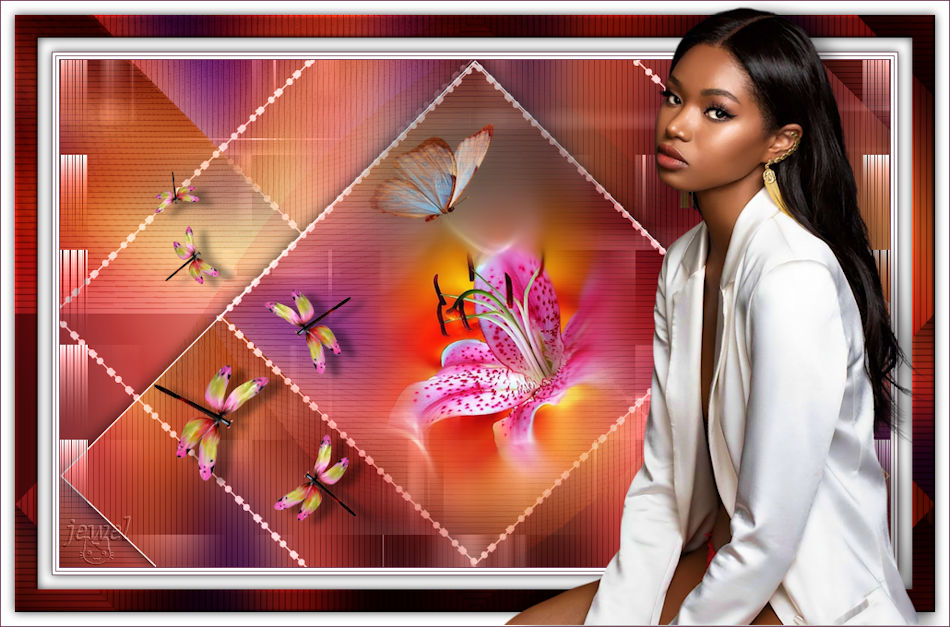
-

Colybrix, thank you very much for your permission that I may translate your tutorials
Tutoriel original ici
***
***
Plugins
Graphic Plus
Plugin Galaxy
AP -Lines
***
Colors
Foreground #30385e
Background #d3d5e3

***
1 - Open a new transparent image 900 px * 500 px
Gradient Linear

2 - Fill the layer with gradient
Adjust - Blur - Gaussian blur 20
3 - Layers - Duplicate
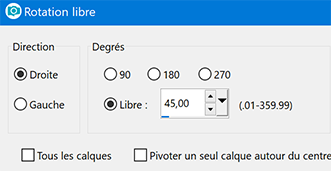
Image - Free rotate
4 - Layers - Duplicate
Image - Mirror
Opacity 75%
5 - Layers - Merge - Merge visible
6 - Effects - Edge effects - Enhance 2 times
7 - Effects Graphic Plus – Cross Shadow
Default except Intensity at 50

8 - Effects - Image effects - Seamless Tiling

Result

9 - Image - Mirror
10 - Effects Plugin Galaxy – Instant Mirror
Vertical Right

11 - Selections - Load/Save - Load selection from disk "selection 1 Jewel"
Selection - Promote selection to layer
Effects AP – Lines – SilverLining - Horizontal

12 - Selections - Select none
13 - Layers - Duplicate
Image - Mirror
Layers - Merge down
14 - Effects - 3D Effects - Drop Shadow

15 - Blend mode Multiply
Layers - Merge - Merge down
16 - Layers - New layer
Fill with the light color
Layers – New mask layer from image – select Narah Mask 1544
17 - Effects - Edge effects - Enhance
Layers - Merge group
Blend mode Luminance (Legacy)
18 - Effects Graphic Plus – Cross Shadow
Settings in memory (intensity at 50 if you use it in Unlimited)
19 - Open "Paysage misted jewel 027"
Erase the watermark
Edit - Copy
Edit - Paste as a new layer
20 - Image - Resize 90% - resize all layers not checked
Opacity 70%
21 - Layers - New layer
Fill with white color
22 - Layers – New mask layer from image – select Narah Mask 1523
23 - Effects - Edge effects - Enhance
Layers - Merge group
Blend mode Lumonance (Legacy)
24 - Layer palette – Click the bottom layer
Copy
25 - Image – Add borders
1 px dark color
Selections - Select all
26 - Image – Add borders 10 px white color
27 - Effects - 3D Effects - Drop Shadow
28 - Selections - Select all
Image – Add borders 5 px dark color
29 - Selections - Invert
Effects Graphic Plus – Cross Shadow (default)

Selections - Select none
30 - Image – Add borders 15 px white color
31 - Selections - Select all
32 - Image – Add borders 20 px dark color
Selections - Invert
33 - Paste the background into the selection (in memory)
Adjust - Blur - Gaussian blur 5
34 - Ajust - Brightness and Contrast
My settings (Adapt if you want)

35 - Selections - Invert
Effects - 3D Effects - Drop Shadow (in memory) 2 times
36 - Selections - Select none
37 - Open "Buste femme jewel 0046"
Erase the watermark
Edit - Copy
Edit - Paste as a new layer
38 - Place on the right
Effects - 3D Effects - Drop Shadow

39 -Open " Gabry fiore bianco 72"
Edit - Copy
Edit - Paste as a new layer
Image - Resize 50% - resize all layers not checked
Place at the bottom left
Effects - 3D Effects - Drop Shadow (in memory)
40 - Open " title Jewel" (or write your own)
Edit - Copy
Edit - Paste as a new layer
Tool select (K)

41 - Effects - 3D Effects - Drop Shadow (dark color)

42 - Do the drop shadow a second time - same settings
43 - Add your watermark
44 - Image – Add borders 1 px dark color
45 - Image - Resize 900 pixels - Resize all layers checked
Adjust - Sharpness - Sharpen
If you want, you can send me your version
If you have problems, or you find a not worked link, write to me

Deux autres versions avec des tubes perso

Thank you so much Gloria

 votre commentaire
-

Colybrix, thank you very much for your permission that I may translate your tutorials
tuto original ici
***
***
Plugins
Carolaine and Sensibility
Simple
Toadies
***
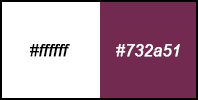
Colors
Foreground #ffffff
Background #732a51
***
1 - Open the background image provided or another one of your choice.
Edit - Copy
2 - Open the Alpha layer provided in the material, Shift D (Window - Duplicate )
We work on the copy - this layer contains selections
3 - Selections -Select all
Edit - Paste in the selection
Deselect
Adjust – Blur – Gaussian blur 20
4 - Effects - Image effects - Seamless Tiling by default
Adjust – Blur – Gaussian blur 20
5 - Effects - Carolaine and Sensibility CS Halloween2 by default

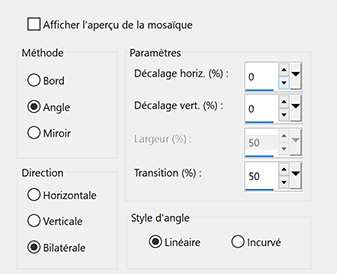
6 - Effects - Simple - Blintz
Image - Mirror
Effects - Simple - Blintz
7 - Layers - Duplicate
Effects - Carolaine and Sensibility CS Halloween1

Blend mode Soft Light - Opacity 80 %
Layers - Merge - Merge visible
8 - Selections - Load - Save selection - Load Selection 1 from Alpha Channel
Layers - New layer
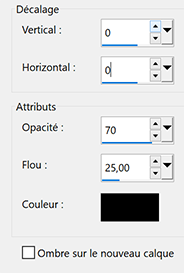
Effects – 3D effects – Drop shadow
Keep the selection
9 - Fill with the white color
Selections - Modify - Contract 2 pixels
Erase
10 - Selections - Load - Save selection - Load Selection 2 from Alpha Channel
Erase (to erase the thin line at the bottom)
Deselect all
11 - Open "déco 1" - Edit - Paste as a new layer
Pick tool (K)

Blend mode Luminance (Legacy) - Opacity 85 %
12 - Layers - New layer
Selections - Load - Save selection - Load Selection 3 from Alpha Channel
Fill with the white color
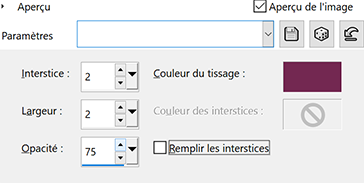
Effects – texture effects – Weave
Effects – Edge effects - Enhance
Deselect all
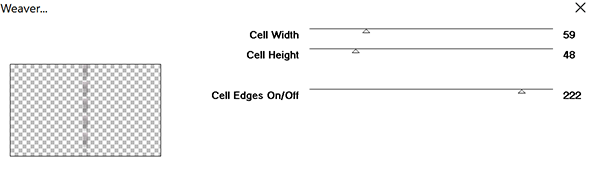
13 - Effects - Toadies > Weaver by default
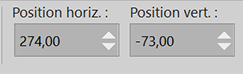
14 - Objects - Align - Left
Blend mode Luminance (Legacy)
15 - Layers - Duplicate
Image - Mirror
Layers - Merge - Merge down
16 - Open" Misted Tine" - Erase the watermark
Edit - Copy
Edit - Paste as a new layer
Image - Resize 65 % - Resize all layers – not checked
Pick tool (K)
17 - Move on the background layer (Merged)
Layers - New layer
Fill with the white color
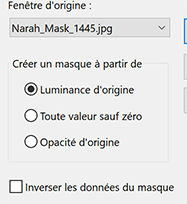
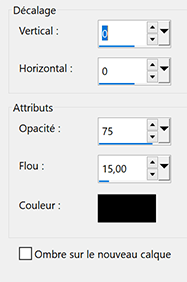
Layers – New mask layer from image - Choose Narah Mask 1445
18 - Effects – Edge effects - Enhance
Layers - Merge - Merge group
19 - Effects - Toadies > Weaver by default
Blend mode Luminance (Legacy) - Opacity 80 %
20 - Move on the background layer (Merged)
Edit - Copy
21 - Image – Add borders
1 px dark color
3 px white color
1 px dark color
3 px white color
1 px dark color
22 - Selections - Select all
Image – Add borders
15 px white color
Effects – 3D effects – Drop shadow
23 - Selections - Select all
Image – Add borders
25 px dark color
Selections - Invert
Paste in the selection ( background in memory)
24 - Selections - Promote selection to layer
Blend mode Multiply
Layers - Merge - Merge down
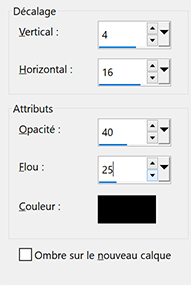
25 - Effects – 3D effects – Drop shadow (same settings in memory)
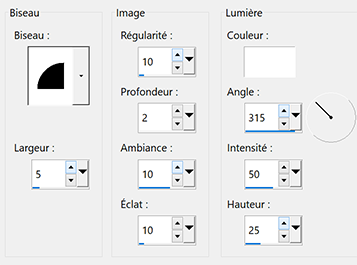
26 - Effects - 3D Effects - Inner bevel
27 - Selections - Select all
Image – Add borders
15 px white color
Effects – 3D effects – Drop shadow (same settings in memory)
Deselect all
28 - Open "femme 779 Coly" - Erase the watermark
Edit - Copy
Edit - Paste as a new layer
Image - Resize 82 % - Resize all layers – not checked
Move right
Effects – 3D effects – Drop shadow
29 - Copy and paste as a new layer "tube 40el"
Image - Resize 65 % - Resize all layers – not checked
Move left
30 - Effects – 3D effects – Drop shadow

31 - Add your watermark
Image – Add borders
1 px background color
Image - Resize 950 pixels - Resize all layers checked
If you want, you can send me your version
If you have problems, or you find a not worked link, write to me
Une autre version avec un tuto femme de Colybrix et des coccinelles de Maryse
Thank you Uschi
 votre commentaire
-

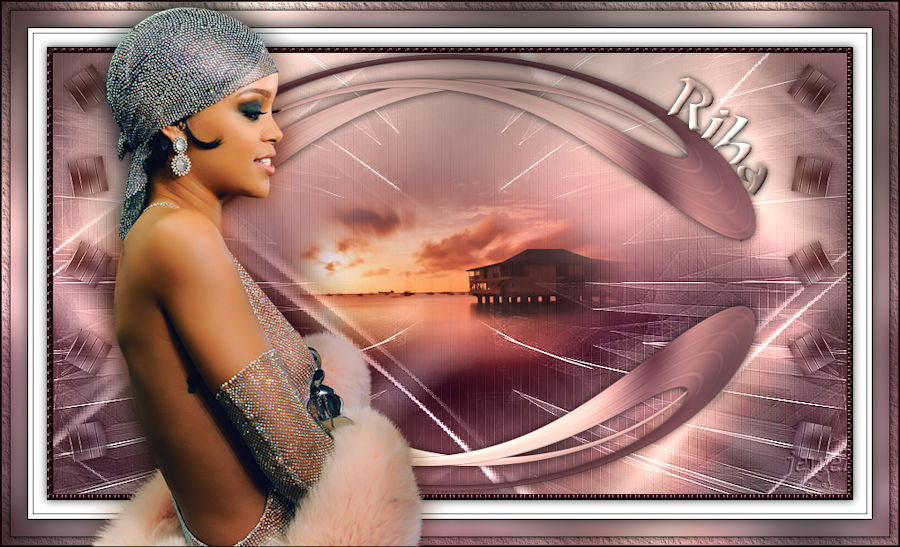
Colybrix, thank you very much for your permission that I may translate your tutorials
tuto original ici
***
***
Plugins
AP 01 (Innovations) Distort - Ou dans AP (Distort)
CuttingEdge et Shift Mesh
here (if you don't have them)
Plugin Galaxy – Instant Mirror
Flaming Pear – Flexify 2
Mura’s Meister - Copies
Graphic Plus – Cross Shadow
AAA Frame - Texture Frame
***

Foreground color #d4b3a7
Background color #1c010f
***
1 - Open a new transparent image 900 px * 500 px
Radial gradient
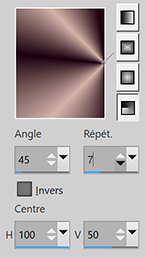
2 - Fill the layer with the gradient
Adjust – Blur – Gaussian blur 15
3 - Layers – Duplicate
Image - mirror
Blend mode Overlay - opacity 50
Layers – merge down
4 - Effects Plugin Galaxy – Instant Mirror
Vertical left

5 – Layers – Duplicate – close the copy and move to layer 1
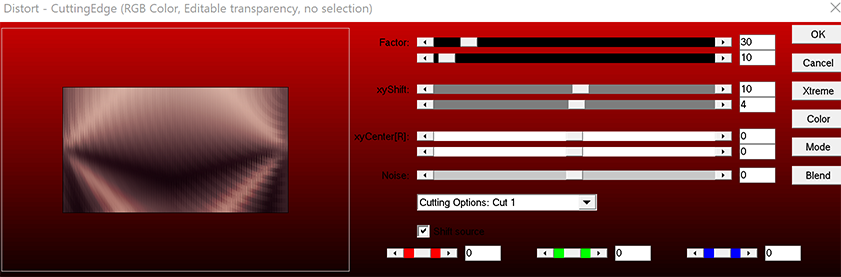
Effets AP 01 (Innovations) – Distort – CuttingEdge – by default
If you have it in AP Distort, the look is different but by default the result is the same
6 - Open the top layer (copy of Raster 1)
Move on this layer
7 - Effects AP 01 (Innovations) – Distort – ShiftMesh par défaut
If you have it in AP Distort, the look is different but by default the result is the same

8 – Effects – Edge effects - Enhance
Blend mode Screen – Opacity 55
9 – Layers – Merge down
10 – Layers – New layer
Fill with white color
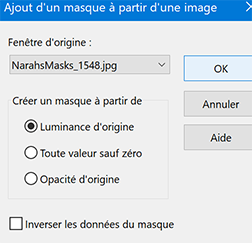
11 - Layers – New mask layer from image
Choose « masque Narah 1548 »
12 - Effects – Edge effects - Enhance
Layers – Merge - Merge group
Blend mode Luminance (Legacy)
13 – Open « paysgete22-coly » – Erase the watermark
Edit - Copy
Edit - paste as a new layer
14 – Image - Resize 50% - Resize all layers – not checked
Layers – Arrange – move down
Opacity 80%
15 – Open « deco 1 Riha »
Edit - Copy
Edit - paste as a new layer
Blend mode Luminance (Legacy)
16 – Move on layer Raster 1 at the bottom
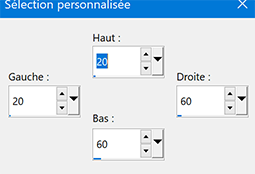
Selection Tool - Custom selection (S)

17 - Selections - Promote selection to layer
Layers – Arrange – bring to top
18 - Effects – Edge effects - Enhance
Deselect all
19 - Effects Flaming Pear – Flexify 2

20 – Layers – Duplicate
Image – Mirror
Layers – merge – Merge down
21 - Layers – Duplicate
Image – Flip
Layers – merge – Merge down
22 – Pick tool (K)

23 - Effects – 3D effects – Drop shadow

24 – Layers – Merge – Merge visible
25 – Layers – New layer
Selection Tool - Custom selection (S)
26 – Fill with the gradient
27 – Adjust – Blur – Gaussian blur 5
28 - Effects AP 01 (Innovations) – Distort – ShiftMesh by default
29 - Effects – Edge effects - Enhance
Deselect all
30 - Effects Mura’s Meister - Copies

Blend mode Luminance (Legacy) – opacity 75
31 – Layers - Duplicate
Image – Mirror
Layers – Merge – Merge down
32 - Effects – 3D effects – Drop shadow (same settings)
33 - Layers – Merge – Merge visible
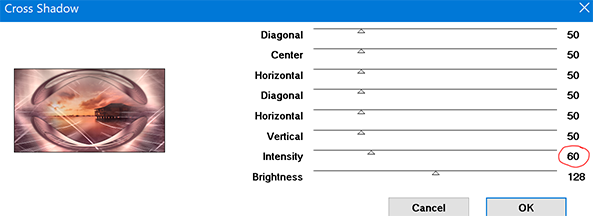
34 - Effects – Graphic Plus – Cross Shadow
By default except intensity 60 (adapt to your result)
35 – Edit - Copy
36 - Image – Add borders
1 pixel – dark color
Selections – Select all
37 - Image – Add borders
5 pixels – dark color
Selections - invert
38 - Effects – texture effects – Weave

39 – Effects - 3D effects – Inner bevel

Deselect all
40 - Image – Add borders
1 pixel – dark color
Selections – Select all
41 - Image – Add borders
15 pixels – white color
42 - Effects – 3D effects – Drop shadow (same settings)
Deselect all
43 - Image – Add borders
1 pixel – dark color
5 pixels – white color
1 pixel – dark color
30 pixels – white color
44 - Magic Wand Tool – Select this white border
Edit – Paste in the selection (background in memory)
Adjust – Blur – Gaussian blur 15
45 – Effects - Graphic plus – Cross Shadow (same settings)
(if you have it in Unlimited, reset intensity to 60)
46 – Selections - Invert
Effects – 3D effects – Drop shadow
Deselect all
47 – Open « femme754-coly » Erase the watermark
Edit – Copy
Edit – Paste as a new layer
Image - Resize 75% - Resize all layers – not checked
Move on the left
48 – Layers - Duplicate
On the layer below – Adjust – Blur – Gaussian blur 15
Blend mode Multiply
49 – Copy the text – Paste as a new layer
Pick tool (k)

50 – Selections – Select all
Selections Float
Selections Defloat
51 – Layers – New layer
Fill with the light color
Effects Graphic Plus – Cross Shadow – same settings in memory
(if you have it in Unlimited, reset intensity to 60)
52 - Effects - 3D effects – Inner bevel (same settings in memory)
Deselect all
53 - Effects – 3D effects – Drop shadow
54 - Delete the original text layer (Raster 3)
55 - Move on layer Raster 1 at the bottom
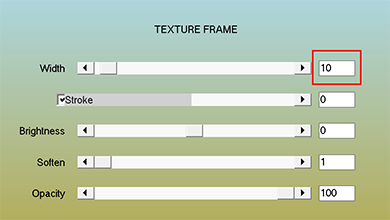
Effects – AAA Frame – Texture Frame
56 – Selections – Select all
Selections – Modify - Contract 10 pixels
57 - Effects – 3D effects – Drop shadow (same settings in memory)Deselect all
58 – Add your watermark
59 – Image – Add borders
1 pixel – dark color
60 - Image - Resize 900 pixels - Resize all layers checked
***
If you want, you can send me your version
If you have problems, or you find a not worked link, write to me
Une autre version avec un tube de Colybrix
 votre commentaire
-


Colybrix, thank you very much for your permission that I may translate your tutorials

tuto original ici
****

***
Double click on the preset to install it
Open Masks and tubes in PSP and minimize
***
Plugins
VM DistortionSimple
Carolaine and Sensibility
Eye Candy 5 Impact/ Glass
Mura’s Meister
***Foreground color # a51832
Background color # f5e0ec

Linear gradient

1 – Open Alpha layer – Window / duplicate
We work on the copy
2 – Fill with the gradient
Ajust – Blur – Gaussian blur 25
Adjust - Noise – Add noise

3 – Layers – New layer
Selections – Select all
Open « femme 755 Coly » - Erase the watermark
Edit - Copy
Edit – Paste into selection
Selections – Select none
4 - Image effects – Seamless Tiling – by default
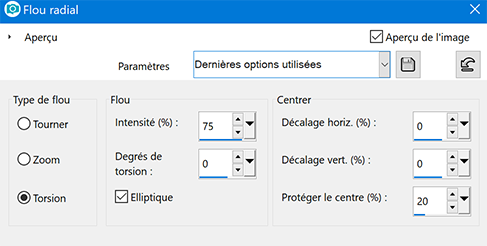
5- Ajust – Blur – Radial blur
6 – Effects – Edge effects - Enhance
Layers – Merge – Merge down
7 – Effects – Plugins – Filters Unlimited - VM Distortion – Mosaic Ripple

8 - Effects - Plugins - Simple – Half Wrap
Effets – Plugins - Simple – Blintz
9 – Layers - Duplicate
Image - Flip (Ctrl T)
Blend mode Screen
Layers – Merge - Merge down
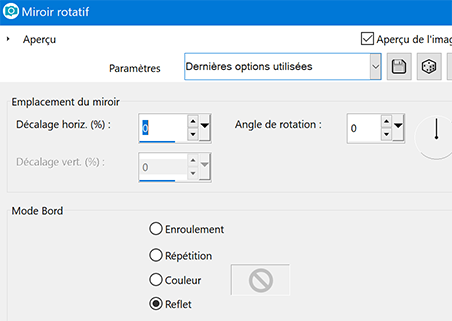
10 – Effects - Reflexion effects – Rotating mirror
11 – Layers – new layer – Fill with dark color
Layers – New mask layer from image
Choose « masque Catimi 19

12 – Layers – Merge – Merge group
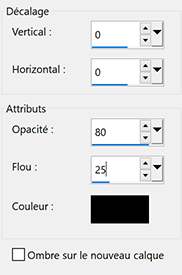
13 – Effects – 3D effects – Drop shadow - white color
13 bis – Layers – Merge – Merge down
14 - Selections - Load - Save selection - Load Selection 1 from Alpha Channel
Selections - Promote selection to layerEffects – 3D effects – Drop shadow - dark color
15 – Effects – Plugins Carolaine and Sensibility -CS DLines by default

Selections – Select none
16 - Selections - Load - Save selection - Load Selection 2 from Alpha Channel
Selections - Promote selection to layer17– Effects – 3D effects – Drop shadow same settings
Selections – Select none
18 - Activate the bottom layer raster 1
Selections - Load - Save selection - Load Selection 3 from Alpha Channel
Selections - Promote selection to layer19 - Effects – Plugins Carolaine and Sensibility -CS DLines by default
20 - Effects – 3D effects – Drop shadow same settings
Selections – Select none
21 – Layers - Duplicate
Image - Flip
Layers – Merge – Merge down
22- You should have this result
23 – Layers – Merge – Merge visible
24 – Open deco 1
Edit - Copy
Edit – Paste as a new layer – Don't move
Effects – 3D effects – Drop shadow - dark color
25 - Activate the bottom layer raster 1
Selections - Load - Save selection - Load Selection from Alpha Channel 4
26 - Selections - Promote selection to layer
27 – Effects – Plugins - Eyes Candy 5 Impact - Glass
Preset Glass coly 01
Selections - None
Blend mode Multiply
28 – Change the background color – white color
Layers – new layer – fill with the white color
29 - Layers – New mask layer from image
Choose Narah Mask 1353
30 – Effects - Edge effects - Enhance
Layers – Merge - Merge group
31 – Layers - Duplicate
Image effects – Seamless Tiling – by default
Layers – Merge – Merge down
Blend mode Luminance (Legacy) – opacity to 80
32 – Layers – Arrange - Move down
33 – Activate the top layer
Open the tube "plume"
Edit – Copy
Edit – paste as a new layer
34 – Pick tool (k)
Blend mode Luminance (Legacy)
35 – Layers - Duplicate
Image - Resize 50% - Resize all layers – not checked
Effects – Plugins - Mura’s Meister – Copies

36 - Objects – Align – center in canvas
or pick tool (k)
Layers – Arrange - Move down
Opacity to 77%
37 – Image – Add borders
1 pixel – dark color
3 pixels – white color
1 pixel – dark color
38 – Selections – Select all
39 – Image – Add borders
15 pixels – white color
40 - Effects – 3D effects – Drop shadow - red color

Selections – Select none
41 – Image – Add borders
10 pixels – dark color
42 – Magic Wand Tool – Select this border
Effects – texture effects – Weave

43 – Selections – Select all
44 – Image – Add borders
30 pixels – white color
45 - Effects – 3D effects – Drop shadow (same settings)
46 – Selections – Select none
47 – Edit – Copy « femme 755 Coly »
Edit – Paste as a new layer
Image – Mirror
Image - Resize 82 % - Resize all layers – not checked
Place
48 - Effects – 3D effects – Drop shadow

49 Add your watermark
Image – Add borders
1 pixel – dark color
50 - Image - Resize 900 pixels - Resize all layers checked
Adjust – Sharpness - Sharpen
If you want, you can send me your version
If you have problems, or you find a not worked link, write to me
Une autre version avec un tube de LB - Beatriz
 votre commentaire


|
|
|
|