-


Colybrix, thank you very much for your permission that I may translate your tutorials

Tutorial here
***

***
Plugins
Flaming Pear : Sphere Warp A
The effect used can be found in the Freebies filter folder of Flaming Pear if you have not yet installed it.
Filters Unlimited 2.0 > Paper textures > papier kasy 1
AAA Frames
***
Colors
Color 1 : #dbe7ff
Color 2 : #7fd6dd
Color 3 : #1a1b3a
Color 4 : #d46198
***
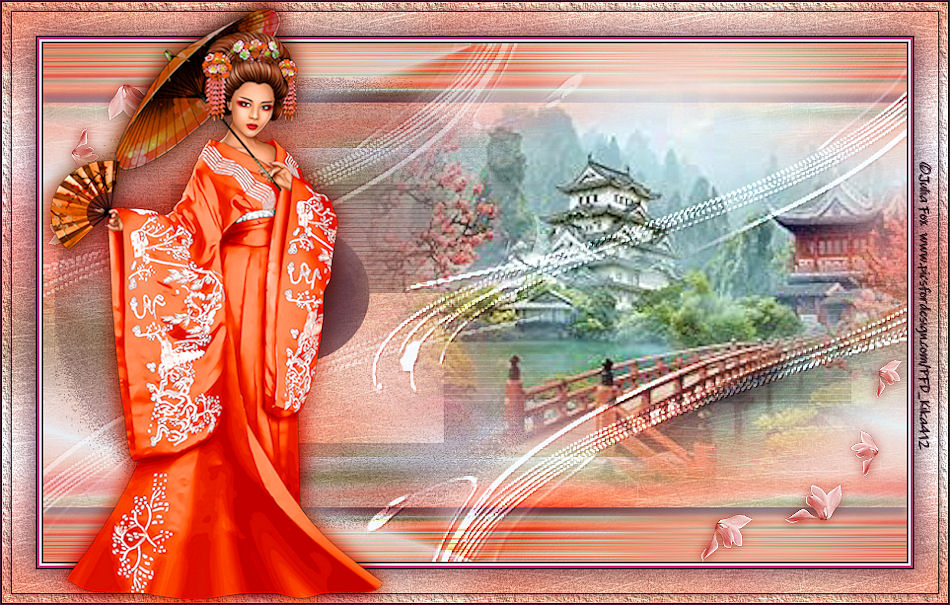
1 - File - New 875 x 525 pixels transparent
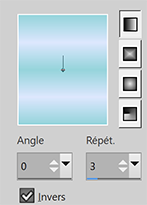
Fill with linear gradient colors 1 et 2
Adjust - Blur - Gaussian blur 15
2 - Layers - New raster layer
Selections – Select all
Open "femmasie10-coly" Erase the watermark
Edit - Copy
Edit - Paste into selection
Selections – Select none
Effects - Image effects - Seamless Tiling by default
Adjust - Blur - Gaussian blur 35
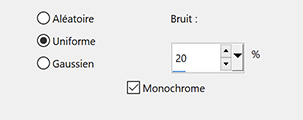
Adjust - Add/Remove Noise - Add Noise
Layers - Merge - Merge down
3 - Effects Flaming Pear - Sphere Warp A
4 - Selection Tool (S)
Custom selection

Effects Filters Unlimited 2.0 - Paper textures - papier kasy 1 by default

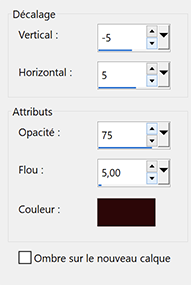
Effects 3D - Drop shadow 8, 0, 75, 10, color 3
Effects 3D - Drop shadow - 8, 0, 75, 10, color 3
Selections – Selection none
5 - Layers - New raster layer
Fill with color 1
Layers – New mask layer from image – select "Coly-mask38"

Effects - Edge effects - Enhance
Layers - Merge - Merge group
6 - Layers - New raster layer
Fill with color 3
Layers – New mask layer from image – select "NarahsMasks_1729"

Adjust - Sharpness - Sharpen
Layers - Merge - Merge group
Effects 3D - Drop shadow 0, 0, 75, 1, couleur 3
7 - Open "Krysmistpaysage-21-06-2017-003" - Erase the watermark
Edit – Copy
Edit – Paste as a new layer
Image – Miroir horizontal
Move it to the right
8 - Layers - New raster layer
Fill with color 1
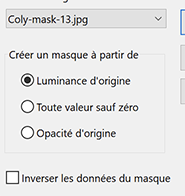
Layers – New mask layer from image – select "Coly-mask-13"
Effects - Edge effects - Enhance
Layers - Merge - Merge group
9 - Pick Tool (k) – Position X - 235.
Effects 3D - Drop shadow 1, 1, 75, 1, color 3
Blend mode Overlay
10 - Layers - Duplicate
Image – Mirror horizontal
Image – Mirror vertical(Flip)
Opacity 50%
11 - Open "déco fleurs"
Edit – Copy
Edit – Paste as a new layer
Pick Tool (K) – Position X 5, Position Y 0
Layers - Duplicate
Image – Mirror horizontal
Image – Mirror vertical(Flip)
Layers - Merge - Merge down
12 - Layers - Duplicate
on the layer below - Adjust - Blur - Gaussian blur 5
Blend mode Multiply
13 - Edit – Copy special - Copy merged
14 - Image – Add borders
2 pixels – color 3
2 pixels – color 1
2 pixels – color 4
2 pixels – color 3
15 - Selections – Select all
Image – Add borders
35 pixels – color 3
Selections – Invert
16 - Edit – Paste into selection
Adjust - Blur - Gaussian blur 15
Adjust - Add/Remove Noise - Add Noise - same settings in memory
Effects Filters Unlimited 2.0 > Paper textures > papier kasy 1, by default
Selections – Invert
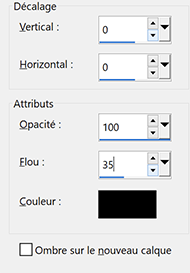
Effects 3D - Drop shadow 0, 0, 75, 35, couleur 3
Selections – Select none
17 - Effets AAA Frames > Texture Frame

Selections – Select all
Selections – Modify > contract : 10
Effects 3D - Drop shadow 0, 0, 75, 10, couleur 3
Selections – Select none
18 - Open "femmasie10-coly" Erase the watermark
Edit - Copy
Edit - paste as a new layer
Image - Resize 85 % all layers not checked
Move it on the left
Layers - Duplicate
on the layer below - Adjust - Blur - Gaussian blur 10
Blend mode Multiply
19 Add your watermark
Image – Add borders
1 pixel – color 3
Image - Resize 950 pixels
Save Jpeg
If you want, you can send me your version
If you have problems, or you find a not worked link, write to me

Une autre version avec un tube femme de Thafs

Thank you so much Kika
 votre commentaire
-

Colybrix, thank you very much for your permission that I may translate your tutorials
Tutorial here
***
***
Plugins
Graphic Plus
Flaming Pear
AAA Frames
***
Colors
Foreground color : #330608
Background color : #f9d497

***
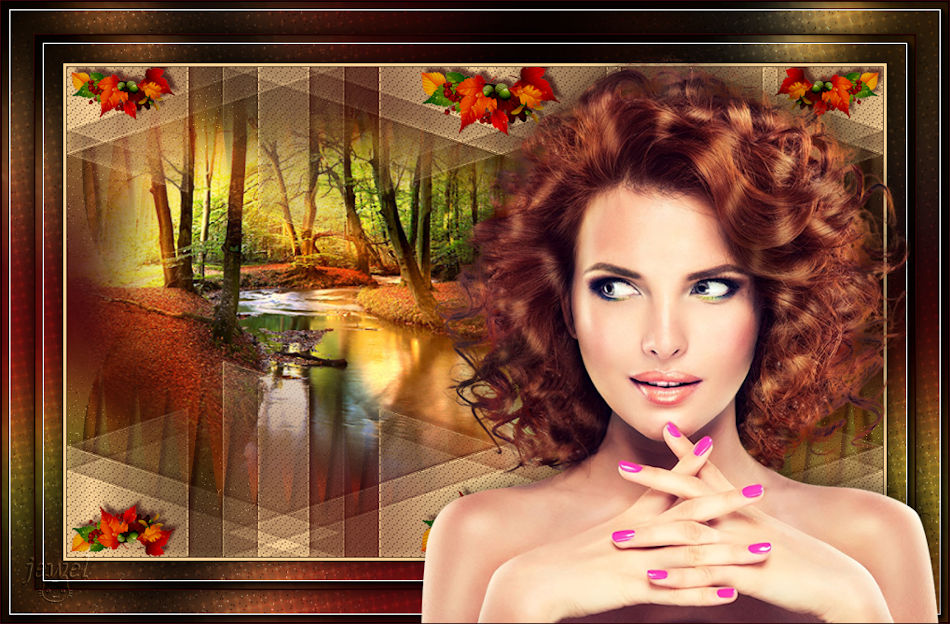
1 - File - New 875 x 525 pixels transparent
Fill with foreground color
Layers - New raster layer
Selections – Select all
2 - Open "mistautomn6-coly" - Erase the watermark
Edit – Copy
Edit – Paste into selection
Selections – Select none
Layers - Duplicate
Close the landscape copy (Copy of Raster 2)
3 - Move to Raster 2 (landscape)
Adjust - Blur - Gaussian blur 35
Effects - Image effects - Seamless Tiling by default
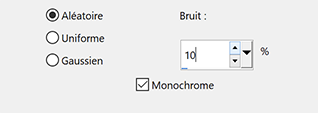
Adjust - Add/Remove Noise - Add Noise
Layers - Merge - Merge down
4 - Effects Graphic Plus > Cross Shadow by default
(*on my 2nd version I set the intensity to 35, the background being very clear)
Layers - Duplicate
Effetcs - Géométric effects - Circle - checked Transparent
5 - Effects - Flaming Pear - Flexify 2
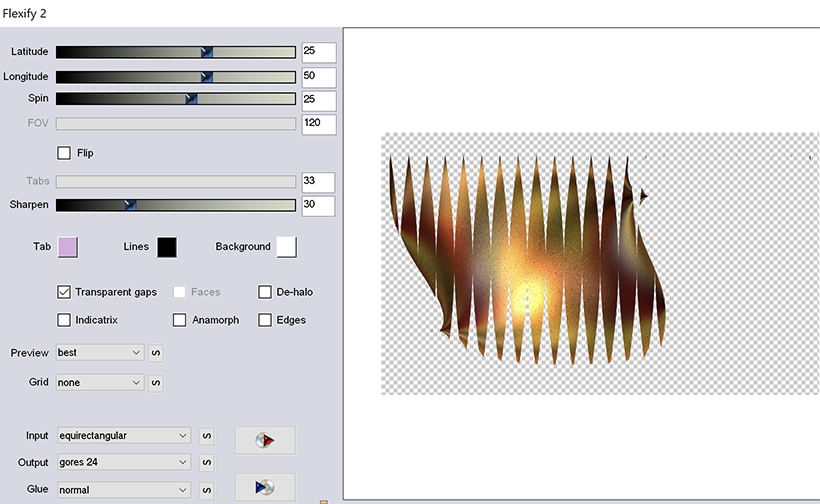
Layers - Duplicate
Image – Mirrorl
Layers - Merge - Merge down
6 - Effects 3D - Drop shadow dark color
7 - Effects - Reflection Effects - Rotating Mirror

Blend mode Overlay - opacity 70 %
8 - Layers - New raster layer
Fill with light color
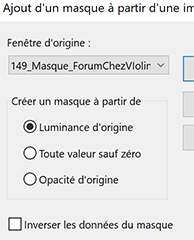
Layers – New mask layer from image – select "masque 149_Masque_ForumChezVIoline"
Effects - Edge effects - Enhance
Layers - Merge - Merge group
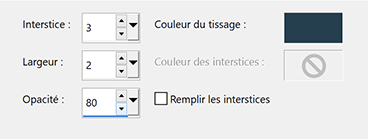
9 - Effects - Textures Effects - Weave
Foreground color

Effects 3D - Drop shadow dark color same settings in memory
10 - Open the Raster 2 Copy layer and activate it
Pick Tool (K) Position X -47, Position Y 2
Layers - Arrange - Move down
11 - Move to the top layer
Open Deco 1
Edit – Copy and paste as a new layer
Effects 3D - Drop shadow dark color same settings in memory
12 - Move to Raster 1
Edit – Copy
13 - Image – Add borders
1 pixel – dark color
3 pixels – light color
1 pixel – dark color
14 - Selections – Select all
Image – Ajdd borders
30 pixels – any color
Selections – Invert
Edit – Paste the background in memory into selection
15 - Effects Graphic Plus - Cross Shadow by default
Effects - Artistic effects - Halftone

Selections – Invert
Effects 3D - Drop shadow black color
16 - Selections – Select none
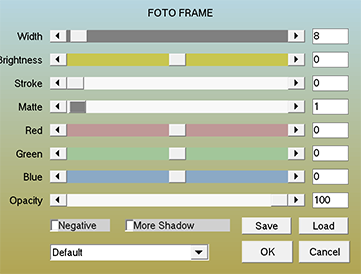
Effects AAA Frames - Foto Frame
17 - Image – Add borders
1 pixel – dark color
Selections – Select all
Image – Add borders 35 pixels – any color
Selections – Invert
Edit – Paste the background in memory into selection
18 - Effects – Graphic Plus - Cross Shadow by default
Effects - Artistic effects - Halftone same settings in memory
Selections – Invert
Effects 3D -Drop shadow same settings
Sélections – Select none
19 - Effects AAA Frames - Foto Frame same settings in memory
20 - Open "femme851-coly" - Erase the watermarck
Edit - Copy
Edit - Paste as a new layer
Image - Mirror
Image – Resize 75% all layers not checked
Move to the right
Effects 3D - Drop shadow -5, 10, 50, 35 dark color
21 - Add your watermark
Image – Add borders
1 pixel – dark color
Image - Resize 950 pixels
Save Jpeg
If you want, you can send me your version
If you have problems, or you find a not worked link, write to me
Une autre version avec des tubes de Tine

Thank you so much Kika
 votre commentaire
-


Colybrix, thank you very much for your permission that I may translate your tutorials
Tutorial here
***
***
Plugins
Graphic Plus
Mura’s Seamless
AAA Filters
AAA Frames
Alien Skin Eye Candy 5 : Impact
***
Colors
Foreground : #173863
Background : #bccddd

***
***
1 - Open Alpha Lumière de Lune – Window / duplicate (Ctrl D)
We work on the copy
(it contains selections)
Fill with foreground color
Selections - Select all
Open "Paysage 156" - Erase teh watermark
Edit - Copy
Edit - Paste into selection
Selections - Select none
2 - Adjust - Blur - Gaussian blur 35
Effects - Image effects - Seamless tiling - Side by Side

3 - Layers - Duplicate
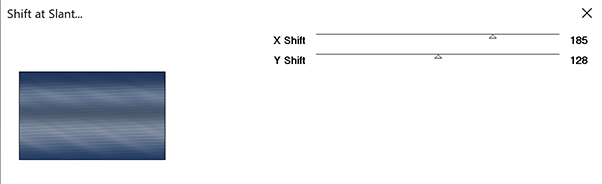
Effects Mura’s Seamless - Shift at Slant
Effects - Geométric Effects - Skew - Wrap- vertical 25

Blend mode Multiply (on my version 2 Blend mode Overlay)
4 Move to Raster 1
Effects Graphic Plus - Cross Shadow, by default except Intensity 50

Move to Layer Copy of Raster 1 - Edit - Repeat effect Cross Shadow
5 - Layers - New Raster Layer
Fill with the light color
Layers – New mask layer from image – select " NarahsMasks_1738"
Effects - Edge effects - Enhance
Layers - Merge - Merge group
6 - Copy and paste as a new layer "Paysage 156"
Resize 70% all layers not checked
Layers - Duplicate
Pick Tool (k) - Position X -100
Position Y - 123

Selections – Load / Save selection - Load Selection 1 from Alpha Channel
Selections - Invert
Erase
Selections - Select none
7 - Move to Raster 2 (Paysage below)
Pick Tool (k) p Position X 348
Position Y 126

Selections – Load / Save selection - Load Selection 2 from Alpha Channel
Selections - Invert
Erase
Selections - Select none
Move to (Copy of Raster 2)
Layers - Merge - Merge down
Opacity 50%
8 - Move to (Group Raster 2)
Textures Effects Weave (Dark color)

Effects 3D - Drop shadow 5, 10, 100, 10 black color
9 - Copy and paste as a new layer "Paysage 156"
Image – Resize 85%
Pick Tool (k) position X 100
Position Y -89

10 - Blend Mode Hard Light
Layers - Duplicate
Opacity 50%
11 Move to Layer Copy of Raster 1
Effects AAA Filters - Custom
Choose Prewitt, opacity 50%

12 - Layers – New Raster layer
Fill with Light color
Layers – New mask layer from image – select " NarahsMasks_1740"
Effects - Edge effects - Enhance
Layers - Merge - Merge group
Blend Mode Luminance (Legacy) - opacity 77%
13 - Layers and Result


14 - Move to Layer Copy of Raster 1
Layers - Merge - Merge down
Edit – Copy
Edit – Paste as a new image
Save it for later
Layers - Merge - Merge visible
15 - Selections – Load / Save selection - Load Selection 3 from Alpha Channel
Layers – New Raster layer
Fill with Dark color
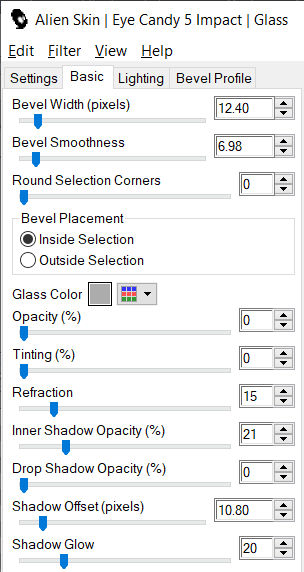
Effects Alien Skin Eye Candy 5 - Impact - Glass

16 - Effects 3D - Drop shadow 1, 1, 100, 10 black color
Selections - Select none
17 - Image – Add borders
2 pixels – Foreground color
2 pixels – Background color
2 pixels – Foreground color
18 - Selections – Select all
Image – Add borders
40 pixels – any color
Selections – Invert
Edit – Paste into the selection the background image saved in step 14
19 - Effects Graphic Plus -Cross Shadow, same settings in memory
Selections – Invert
Effects 3D - Drop shadow 0, 0, 100, 40, dark color or black
Selections – Select none
20 - Effects AAA Frames - Foto Frame

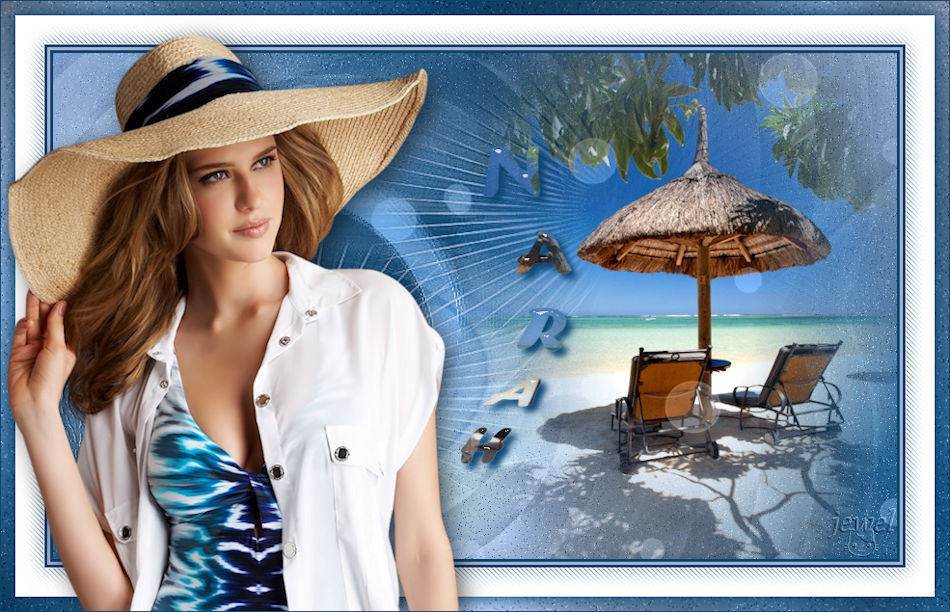
21 - Open "femme821-coly"
Erase the watermark
Edit - Copy
Edit - Paste as a new layer
Resize 74% all layers not checked
Place on the right
Adjust – Sharpness - Sharpen
Effects 3D - Drop shadow 2, 16, 50, 40, dark color or black
22 - Copy the Title
Paste as a new layer
Place at the bottom left (or as you wish)
Effects 3D - Drop shadow 2, 2, 100, 2, black color
Edit - Repeat Drop shadow
Blend mode Luminance (Legacy)
23 - Add your watermark
Image – Add borders
1 pixel – Foreground color
Save Jpeg
If you want, you can send me your version
If you have problems, or you find a not worked link, write to me
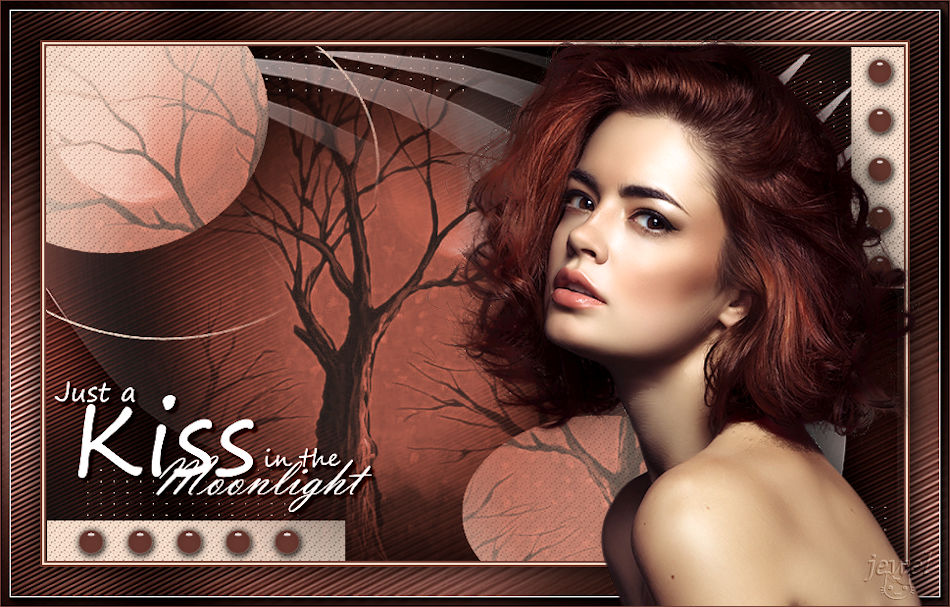
Une autre version avec un tube de LB Beatriz
Thank you so much Kika

Thank you so much Paula
 votre commentaire
-

Colybrix, thank you very much for your permission that I may translate your tutorials
Tutorial here
***
***
Plugins
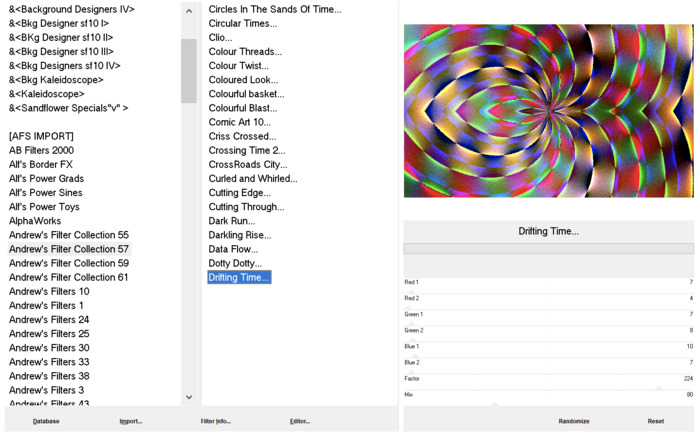
Andrews Filter Collection 57 > Drifting Time
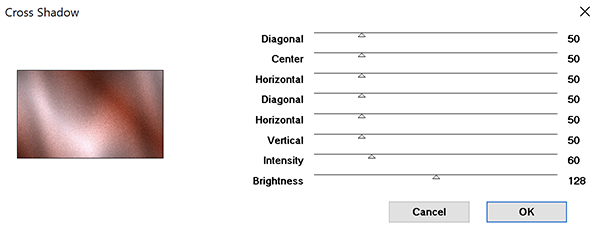
Graphic Plus > Cross Shadow
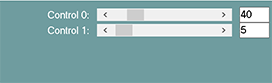
Carolaine and Sensibility > CS_DLines
Eye Candy 5 – Impact > Glass
***
Colors
Foreground: #c9adb5
Background : #692112

Linear gradient

***
1 - File - New 875 x 525 pixels
Fill with the gradient
Adjust - Blur - Gaussian blur 20
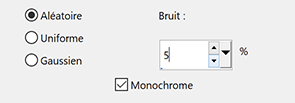
2 - Adjust - Add/Remove Noise - Add Noise
3 - Layers - Duplicate
Effects Filters Unlimited > Andrews Filter Collection 57 > Drifting Time by default
Blend mode Luminance (Legacy) opacity 21
4 - Layers - New raster layer
Fill with dark color
Layers – New mask layer from image – select NarahsMasks_1734
Effects - Edge effects - Enhance
Layers - Merge - Merge group
5 - Effects 3D - Drop shadow light color

6 - Layers - New raster layer
Fill with light color
Layers – New mask layer from image – select NarahsMasks_1733
Effects - Edge effects - Enhance
Layers - Merge - Merge group
7 - Layers - Duplicate
Layers - Merge - Merge down
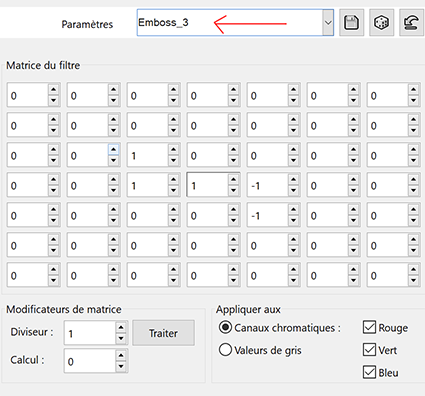
User Defined Filter - Emboss 3
Blend Mode Hard Light
8 Activate Raster 1
Effects Graphic Plus > Cross Shadow
9 - Activate top layer
Open "paysg153-coly" - Erase the watermark
Edit - Copy
Edit - Paste as a new layer
Image – Resize 75% - all layers not checked
Pick Tool (K) Position X 525, Position Y -43.
Blend Mode Hard Light - opacity 80%
10 - Open "Deco 1"
Edit - Copy
Edit - Paste as a new layer
Blend Mode Luminance (Legacy), opacity 40%
11 - Activate Raster 1
Edit – Copy
12 - Image – Add borders
3 pixels – Background color
3 pixels – Foreground color
3 pixels – Background color
13 - Selections – Select all
Image – Add borders
30 pixels – white color
Effects 3D - Drop shadow - Background color

14 - Selections – Invert
Carolaine and Sensibility > CS_DLines
Adjust - Sharpness - Sharpen
Edit - Repeat Sharpen
15 - Selections – Select all
Image – Add borders
15 pixels – white color
Selections – Invert
Edit – Paste into selection (Background in memory)
16 - Selections – Invert
Effects 3D - Drop shadow - Background color (Same settings in memory)
Edit - Repeat Drop shadow
Selections – Select none
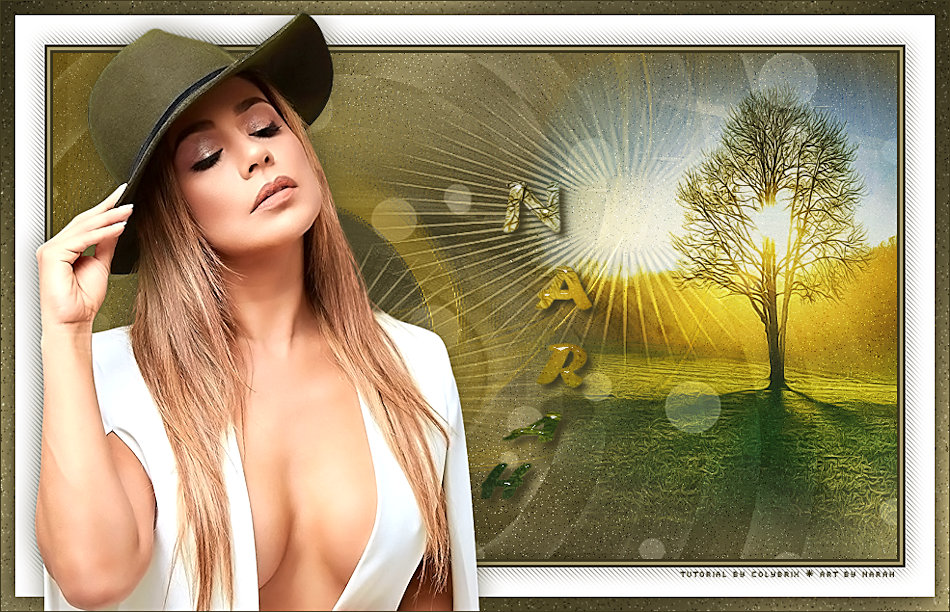
17 - Open "femme-848-coly" - Erase the watermark
Edit - Copy
Edit - Paste as a new layer
Image – mirror - mirror horizontal
Image – Resize 80% all layers not checked
Move to the left
Optional - On my tube I made a setting Brightness - Contrast

Effects 3D - Drop shadow (of your choice)
18 - Copy – Paste as a new layer " le titre blanc"
(If you wish I have also put my finished result: titre fond)
Place on the right above the landscape
Pick Tool (k) Position X 756, Position Y 129
19 - Selections – Select all
Selections – Float
Selections – Defloat
Activate Raster 1
Promote selection to layer
Selections - select none
Delete the layer of the "titre en blanc" (Raster 3)
Stay on the transformed selection (you don't see the title, it's normal)
20 - Effects – Eye Candy 5 – Impact > Glass
Setting Coly-Narah
Move on the left (or your choice)
Pick Tool (K) Position X 58, Position Y 67
Effects 3D - Drop shadow 6, 6, 100, 10, dark color
21 - Add your watermark
Image – Add borders
1 pixel – background color
Image - Resize 950 pixels
Save Jpeg
If you want, you can send me your version
If you have problems, or you find a not worked link, write to me
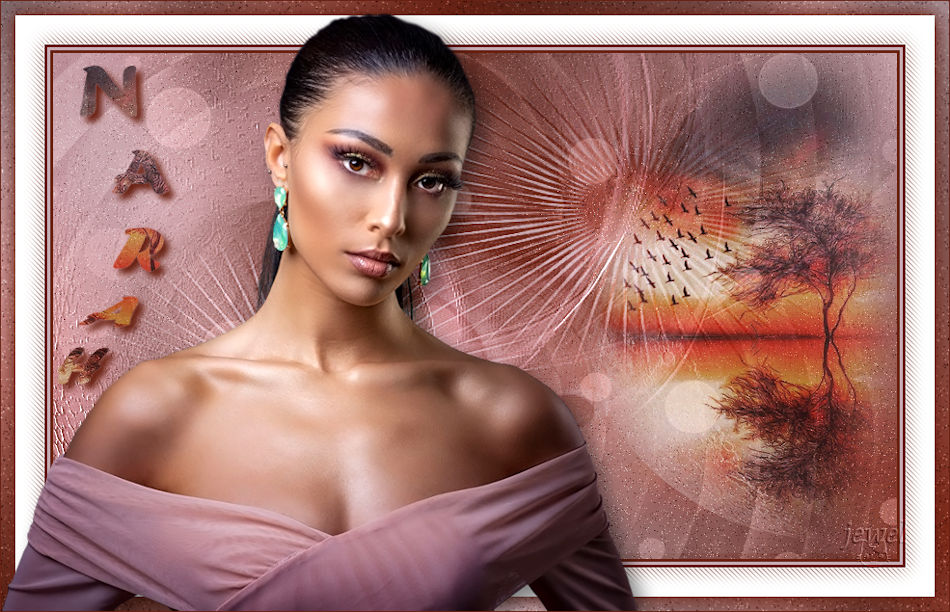
une autre version avec des tubes de Thafs et Grisi
Thank you so much Kika

Thank you so much Narah
Thank you Etelka
 votre commentaire
-


Colybrix, thank you very much for your permission that I may translate your tutorials
Tutorial here
***
***
Plugins
Graphic Plus
***
Colors
Color 1 – foreground : #a2bcc8
Color 2 – background : #1c4051
Color 3 : #1686c3
Color 4 : #ffffff

***
1 - Open Alpha Sous la mer – Window / duplicate (Ctrl D)
We work on the copy
(it contains selections)
The white layer will be removed at the end of the tutorial
2 - Layers – New Raster layer
Fill with background color - dark color
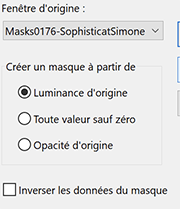
Layers – New mask layer from image – select Mask0176
Layers - Merge - Merge group
Image – Resize 95% - all layers not checked
3 - Effects 3D - Effects 3D - Drop shadow - check shadow on a new layer

Move to the top layer
Adjust - Blur - Gaussian blur 10
4 - Layers – New Raster layer
Selections – Load / Save selection - Load Selection 1 from Alpha Channel
Fill with the light color
5 - Layers – New Raster layer
Put in the foreground the pattern provided with these settings

Fill the selection with this pattern
Blend mode Overlay - opacity 85%
Layers - Merge - Merge down
Effects 3D - Drop shadow 14, 10, 35, 35, black color - uncheck the bottom box
6 - Effects Graphic Plus - Cross Shadow
*on my version 2 I lowered "intensity" to 15 my light color being lighter than the original

7 - Layers – New Raster layer
Selections – Modify - select - selection borders

Fill with the pattern, same settings in memory
Layers - Merge - Merge down
Selections – Select none
8 - Layers – New Raster layer
Selections – Load / Save selection - Load Selection 2 from Alpha Channel
Fill with the dark color
Layers – New Raster layer
Fill with the pattern, same settings in memory
Blend mode Overlay - opacity 85%
Layers - Merge - Merge down
Effects 3D - Drop shadow 14, 10, 35, 35, black color - uncheck the bottom box
9 - Layers – New Raster layer
Selections – Modify - select selection borders - same settings in memory
Fill with the pattern, same settings in memory
Layers - Merge - Merge down
Selections – Select none
10 - Effects Graphic Plus - Cross Shadow
11 - Layers – New Raster layer
Selections – Load / Save selection - Load Selection 3 from Alpha Channel
Fill with color 3
Layers – New Raster layer
Fill the selection with the pattern
Blend mode Overlay - opacity 85%
Layers - Merge - Merge down
Effects 3D - Drop shadow 14, 10, 35, 35, black color
12 - Open "fondmer2" Erase the watermark
Edit – Copy
Edit - Paste as a new layer
Selections – Invert
Press the Delete key on the keyboard
Selections – Invert
Opacity 60%
13 - Layers – New Raster layer
Selections – Modify - select selection borders - same settings in memory
Fill with the pattern, same settings in memory
Layers - Merge - Merge down
Edit - Repeat Merge down
Selections – Select none
Effects 3D - Drop shadow 14, 10, 35, 35, black color
14 - Effects Graphic Plus - Cross Shadow
15 - Dodge Brush Tool(J)

With these settings

Make one or two left clicks (to lighten) on the top left part of the layer
And one or two right clicks (to darken) on the bottom right part
16 - Do the same on the two square layers below
Move to the top layer
17 - Open "dauphins" - Edit – Copy
Edit - Paste as a new layer
do not move - it is well placed
Opacity 90%
18 - Layers – New Raster layer
Selections – Load / Save selection - Load Selection 4 from Alpha Channel
Fill with foreground color
Effects - Textures effects - Weave - background color
Selections – Select none
Effects 3D - Drop shadow 3, 3, 35, 10, black color
Layers - Duplicate
Select Tool (k) Position X 230, Position Y 160
19 - Open "corail blanc" Erase the watermark
Edit – Copy
Edit - Paste as a new layer
Image – Resize 32% all layers not checked
Place in the bottom
Opacity 90%
20 - Add your watermarck
Delete the bottom white layer
Layers - Merge - Merge visible
Save Png (do not flatten)
If you want, you can send me your version
If you have problems, or you find a not worked link, write to me
Une autre version avec un tube de Lisa T

Thank you so much Kika
 votre commentaire


|
|
|
|