-

Colybrix, thank you very much for your permission that I may translate your tutorials

Tutorial here
***

***
Put the Pick Coly Balade preset in the default settings folder of your Psp
***
Plugins
Texture > Texturizer (English version)
Or Textures > Placage de texture (French version)
Flaming Pear
***
Colors
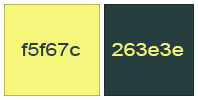
Foreground color : #f5f67c
Background color : #263e3e
***
1 - Open Alpha layer – Window / duplicate (Ctrl D)
We work on the copy
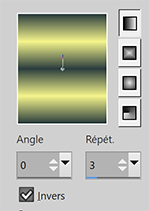
Fill with this Linear Gradient
Adjust - Blur - Gaussian blur 20
2 - Effects - Textures - Placage de texture OR Texture - Texturizer
 OU
OU 
3 - Layers – New Raster layer
Selections – Load / Save selection - Load Selection 1 from Alpha Channel
Fill with the light color
Selections – Modify - contract 20 px
Layers – New Raster layer
Fill with this Linear Gradient

Adjust - Blur - Gaussian blur 20
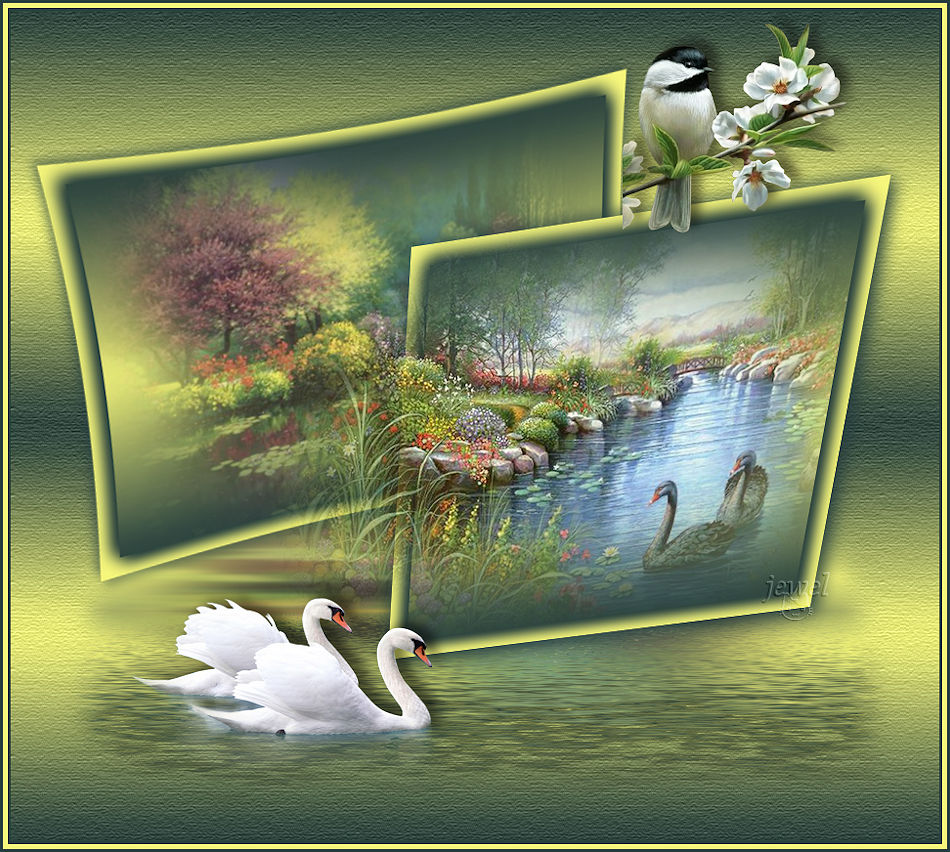
4 - Open "paysg136-coly" Erase the watermark
Edit – Copy
Edit - Paste as a new layer
Image – Resize 80% - all layers not checked
Place the landscape in the selection
5 - Selections – Invert
delete key on the keyboard
Layers - Merge - Merge down
6 - Selections – Invert
Effects 3D - Drop shadow 5, 5, 100, 25, background color
Edit - Repeat Drop shadow

Effects 3D - Drop shadow -5, -5, 100, 25, background color
Edit - Repeat Drop shadow

7 - Selections – Select none
Layers - Merge - Merge down
Image – Resize 110% - all layers not checked
Effects - Distortion Effects - Lens distortion

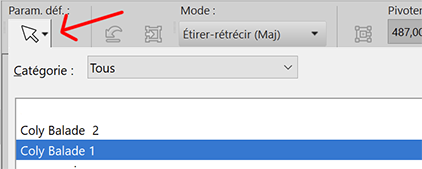
8 - Pick Tool (k) – Click on the small arrow and get the preset Balade 1
your layer will automatically be placed
9 - Effects 3D - Drop shadow 5, 5, 100, 25, background color
Effects 3D - Drop shadow -5, -5, 50, 15, background color

10 - Layers – New Raster layer
Selections – Load / Save selection - Load Selection 2 from Alpha Channel
Fill with the light color
Selections – Modify - contract 20 px
11 - Layers – New Raster layer
Fill with this Linear Gradient in memory
Adjust - Blur - Gaussian blur 20
Open "paysg143-coly" Erase the watermark
Edit – Copy
Edit - Paste as a new layer
Image – Resize 80% - all layers not checked
Place the landscape in the selection
Selections – Invert
delete key on the keyboard
Layers - Merge - Merge down
12 - Selections – Invert
Effects 3D - Drop shadow 5, 5, 100, 25, background color
Edit - Repeat Drop shadow
Effects 3D - Drop shadow -5, -5, 100, 25, background color
Edit - Repeat Drop shadow
Selections - Select none
Layers - Merge - Merge down
13 - Pick Tool (k) – Click on the small arrow and get the preset Balade 2
your layer will automatically be placed
Effects 3D - Drop shadow 5, 5, 100, 25, background color
Effects 3D - Drop shadow -5, -5, 50, 15, background color
14 - Open "morceau paysage 143" Erase the watermark
Edit – Copy
Edit - Paste as a new layer
Pick Tool (k) Position X 230, Position Y 198
15 - Layers – New Raster layer
Selections – Load / Save selection - Load Selection 3 from Alpha Channel
Fill with this Linear Gradient

16 - Open "paysg136-coly" Erase the watermark
Image - Mirror - Mirror vertical
Edit – Copy
Edit - Paste into selection
Adjust - Blur - Motion blur
Adjust - Blur - Motion blur

Selections - Select none
17 - Layers – Arrange - move down (3x)

Effects - Flaming Pear Flood

18 - Eraser Tool (X)

Erase the edges of the effect like this

Result

19 - Activate top layer
Open "oiseau43-coly" Erase the watermark
Edit – Copy
Edit - Paste as a new layer
Image – Resize 60% - all layers not checked
Place at the bottom left
Effects 3D - Drop shadow -6, 10, 50, 15 Black color
20 - Open "oiseau37-coly" Erase the watermark
Edit – Copy
Edit - Paste as a new layer
Image – Resize 45% - all layers not checked
Place at the top edge of the left frame
Effects 3D - Drop shadow -6, 10, 50, 15 Black color
21 - Add your watermark
Image – Add borders
3 pixels – dark color
5 pixels – light color
3 pixels – dark color
22 - Image - Resize 950 pixels
Adjust - Sharpness - Sharpen
Save Jpeg
If you want, you can send me your version
If you have problems, or you find a not worked link, write to me

Une autre version avec une tube déco de Thafs et un tube oiseau de Guismo

 votre commentaire
-


Colybrix, thank you very much for your permission that I may translate your tutorials
Tutorial here
***
***
Place the selections in the Selections folder of your Psp
For the Script file, you can leave it in the material or put it in the Regulated Scripts folder, if you leave it in the material it will suffice to fetch it from the material when you need it
Plugins
***
Penta com
Mehdi
Eye candy 5 - Impact
***
Colors
Foreground color : #fafafa
Background color : #561841

***
1 - File - New 900 x 550 pixels
Fill with dark color
Selections - Select all
Edit - Copy "mentali-misted2262"
Edit - Paste into selection
2 - Selections - Select none
Effects - Image effects - Seamless tiling by default
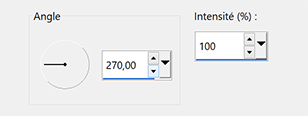
3 - Adjust - Blur - Radial blur

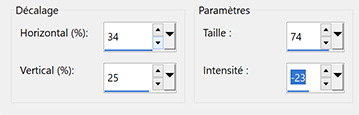
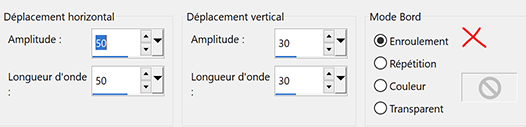
4 - Effects - Distorsion Effect - Wrap
Effects - Edge effects - Enhance
5 - Layers - Duplicate
Blend mode Soft Light
Effects - Penta com - Color Dot by default
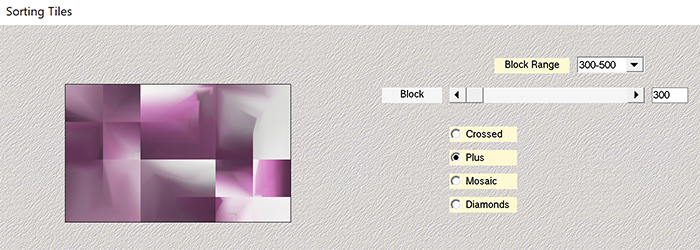
6 - Effects - Mehdi - Sorting Tiles
Adjust - Sharpness - Sharpen
7 - Layers - New Raster Layer
Fill with the light color
Layers – New mask layer from image – select "Silvie_Mask_Deco42H"
Effects - Edge effects - Enhance
Layers - Merge - Merge group
Blend Mode Luminance (Legacy) - Opacity 75 %
8 - Edit – Copy "mentali-misted2262"
Edit – Paste as a new layer
Image – Resize 75% all layers not checked
Objets – Align - Left
9 - Layers - New Raster Layer
Selections – Load / Save selection - Load selection from Disk "selection 1 rectangle"
Fill with the light color
Selections – Modify > Contract : 10 px
Press the Delete key on the keyboard
10 - Effects Eye Candy 5 – Impact - Glass - Settings Clear
Basic Settings

Selections - Invert
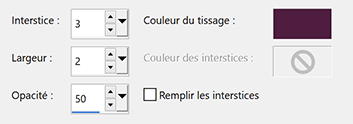
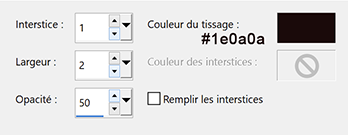
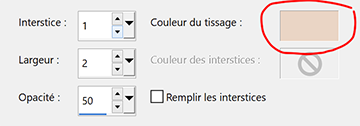
Effects - Textures effects - Weave - Dark color
Selections – Select none
11 - Layers - Duplicate
Pick Tool (k) Position Y 101
Layers - Duplicate
Pick Tool (k) Position Y 151
Layers - Merge - Merge down
Edit - Repeat Merge down
12 - Effects 3D - Drop shadow -6, -6, 50, 10, black color
Pick Tool (k) Position X 8, Position Y. 8
the decoration is not always put in the right place with the settings, in this case move slightly with the mouse then enter the settings again
13 - Layers - New Raster Layer
Selections – Load / Save selection - Load selection from Disk "selection 2 rectangle bas"
Fill with dark color
Selections – Modify - Contract 10 px
Press the Delete key on the keyboard
14 - Effets Eye Candy 5 – Impact > Glass - Clear with same settings
Selections - Invert
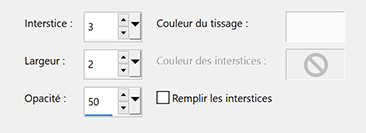
15 - Effects - Textures effects - Weave - Light color
Selections – Select none
16 - Layers - Duplicate
Pick Tool (K) Position Y 407
Layers - Dplicate
Pick Tool (k) Position Y 357
Layers - Merge - Merge down
Edit - Repeat Merge down
17 - Effects 3D - Drop shadow -6, -6, 50, 10, black color
Pick Tool (k), Position X 790, Position Y 383.
the decoration is not always put in the right place with the settings, in this case move slightly with the mouse then enter the settings again
Result

18 -. Edit – Copy "Yoka-TEXT-Silence1-150815"
Edit - Paste as a new layer
Image – Resize 75% all layers not checked
Place at the top left
Pick Tool (k), Position X 600, Position Y 18
Effects 3D - Drop shadow dark color

19 - Save your work as a precaution before running the script
File – Script - Run
Get the script from the hardware or from your Regulated Scripts folder
This window opens
Put in interactively mode if you want to change the colors, if not put in Silent mode
uncheck the "Check script version" box

Go to step 20
If the script does not work for you, here are the steps in detail
Image - Add borders
1 px dark color
3 px light color or white
1 px dark color
10 px Light color or white
1 px dark color
3 px light color or white
1 px dark color
3 px light color or white
1 px dark color
10 px light color or white
1 px dark color
25 px light color or white
1 px dark color
End os Script
Continue here after the script20 - Selections – Load / Save selection - Load selection from Disk "Selection 3 bordures"
Fill with dark color
Effects - Textures effects - Weave - Light color
Change the opacity

21 - Selections – Load / Save selection - Load selection from Disk "Selection 4 contour"
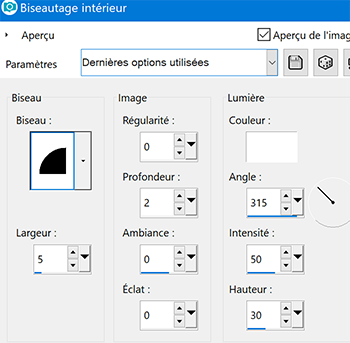
Effects 3D - Inner Bevel
Selections – Select none
22 - Add your watermark
Layers - Merge - Merge all flatten
Image - Resize 950 pixels
Save Jpeg
If you want, you can send me your version
If you have problems, or you find a not worked link, write to me
2 autres versions avec des mists perso


Muito obrigada Roberta

Thank you so much Kika

Thank you so much Trudy
 votre commentaire
-


Colybrix, thank you very much for your permission that I may translate your tutorials
Tutorial here
***
***
Plugins
Filters Unlimited 2.0 > Filter Factory Gallery M
Graphic Plus
Alien Skin Eye Candy 5 : Impact
AAA Filters
***
Colors
Foreground #1e0a0a
Background #efd4c3

***
1 - Open Alpha layer – Window / duplicate (Ctrl D)
We work on the copy
Fill with this Linear Gradient

Adjust - Blur - Gaussian blur 20
2 - Layers - Duplicate
Image – Mirror - Mirror horizontal
Blend mode Multiply
Layers - Merge - Merge down
3 - Effects - Textures effects - Weave
4 - Effects Filters Unlimited 2.0 - Filter Factory Gallery M - Motion Trail by default
Layers - Duplicate
Image – Mirror - Mirror horizontal
Effects Graphic Plus - Cross Shadow by default

Blend mode Overlay
5 - Layers – New Raster layer (2)
Fill with light color
Layers – New mask layer from image – select NarahsMasks_1711
Effects - Edges effects -Enhance
Layers - Merge - Merge group
6 - Effects Filters Unlimited 2.0 - Filter Factory Gallery M - Motion Trail by default
Image – Mirror - Mirror horizontal
Effects Filters Unlimited 2.0 - Filter Factory Gallery M - Motion Trail by default
7 - Open "1868 - paisaje misted - LB TUBES"
Edit – Copy
Edit - Paste ias a new layer
Image – Resize 75% - all layers not checked
Image – Mirror - Mirror horizontal
Pick Tool (k) X 180 Y 39
Blend mode Hard light - Opacity 85 %
8 - Layers – New Raster layer (3)
Selections – Load / Save selection - Load Selection 1 from Alpha Channel
Fill with the gradient
Effects 3 D - Inner Bevel

9 - Selections - Select none
Layers - Duplicate
Image – Mirror - Mirror horizontal
Layers - Merge - Merge down
Effects 3D - Drop shadow 2, 2, 100, 2, black color
Effects Graphic Plus - Cross Shadow by default
10 - Edit – Copy special - Copy merged
Selections – Load / Save selection - Load Selection 2 from Alpha Channel
Layers – New Raster layer (4)
Fill with the light color
Effects Alien Skin Eye Candy 5 - Impact - Glass - Preset Clear
11 - Selections – Modify - contract 20 px
Fill with the dark color
Selections – Modify - contract 4 px
Fill with the light color
Selections – Modify - contract 4 px
Edit – Paste into selection
Effects Alien Skin Eye Candy 5 - Impact - Glass - Preset Clear
Selections – Select none
12 -Image – Resize 70% - all layers not checked
Pick Tool (k) Position X 80 - Y 377
13 - Layers - Duplicate
Image – Resize 70% - all layers not checked
Pick Tool (k) Position X 271 - Y 30
Layers - Merge - Merge down
Effects 3D - Drop shadow 2, 2, 100, 2, black color
14 - Activate Copy of Raster 1

Layers – New Raster layer (5)
Selections – Load / Save selection - Load Selection 3 from Alpha Channel
Fill with the gradient
Selection – Select none
Effects - Distorsion Effects - Wave
Blend mode Hard Light
Layer - Duplicate
15 - Image – Add borders
1 pixel – Foreground color
Selections – Select all
Image – Add borders
15 pixels – Background color
Selections – Invert
16 - Effects Graphic Plus - Cross Shadow (intensity 70)

Selections – Invert
Effects 3D - drop shadow

17 - Selections – Select all
Image – Add borders
15 pixels – Foreground color
Selections – Invert
Effects - Textures effects - Weave - Light color
Effects 3 D - Inner Bevel - same settings in memory
18 - Selections – Select all
Image – Add borders
25 pixels – Background color
Selections - Invert
19 - Effects Graphic Plus - Cross Shadow (intensity 70) (intensity à 70)
Selections – Invert
Effects 3D - Drop shadow - same settings in memory
20 - Selections - Select all
Image – Add borders
5 pixels – Foreground color
Selections – Invert
Effects - Textures effects - Weave - same settings in memory
Effects 3 D - Inner Bevel - same settings in memory
Selections – Select none
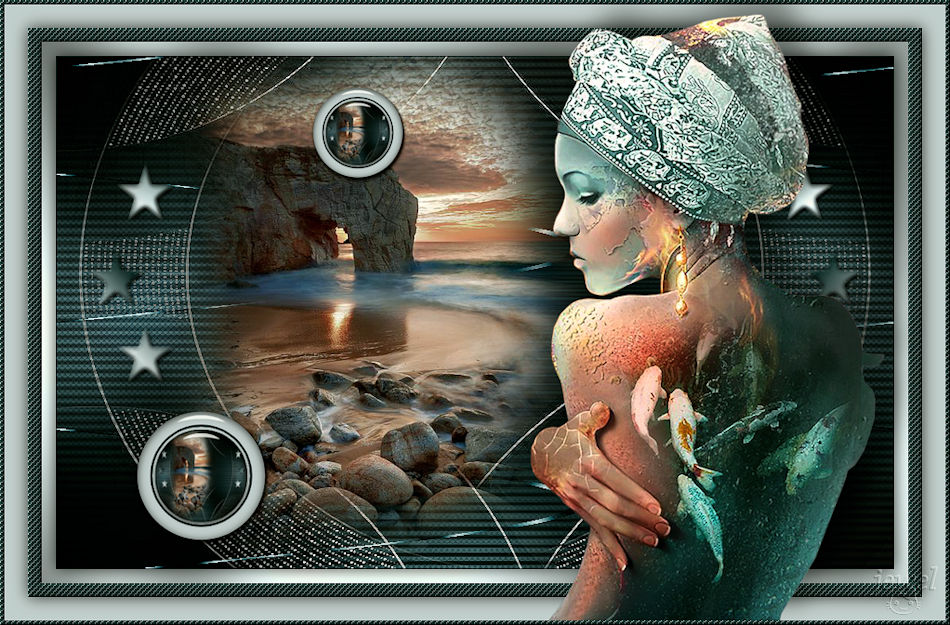
21 - Edit – Copy "3708 - woman - LB TUBES"
Edit - Paste as new layer
Image – Resize 98% - all layers not checked
Move to the right - I put just above the 5 px border
Adjust - Sharpness - Sharpen
Optional : Effects AAA Filters - Custom - Landscape

22 - Effects 3 D - Drop shadow -20, 24, 60, 35 black color
Add your watermark
Layers - Merge - Merge all flatten
Image - Resize 950 pixels
Adjust - Sharpness - Sharpen
Save Jpeg
If you want, you can send me your version
If you have problems, or you find a not worked link, write to me
Une autre version avec des tubes de Nicole ( Bambou)
Thank you so much Flavia-Rosaflor

Thank you so much Kika

Dank je wel Jeanne

Muito obrigada Carmen
Thank you so much Narah
 votre commentaire
-


Colybrix, thank you very much for your permission that I may translate your tutorials
Tutorial here
***
***
Plugins
VanDerLee > UnPlugged-X
Mura’s Meister
***
Colors
Foreground : #ffffff
Background : #103153

***
1 - File - New 900 px / 550 px transparent
Selections – Select all
Open "Fond"
Edit - Copy
Edit - Paste into selection
Selections - Select none
2 - Adjust – Blur - Gaussian blur 35
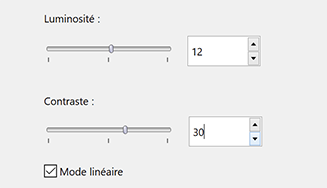
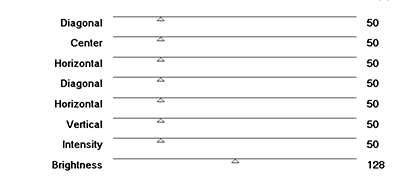
Adjust – Brightness and Contrast (adapt to your background if you use another one)
3 - Adjust – Add/ Remove noise - Add noise

4 - Layers - Duplicate
Effects VanDerLee > UnPlugged-X > Distortion

Blend Mode Overlay – Opacity 80 %
Layers - Merge - Merge down
5 - Layers - New Raster Layer
Fill with white color
Layers – New mask layer from image – select "creation.tine_masque285"
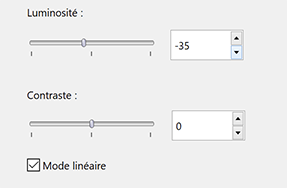
Adjust – Brightness and Contrast
6 - Effects - Edges Effects - Enhance
Layers - Merge - Merge group
Blend Mode Luminance (Legacy)
7 - Layers - New Raster Layer
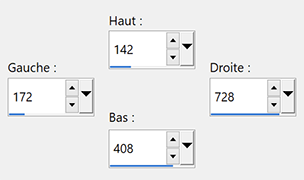
Selections (S) – Custom selection

Fill with white color
Selections – Modify - contract 10 pixels
Fill with background color
Selections – Modify - contract 10 pixels
Fill with white color
Selections – Modifiy - contract 2 pixels
Press the Delete key on the Keyboard
Selections – Select none
8 - Open "mist fond"
Edit - Copy
Edit Paste as a new layer
Image – Resize 75% - all layers not checked
Select Tool (k) Position X 130, - Position Y 60
Selections –Custom Selection
9 - Selections - Invert
Press the Delete key on the Keyboard
Selections – Select none
Layers – Arrange - Move down
10 - Activate top layer
Magic Wand Tolerance and Feather 0
Select blue border
Adjust – Add/ Remove noise - Add noise

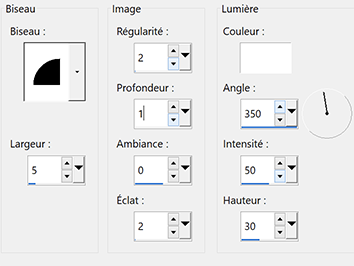
11 - Effects 3D - Inner Bevel

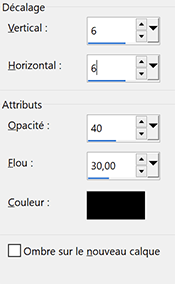
Effects 3D - Drop shadow 0, 0, 100, 10, black
Selections – Select none
12 - Effects 3D - Drop shadow 0, 0, 100, 30, black
Layers - Merge - Merge down
Effects - Image effects - Seamless tiling
13 - Activate Bottom layer (Raster 1)
Layers - Duplicate
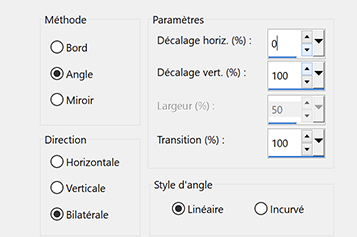
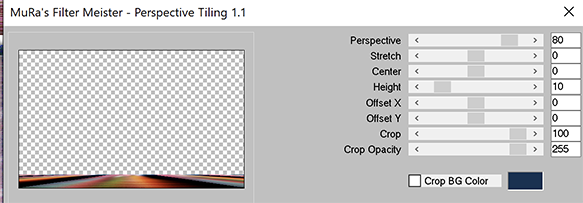
Effects Mura’s Meister - Perspective Tiling
14 - Layers - Arrange - Move up
Magic Wand - select the transparent part of the layer
Selections – Modify - Feather 30
Press the Delete key on the Keyboard (5 times)
Selections – Select none
15 - Layers - Duplicate
Image – Mirror vertical
Layers - Merge - Merge down
Effects 3D - Drop shadow (same settings in memory)
16 - Activate Bottom layer
Selections – Custom selection (S)

Selections - Promote selection to layer
Adjust – Blur - Gaussian blur ( same settings)
17 - Selections – Edit Selection

Image – Mirror horizontal
Selections – Edit Selection
Activate Bottom layer
Selections - Promote selection to layer
Adjust – Blur - Gaussian blur ( same settings)
Selections – Select none
18 - Activate top layer
Open "Deco" - Edit - Copy
Edit - Paste as a new layer
Select Tool (k) Position X 175 - Position Y 149.
Layers - Dupliquer
Image – Mirror horizontal
19 - Activate Bottom layer
Edit – Copy
20 - Image - Add borders
1 pixel – Background color
Selections - Select all
Image – Add borders
15 pixels – White color
Effects 3D - Drop shadow (same settings in memory)
21 - Selections - Select all
Image – Add borders
15 pixels – White color
Selections – Invert
Edit - Paste into selection
Selections – Invert
Effects 3D - Drop shadow (same settings)
22 - Selections - Select all
Image – Add borders
15 pixels – White color
Effects 3D - Drop shadow (same settings in memory)
Selections – Select none
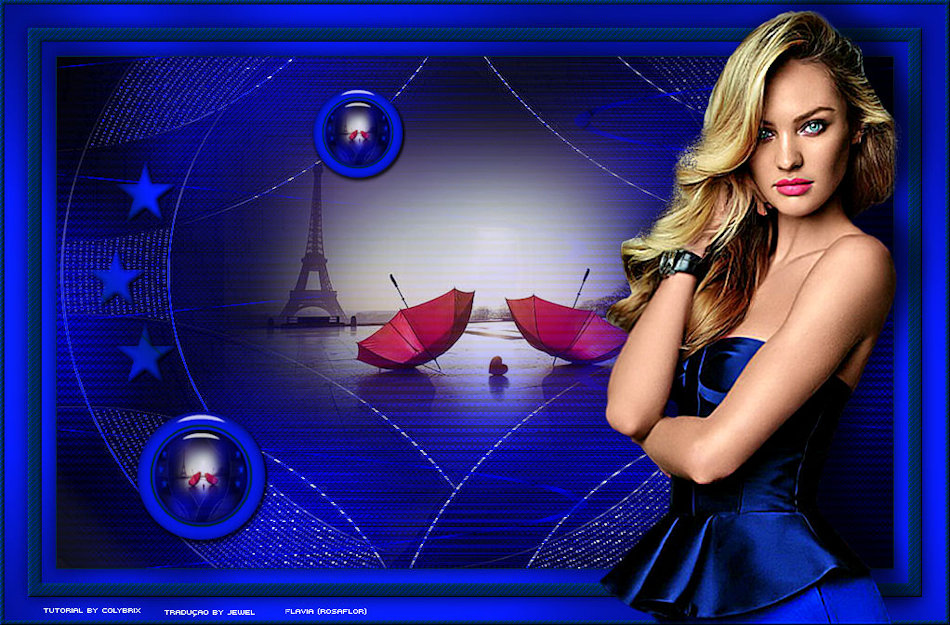
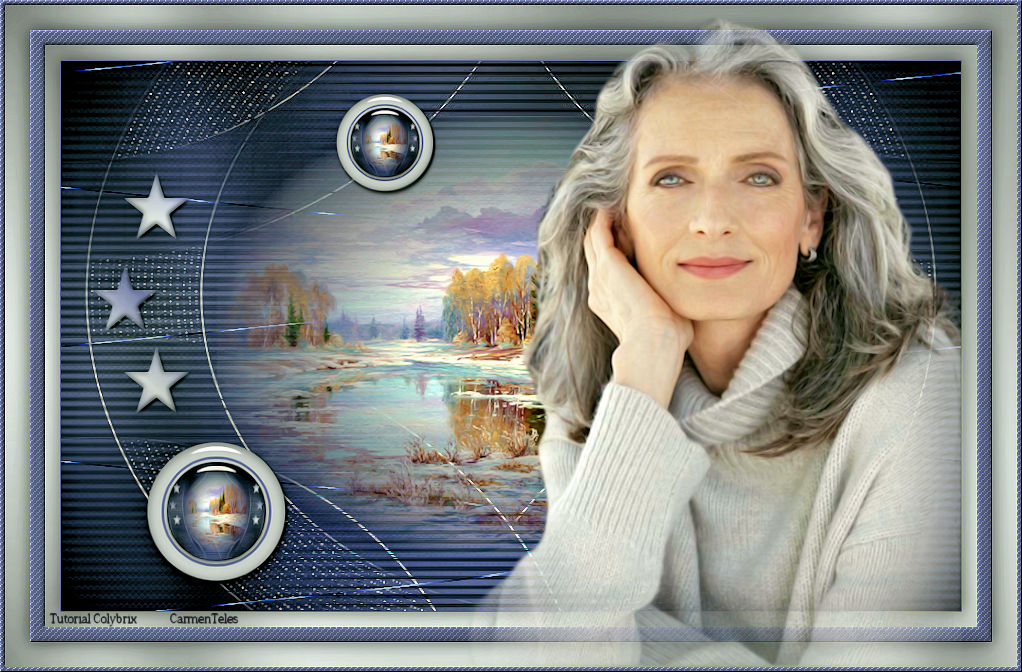
23 - Open "3692 - woman - LB TUBES"
Edit - Copy
Edit - Paste as a new layer
Resize 92% all layers not checked
Effects 3D - Drop shadow -4, 14, 50, 30, Black color
24 - Open "objet_deco16_tine_07.2020-386"
Edit - Copy
Edit - Paste as a new layer
Resize 70% all layers not checked
Place on the left
Effects 3D - Drop shadow -4, 14, 50, 30, Black color
25 - Add your watermark
Image – Add borders
1 pixel – Background
Image – Resize 950 pixels - resize all layers checked
Save Jpeg
If you want, you can send me your version
If you have problems, or you find a not worked link, write to me
Une autre version avec des tubes de LB-Beatriz et Guismo

Thank you so much Trudy

Muchas gracias Beatriz

Thank you so much Kika

Thank you so much Marie Nickol

Muito obrigada Carmen
 votre commentaire
-


Colybrix, thank you very much for your permission that I may translate your tutorials
Tutorial here
***
***
Plugins
Filters Unlimited - &<Bkg Designer sf10 II
Graphic Plus
Penta.com
AAA Frames
***
Colors

Foreground : #ffffff
Background : #af601b
Color 3 : #f5cc6c
1 - Open image "Printemps" (or your own)
Edit – Copy
File - New 900 px / 550 px transparent
Selections – Select all
Edit – Paste into selection
Selections – Select none
2 - Adjust - Blur - Gaussian blur 20
Adjust – radial blur

Effects - Edges Effects - Enhance (twice)
3 - Effects - Filters Unlimited - &<Bkg Designer sf10 II - DIS Refractor 2 by default

Layers - Duplicate
Blend mode Overlay - opacity 75 (adapt to your image)
Layers - Merge - Merge down
4 - Layers – New Raster layer
Fill with white color
Layers – New mask layer from image – select "NarahsMasks_1536"

Effects - Edges Effects - Enhance
Layers - Merge - Merge group
5 - Effects - Image effects - Seamless tiling

6 - Layers – New Raster layer
Fill with white color
Layers – New mask layer from image – select "NarahsMasks_1240"

Effects - Edges Effects - Enhance
Layers - Merge - Merge group
7 - Layers - Duplicate
Layers - Merge - Merge down
Effects 3D - Drop shadow - color #af601b

8 - Open "image fleurs"
Edit – Copy
Edit – Paste as a new layer
Image - Resize 60 % all layers not checked
Pick Tool (k) Position X : 316 - Position Y : 43
Blend mode Screen
Effects - Image effects - Seamless tiling

8 bis - Open "dessin91-oiseau50" Erase the watermark
Edit - Copy
Edit - Paste as a new layer
Image - Resize 55 % all layers not checked
Place at the top right
Effects 3D - Drop shadow 6, 6, 40, 30, black color
9 - Foreground color 3
Linear gradient

10 - Image – Add borders
2 pixels – background color
Selections – Select all
Image – Add borders
10 pixels – background color
11 - Selections – Invert
Fill with linear gradient
Effects Graphic Plus - Cross Shadow
12 - Effects Penta.com - Dot and Cross by default
Effects 3D - Inner Bevel
Selections – Select none
13 - Image – Add borders
2 pixels – background color
Selections – Select all
Image – Add borders
25 pixels – background color
14 - Selections – Invert
Fill with the linear gradient
Effects Graphic Plus - Cross Shadow- same settings in memory
Effects - Texture Effects - weave

15 - Selections – Invert
Effects 3D - Drop shadow 6, 6, 75, 30
Selections – Select none
16 - Effects AAA Frames - Foto Frame

17 - Open "dessin79-anim56-coly"
Edit – Copy
Edit – Paste as a new layer
Image - Resize 60 % all layers not checked
Image – Mirror horizontal
Place at the bottom left
Effects 3D - Drop shadow 6, 6, 40, 30, black
18 - Open "Fleur76-coly" - Erase the watermark
Edit - Copy
Edit - Paste as a new layer
Image – Mirror horizontal
Image - Resize 50 % all layers not checked
Place at the bottom right
Effects 3D - Drop shadow 6, 6, 40, 30, black
19 - Open "Note musique"
Edit - Copy
Edit - Paste a new layer
Image - Resize 50 % all layers not checked
Place behind the cicada
Effects 3D - Drop shadow 1, 1, 40, 1, black
20 - Write the text with the font provided (or another one of your choice)
Or paste the title provided
My settings for the text

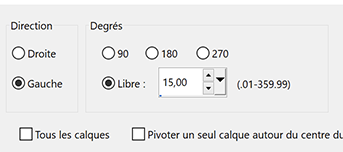
20 - Image – Free rotate
Effects 3D - Drop shadow 2, 2, 40, 2, black
21 - Add your watermark
Image – Add borders
2 pixels – background color
Image – Resize 950 pixels - resize all layers checked
Save Jpeg
If you want, you can send me your version
If you have problems, or you find a not worked link, write to me
Une version avec des tubes de Tine, Colybrix et Thafs

une autre version avec des tubes de Tine

Thank you so much Joice
 votre commentaire


|
|
|
|