-
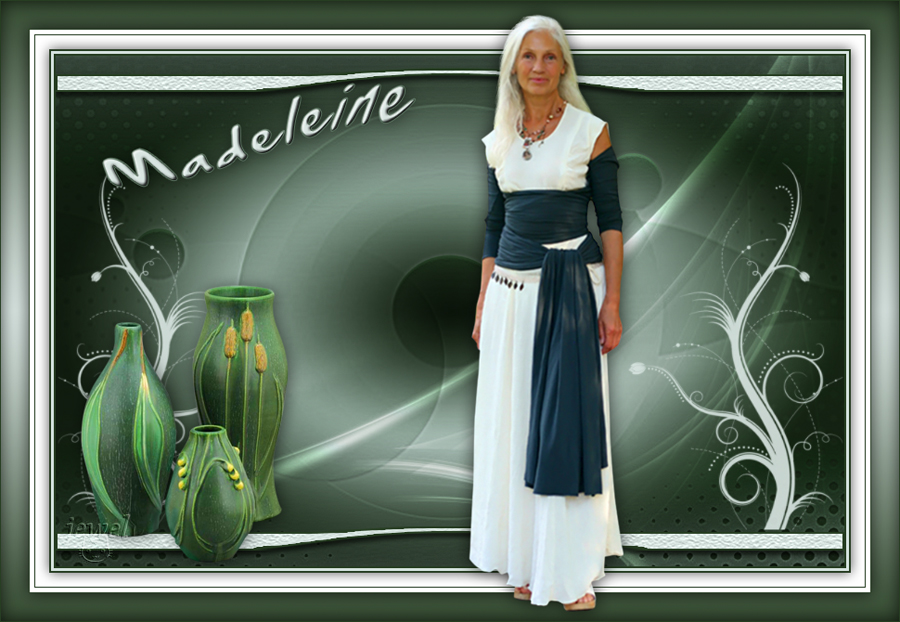
Sauvegarde Madeleine

Colybrix, thank you very much for your permission that I may translate your tutorials

Tuto original ici
***

***
Colors
Foreground : d8e5e1
Background: 273e22

1 - Open Alpha layer
Image - Duplicate to make a copy
Close the original.
The copy, that will be the basis of your work, is not empty,but contains selections and guide
2- Gradient tool (G)– Reflected – foreground – background

Pull the gradient from the marker to the top edge, holding down the shift key to go straight

Résult

3 - Filter – Blur - Gaussian blur à 20
4 – Layer - duplicate – multiply mode
Layer – Merge down (Ctrl + E)
5. Filtre – Distort – Polar coordinates
Rectangular to polar

6. Layer – New layer - click X to invert the colors
Do the same gradient as before with your inverted colors
result

7- Add a layer mask
8 - Open Narah mask 1592 (it is resized)
Selection – Select all – copy (ctrl a – ctrl c)
9 - Go back to your layer with the layer mask
Press while holding the Alt key on the thumbnail of the merge mask in the layer window
The layer is white
Edit – copy (ctrl v)
The mask goes in the layer mask
Right click on the mask layer – Apply the layer mask
Selection - Deselect
10 - View, clear guides
11. Filter – Sharpen - unsharp mask

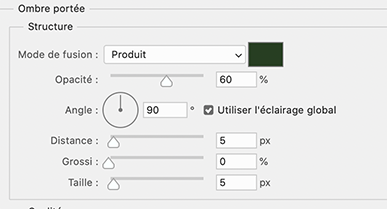
12 – Layer style – Drop shadow (dark color)

Blend mode Hard light (or other according to your colors)
Result

13 – Layer – New layer – Edit - Fill with white color

14 - Open Narah mask 1337 resized
Selection – Select all – copy (ctrl a – ctrl c)
Go back to the white layer, add a layer mask
Click while holding the Alt key on the thumbnail of the merge mask
Edit - Copy (ctrl v)
The mask goes in the layer mask
Right click on the mask layer – Apply the layer mask
Selection - Deselect
15 - Blend mode Overlay
16 – Layer – New layer
Sélection – Load selection
Choise selection 1 in the scroll menu
17 – Fill with the clear color
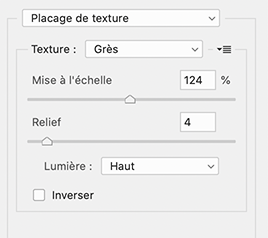
Filter – Textures – texturiser
Deselect
18 - Filter – Distort – Pinch

Keyboard key Ctrl F to remake the filter
Remake Ctrl F
The effect is done 3 times
19 – Layer style - stroke - inside

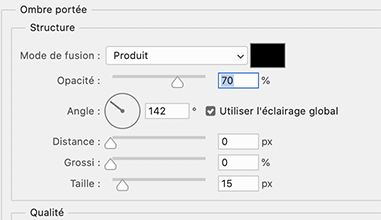
Drop shadow
20 – Layer - Duplicate
Ctrl t (free transform)
Right click, flip vertical
Place at the bottom
Settings (H ...minus 100 )

21 - Calque – new layer
Sélection – Load selection
Choise selection 2 in the scroll menu
Fill with the clear color
Deselect
Blend mode Linear light (or other)
22 – Layer – Flatten image
23 – Open « vase 81-Coly », erase the watermark
Copy – Paste as a new layer
Ctrl T (free transform)
My settings

Layer style - Drop shadow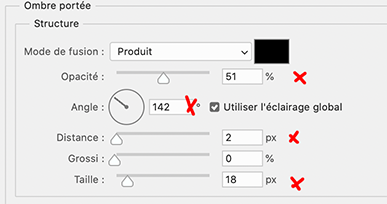
24 – Calque – new layer
Sélection – Load selection
Choise selection 3 in the scroll menu
Fill with the clear color
Deselect
25 – Layer style - Drop shadow

Stroke - center – color 59705e

Bevel and Emboss

26 - Layer – Flatten image
27 - Image – canvas size
4 pixels – dark color
6 pixels – clear color
4 pixels – dark color
30 pixels – white color
28 - Select the white border with the magic wand tool (W)
Select - Invert
Ctrl J (new – layer via copy)
Layer style - Drop shadow
29- Layer – Flatten image
30 - Image – canvas size
2 pixels – dark color
10 pixels – white color
2 pixels – dark color
60 pixels – white color
31 - Select the white border with the magic wand tool (W)
Gradient tool (foreground clear color , background dark color)
Reflected gradient

Pull the gradient from the center to the top edge, holding down the shift key to go straight

32 - Ctrl J (layer – layer via copy)
Layer style - Inner shadow

33 - Open « femme 71-Coly », erase the watermark
Copy and paste as a layer
Ctrl T (free transform)
My settings

34 – Layer style – drop shadow

35 – Add your watermark
Layer – Flatten image
36 - Image – canvas size
2 pixels – dark color
37 – Image – Image size – 900 pixels
If you want, you can send me your version
If you have problems, or you find a not worked link, write to me

Une autre version avec un tube de LB-Beatriz

|
|
|
|