-
Douceur hivernale


Colybrix, thank you very much for your permission that I may translate your tutorials

Tutorial here
***

***
Plugins
It@lian Editors Effect
Graphic Plus
***
Colors
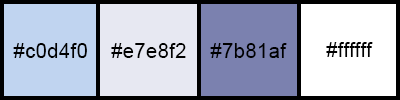
Color 1, foreground : #c0d4f0
Color 2, background : #e7e8f2
Color 3 : #7b81af
Color 4 : #ffffff
***
1 - File - New 875 x 525 pixels transparent
Fill with linear gradient colors 1 et 2

2 - Open "paysghiver16-coly" - Erase the watermark
Edit - Copy
Edit - Paste as a new layer
Image – Mirror horizontal
Image - Resize 83% all layers not checked
Layers - Duplicate
Close the copy layer
3 - On the layer below (the mis)
Effests - Image effects - Seamless Tiling (Side by Side)

Adjust - Blur - Gaussian blur 10
Layers - Merge down
4 - Adjust - Add/Remove Noise - Add Noise

Layers - Duplicate
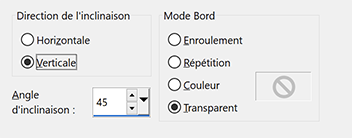
5 - Effects - Geometric effects - Skew
6 - Effects - It@lian Editors Effect - Effetto Fantasma, by default
Effects - Edge effects - Enhance
Effects 3D - Drop shadow 8, 8, 70, 15, color 3

Effects 3D - Drop shadow -8, -8, 70, 15, color 3
7 - Open top layer and activate
Pick tool (k) - Position X 219 - Position Y 0
8 - Color background - White
Layers - New raster layer
Fill with white color
Layers – New mask layer from image – select NarahsMasks_1752

Effects - Edge effects - Enhance
Layers - Merge - Merge group
9 - Layers - New raster layer
Fill with white color
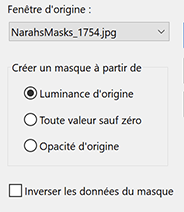
Layers – New mask layer from image – select NarahsMasks_1754
Effects - Edge effects - Enhance
Layers - Merge - Merge group
10 - Image – Resize - as on the picture

Pick Tool (K) Position X -9, position Y -92.
11 - Eraser tool with these settings

Lightly erase on the bottom edge (4-5 passes on each side)
Before

After

12 - Edit - Copy "sol neige droite"
Edit - Paste as a new layer
Objects - Align right
Objects - Align bottom
Edit - Copy "sol neige gauche"
Edit - Paste as a new layer
Objects - Align left
Objects - Align bottom
Blend mode Luminance (Legacy) forthese two tubes
13 - Image – Add borders
1 pixel – color 3
5 pixels – color 4
14 - Select - Select all
Image – Add borders
5 pixels – color 3
Selections – Invert
Effects Graphic Plus - Cross Shadow

15 - Select - Select all
Image – Add borders
20 pixels – color 4
Effects 3D - Drop shadow 0, 0, 50, 15, black
16 - Select - Select all
Image – Add borders
5 pixels – color 3
Selections – Invert
Effects Graphic Plus - Cross Shadow - same settings
17 - Select - Select all
Image – Add borders
30 pixels – color 4
Effects 3D - Drop shadow : 0, 0, 50, 15, black
Selections – Select none
18 - Open "flocons bordure"
Edit - Copy
Edit - Paste as a new layer
Don't move
19 - Open "dessin77-anim55-coly" Erase the watermark
Edit - Copy
Edit - Paste as a new layer
Mirror - Mirror horizontal
Image – Resize 70%, one layer only, don't forget to check the Lock proportions box
Move to the left
Effects 3D - Drop shadow : -5, -5, 50, 15, black
20 - Open "ours"
Edit - Copy
Edit - Paste as a new layer
Image – Resize 50%, all layers not checked
Make a rectangle selection like this
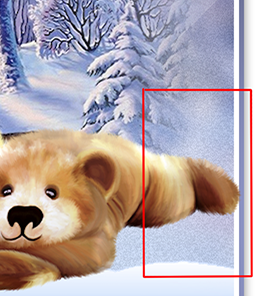
Delate
Place against the bottom right border
Effects 3D - Drop shadow -5, -5, 50, 25, black
21 - Open "WA - Douceur hivernale-creaColy"
Erase the watermark
Image – Resize 70%, all layers not checked
Move to the top right
Effects 3D - Drop shadow: 2, 2, 50, 2, black
22 - Add your watermark
Image – Add borders
1 pixel – color 3
Image – Resize 950 pixels
Save Jpeg
If you want, you can send me your version
If you have problems, or you find a not worked link, write to me

Une autre version avec des tubes de Tine et Colybrix

Thank you so much Kika

Thank you so much Etelka

-
Commentaires
|
|
|
|