-
Puppy


Colybrix, thank you very much for your permission that I may translate your tutorials

Tutorial here
***

***
Colors
Foreground : #4a54a2
Background : #ffffff

***
1 - File - New 875 x 525 pixels transparent
linear gradient

2 - Fill with the linear gradient
Adjust - Blur - Gaussian blur 25
Layers - Duplicate
Effects - Distorsion effects - pixelate (186/88)

3 - Effects - Image effects - Seamless Tiling
4 _ Blend mode Multiply
Layers - Merge down
5 - Selection Tool (S) – Custom Selection

Effects 3D - Drop shadow 0, 0, 75, 25, black
Selections none
6 - Edit - Copy "Pinceau point blanc"
Edit - Paste as a new layer
Pick Tool (k) Position X: 0, Position Y 0
7 - Effects - Distorsion effects - Spiky Halo

Layers - Duplicate
Image – Mirror Horizontal
Layers - merge -Merge down
Opacity 80 ( according to your colors)
8 - Layers - New raster layer
Fill with white color
Layers – New mask layer from image – creation.tine_masque 088
Layers - Merge - Merge group
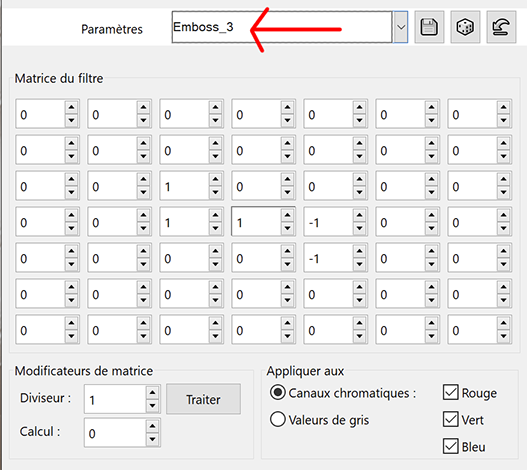
9 - Effects – User Defined Filter / Emboss 3
Effects 3D - Drop shadow 2, 10, 50, 15, black
Blend Mode Soft Light
10 - Open "paysghiver17-coly" Erase the watermark
Edit - Copy
Edit - Paste as a new layer
Image – Mirror horizontal
Image – Resize 80%, all layers not checked
11 - Layers - Duplicate
Effects - Image effects - Seamless Tiling - Same settings in memory
Adjust - Radial Blur

Layers - Rearrange downwards 3 times
Blend mode Overlay

12 - Move to the top layer (landscape)
Pick Tool (k) : Position X 228, Position Y 5
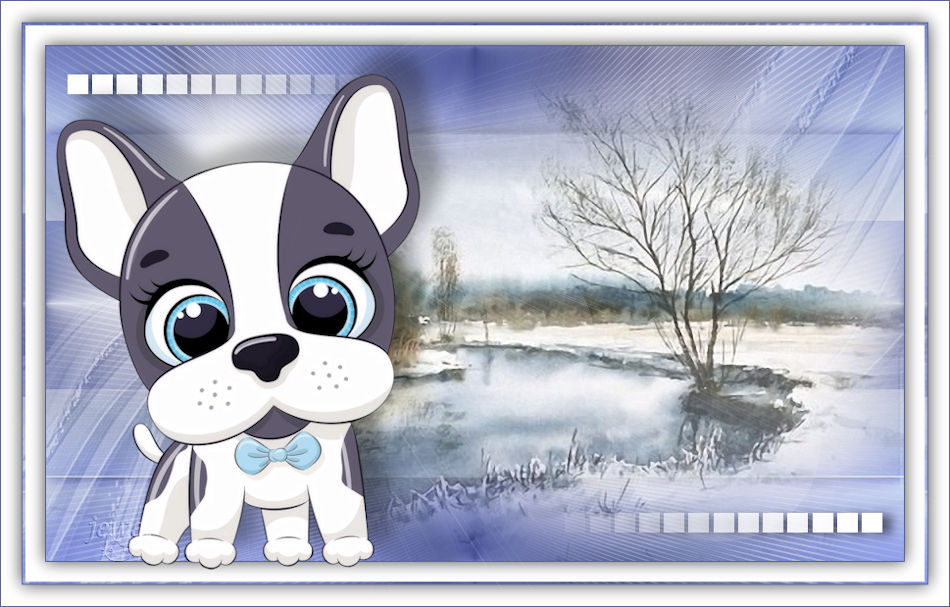
Result

13 - Open"deco"
Edit - Copy
Edit - Paste as a new layer
Don't move
Effects 3D - Drop shadow 2, 10, 50, 15, black
14 - Image - Add borders
1 pixel – dark color
15 - Selections – Select all
Image – Add borders
20 pixels – white
Effects 3D - Drop shadow : 0, 0, 75, 25, black
Select none
16 - Selection Tool (S) – Custom Selection

Selections - Invert
Edit – Copy
17 - Selections – Select all
Image – Add borders
25 pixels – white
Selections – Invert
Edit –Paste into selection
Select none
18 - Open "PelucheHiver1-coly"
Edit - Copy
Edit - Paste as a newl layer
Image - Resize 55% all layers not checked
Move to the left
Effects 3D - Drop shadow -23, 22, 30, 25 couleur noire
19 - Move to the background
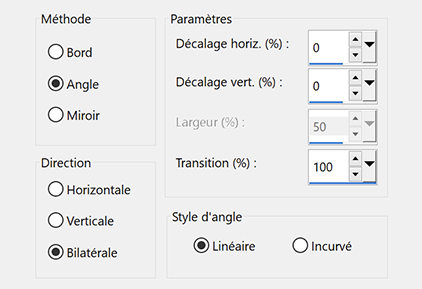
Effects - Illumination Effects - Sunburst with these settings

If you wish, you can change the horizontal and vertical settings, so that the center of the effect is slightly behind the tube, thus not too visible
20 - Add your watermark
Image – Add borders
1 pixel – dark color
Image – Resize 950 pixels
Save Jpeg
If you want, you can send me your version
If you have problems, or you find a not worked link, write to me

une autre version avec un tube Puppy de Tine
Thank you so much Narah

Thank you so much Kika


-
Commentaires
|
|
|
|