-
Par jewelAnnie le 7 Septembre 2021 à 08:03

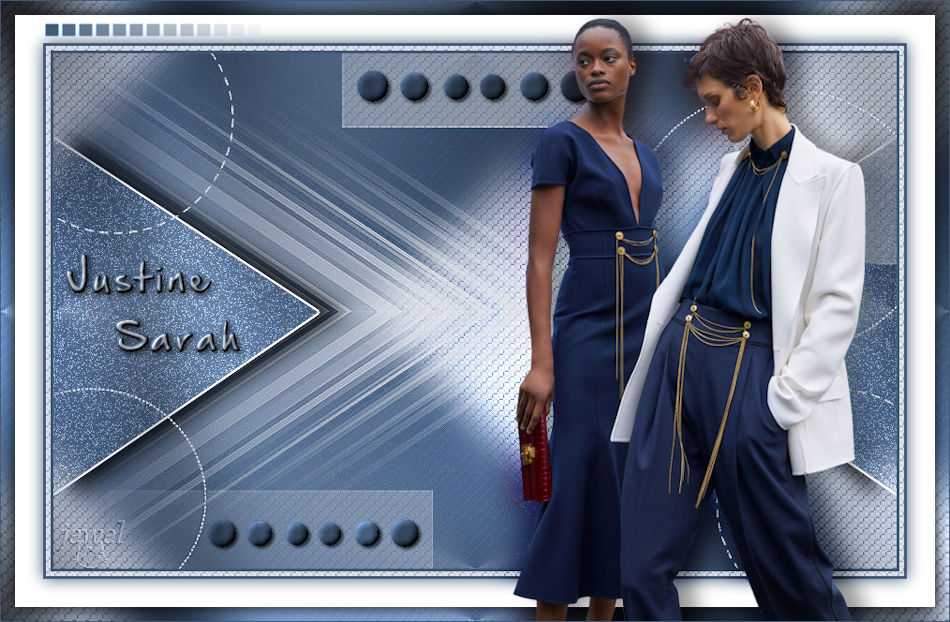
Colybrix, thank you very much for your permission that I may translate your tutorials

Tutoriel original ici
***

***
Plugins
Plugin Galaxy
Graphic Plus
***
Colors
Foreground #425976
Background #e2e5ec

***
Open all files in PSP and minimize to tray
***
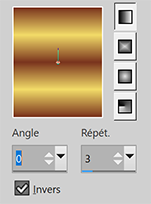
1 - Open Alpha layer – Window / duplicate (Ctrl D)
We work on the copy
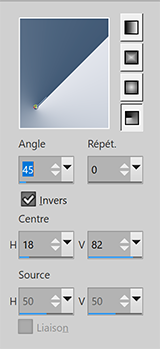
2 - Fill with the radial gradient
Adjust - Blur - Gaussian blur 20
3 - Layers - Duplicate
Image – Mirror
Image – Flip
Blend mode Multiply
Layers - Merge - Merge down
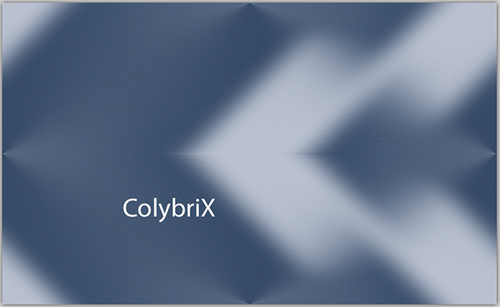
4 - Effects - Image effects - Seamless tiling by default
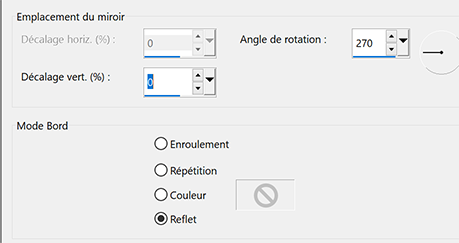
Effects - Reflection effects - Rotating mirror
Effects - Edges effects -Enhance 2 times
Result
5 - Layers – New Raster layer
Fill with light color
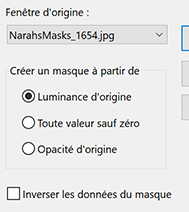
Layers – New mask layer from image – select " creation.tine_masque330"
Effects - Edges effects -Enhance
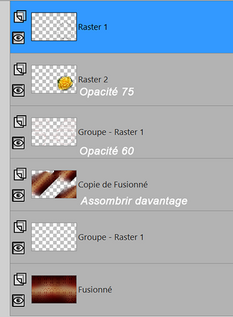
Layers - Merge - Merge group
6 - Image – Mirror
Pick tool (k) Position X -100 - Position Y 0
7 - Activate the bottom layer
Effects - Texture Effects - Weave

8 - Stay on this layer
Selections - Load - Save selection - Load Selection 1 from Alpha Channel
Selections -Promote selection to layer
Effects Plugin Galaxy > Noiseee

9 - Selections – Modify - Select selection borders

Fill with light color
Selections - Select none
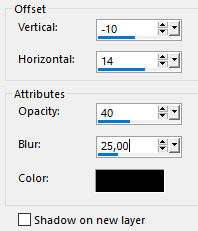
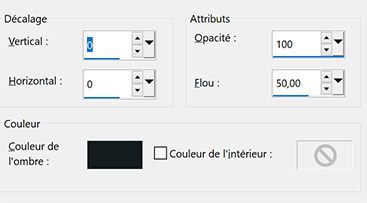
Effects - 3D Effects - Drop shadow 0, 24, 75, 30 - Black color
10 - Layers - Arrange - Bring to top
Layers - Duplicate
Image – Mirror
Layers - Merge - Merge down
11 - Effects Graphic Plus - Cross Shadow intensity 90

12 - Activate Raster 1
Effects Graphic Plus - Cross Shadow same settings but intensity 50
13 - Activate the top layer
Layers - New Raster layer
Fill with light color
Layers – New mask layer from image – select NarahsMasks_1639
Effects - Edges effects -Enhance
Layers - Merge - Merge group
14 - Effects - Texture Effects - Weave
Same settings but Opacity 50

15 - Layers – New Raster layer
Selections - Load - Save selection - Load Selection 2 from Alpha Channel
Fill with dark color
Effects - Graphic Plus - Cross Shadow by default but intensity 50
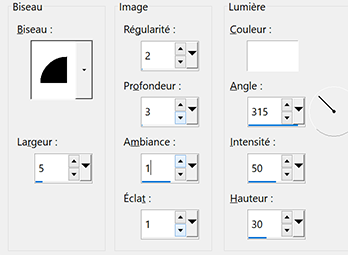
16 - Effects - 3D Effects - Inner bevel
Effects - 3D Effects - Drop shadow 2, 2, 75, 5 - Black color
Selections - Select none
17 - Layers - Duplicate
Image – Resize 90% resize all layers not checked
Pick tool (k) Position X 163 - Position Y 495
Layers - Merge - Merge down
Effects - Graphic Plus - Cross Shadow by default but intensity 50
18 - Activate the bottom layer
Edit - Copy
19 - Image – Add borders
3 pixels – dark color
5 pixels – light color
3 pixels – dark color
20 - Magic Wand tool - tolerance and feather à 0
Select the border 5 pixels light color
Effects - Texture Effects - Weave - same settings
21 - Selections - Select all
Image – Add borders
30 pixels – white color
Effects - 3D Effects - Drop shadow - dark color
22_ Selections - Select all
Image – Add borders
15 pixels –white color
Selections – Invert
Edit – Paste into selection
23 - Effects Graphic Plus - Cross Shadow par défaut - intensity à 128
24 - Selections – Invert
Effects 3D - Drop shadow - same settings but black color
Selections – Select none
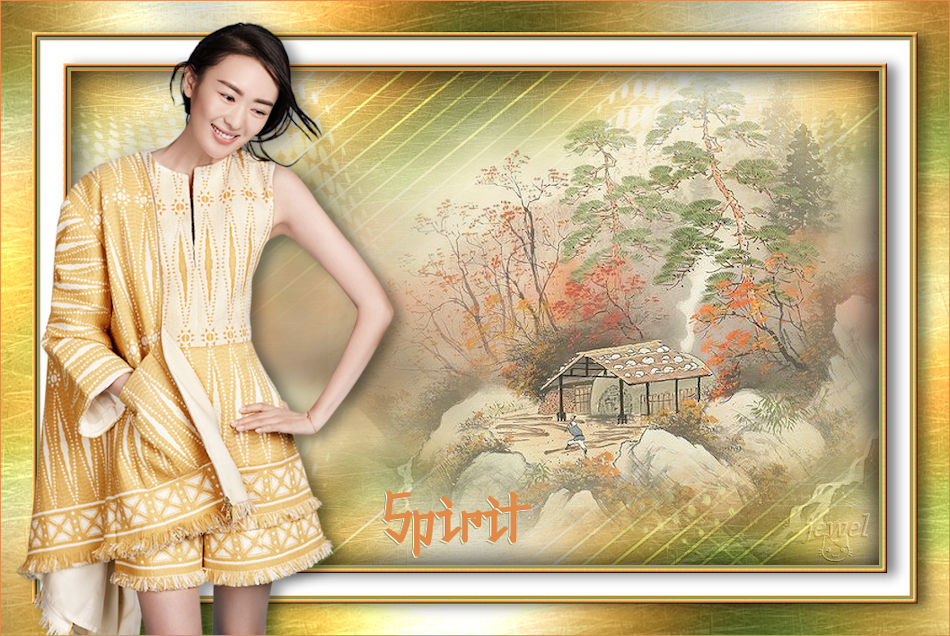
25 - Edit - Copy "Cady 2" - Erase the watermark
Edit - Paste as a new layer
Image - Resize 85% resize all layers not checked
Move on the right
Layers - Duplicate
on the layer below - Adjust - Blur - Gaussian blur 20
Blend mode Overlay
on the top layer - Effects 3D - Drop shadow -2, 18, 40, 30 - dark color
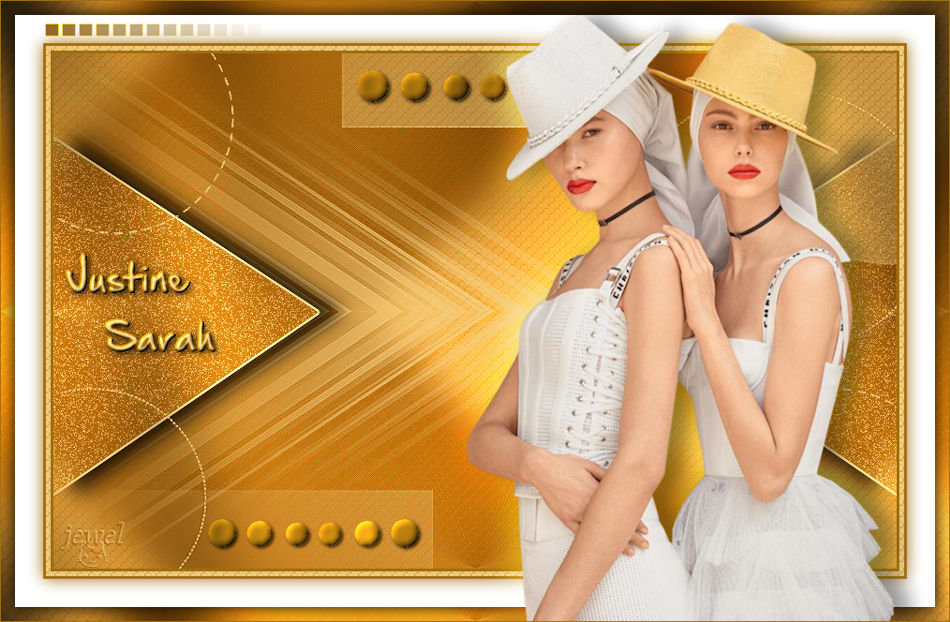
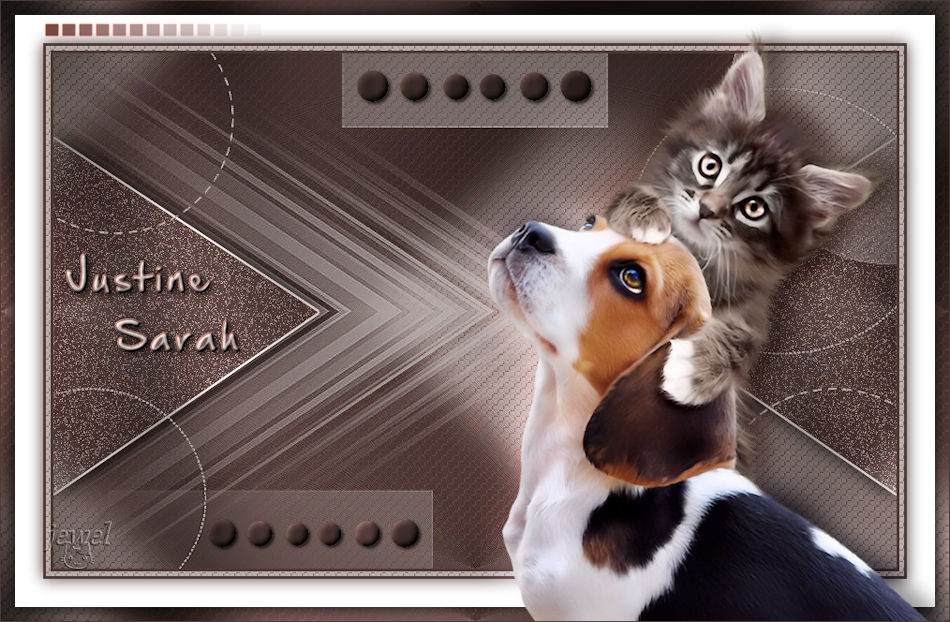
26 - Text tool (or take the text provided) Fond Hand Of Sean

Write ..... Justine (Enter key.......then push 4 times on space to make a shift to the right)
and write ...... Sarah
Right click on the layer in the layer window
Convert to Raster Layer
Effects - 3D Effects - Inner bevel same settings but width 5
Effects - 3D effects - Drop shadow 2, 2, 75, 10 - black color
Pick tool (k) Position X 63 - Position Y 264
27 - Edit - Copy "deco bordure"
Pick Tool (k) position X 45 - position Y 18
Effects - Edges Effects - Enhance
28 - Add your watermark
Image – Add borders
1 pixel – Dark color
Image – Resize 950 pixels - resize all layers checked
Save Jpeg
If you want, you can send me your version
If you have problems, or you find a not worked link, write to me

Une autre version avec un tube de Corinne Vicaire
Une autre version avec un tube de Tine
Muito obrigada Roberta

 votre commentaire
-
Par jewelAnnie le 3 Août 2021 à 13:35


Colybrix, thank you very much for your permission that I may translate your tutorials
Tutoriel original ici
***
***
Plugins
FM Tile Tools
Eye Candy 5 : Impact > Glass
***
Colors

Foreground #520508
Background #e0cfb2
Color 3 #e3c757
Color 4 #ffffff
***
1 - File - New transparent 900 x 550 pixels transparent
Fill with this gradient
Adjust - Blur - Gaussian blur 40
2 - Layers – New raster layer
Selections – Select all
Open "LD-model-813" - Erase the watermark
Edit – Copy
Edit – Paste into selection
Selections – Select none
3 - Effects - Image effects -Seamless Tiling by default
Adjust - Blur - Gaussian blur 40
Blend mode Soft light (or other)
Effects - Texture Effects - Weave Foreground color

4 - Layers - Merge visible
Layers - Duplicate
Blend mode Multiply
Layers - Merge visible
5. Calques – Dupliquer
Effets Géométriques > Inclinaison

6 - Pick Tool (k) Position X -352, Position Y 0

Effects - Image effects -Seamless Tiling by default
Blend mode Darken

7 - Layers – New raster layer
Fill with white color
Layers – New mask layer from image – select NarahsMasks_1654
Effects - Edge effects - Enhance
Layers - Merge - Merge group
8 - Effects FM Tile Tools - Blend Emboss by default
Opacity 60
Effects - Texture Effects - Blinds - Color foreground

9 - Move to bottom layer (Merged)
Layers – New raster layer
Fill with white color
Layers – New mask layer from image – select NarahsMasks_1652

Layers - Merge - Merge group
10- Move to the top layer
Layers - New Raster layer
Selections – Load/Save selection - Load selection from disk - Selection cercle Irina
Effects Eye Candy 5 - Impact - Glass (color doesn't matter)

11 - Open "fleur 100-coly" - Erase the watermark
Edit - Copy
Edit - Paste as a new layer
Image – Resize 60% - resize all layers not checked
place in the center of the circle
Selections – Invert
Delete
Selections – Select none
Layers – Arrange - move down
Opacity 75 (or as you prefer)

12 - Open "LD-model-813"
Edit - Copy
Edit - Paste as a new layer
Don't resize
Move to the left –Pick Tool (k)

We will replace it more in the center then but for the mask which follows, leave to the left
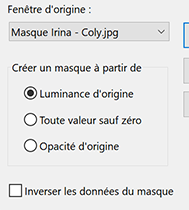
13. - Layers – New mask layer from image – select Masque Irina – Coly
Layers - Merge - Merge group
Move to the center, for my tube Horizontal position 244, vertical position 11
Blend mode Overlay - Opacity 50

14 - Edit – Copy spécial - Copy merged
15 - Image – Add borders
1 pixel – color 1
3 pixels – color 3
1 pixel – color 1
16. -Selections – Select all
Image – Add borders
40 pixels – color 1
Selections – Invert
Edit – Paste into selection (background in memory)
Adjust – Blur - Gaussian blur 20
17 - Effects - Texture Effects - Weave Foreground color (same settings - in memory)
Selections – Invert
Effects 3D - Drop shadow: 0, 0, 100, 45 black color
18 - Selections – Select all
Selections – Modify - Contract 20 px
Effects 3D - Drop shadow: 0, 0, 100, 45 black color
19 - Selections – Modify - Select selection borders

Fill with color 3
Selections – Select none
20 - Edit – Copy "LD-model-813"
Edit - Paste as a new layer
Image – Mirror
Image – Resize 80% - resize all layers not checked
Move to the left
Adjust - Sharpness - Sharpen
21 - Layers - Duplicate
On the one below (original)
Adjust - Blur - Gaussian blur 20
Blend mode Multiply
Layers - Duplicate
22 - Tool text (or take the title provided)

Foreground color 1
Background color 3
Write Irina
Convert to Raster layer
Pick tool (k) Position X 664, Position Y 112
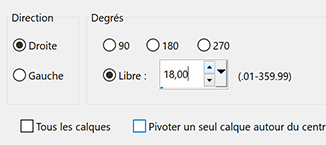
Image – Free rotate
23 - Effects 3D - Inner Bevel

Effects 3D - Drop shadow 6, 4, 80, 10, black color
24 - Add your watermark
Image – Add borders
1 pixel – color 1
Image – Resize 950 pixels - resize all layers checked
Save Jpeg
If you want, you can send me your version
If you have problems, or you find a not worked link, write to me
Une autre version avec des tubes de Tine

Autre version avec des tubes perso

Muito obrigada Roberta
 votre commentaire
-
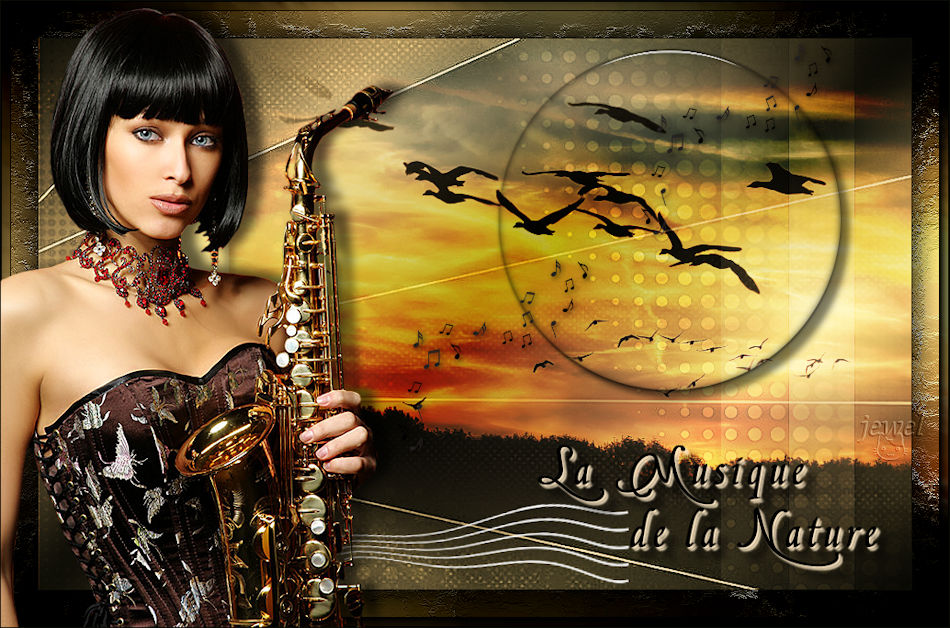
Par jewelAnnie le 7 Juillet 2021 à 08:00
Colybrix, thank you very much for your permission that I may translate your tutorials
Tutoriel original ici
***
***
Plugins
Toadies
Eye Candy5 : Impact
Graphic plus
AAA Frames
***
Colors
Foreground #0b0d07
Background #ffeac7
***
1 - File - New transparent 900 x 600 pixels transparent
Fill with dark color
Layers – New Raster layer
Fill with the light color
2 - Layers – New mask layer from image – select creation.tine_masque359

Effects - Edge effects - Enhance
Layers - Merge - Merge group
3 - Layers – New Raster layer
Fill with the light color
4 - Layers – New mask layer from image – select creation.tine_masque358

Effects - Edge effects - Enhance
Layers - Merge - Merge group
Blend mode Overlay opacity 85
5 - Open "mentali-misted2041"
Edit - Copy
Edit - Paste as a new layer
Pick tool (k)
Position X 119 - Position Y -54
Layers - Arrange - Move down
Opacity 65
6 - Active top layer
Layers – New Raster layer
Fill with linear gradient

7 - Adjus - Blur - Gaussian blur 20
Effects - Image effects -Seamless Tiling by default

Blend mode Overlay
8 - Open "deco 2 Musique"
Edit - Copy
Edit - Paste as a new layer
Layers - Arrange - Move down 3 times
Effects Toadies - What Are You ?

Effects - Edge Effects - Enhance
9 - Layers - Merge visible
Selections - Load selection from disk - Selection "cercle tuto Musique"
Selections - Promote selection to layer
10 - Effects Eye Candy5 - Impact - Glass
Settings - choose Clear

Basic
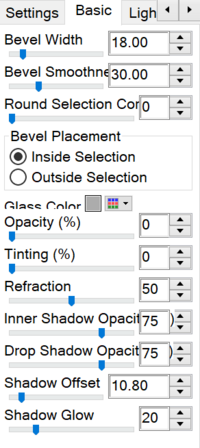
11 - Effects - 3D Effects - Drop shadow

Selections - Select none
12- Layers - Merge - Merge all
Edit- Copy
13 - Image - Add borders
1 pixel – foreground color
Selections - Select all
Image - Add borders
40 pixels – foreground color
Selections – Invert
Edit –Paste into selection
14 - Adjust - Blur - Gaussian blur 20
Effects - Art Média Effects - Brush Strokes

15.- Effetcs - Graphic Plus - Contrast

Selections – Invert
16 - Effects - 3D Effects - Drop shadow

Repeat the shade a second time (optional according to your tastes and colors)
Selections – Select none
17 - Effects - AAA Frames - Foto Frame

18 - Open "SaxoCibiBijoux"
Edit - Copy
Edit - Paste as a new layer
Image – Mirror horizontal
Objects - Align Left
Effects - 3D Effects - Drop shadow -4, 16, 60, 15 dark color
19 - Open "Note musique "
Edit - Copy
Edit - Paste as a new layer
Pick tool (k)
Position X 428 - Position Y 278
Layers - Duplicate
Pick tool (k)
Position X 693 - Position Y 43
20 - Open "deco Musique"
Edit - Copy
Edit - Paste as a new layer
Image - Negative image
Layers - Duplicate
Layers - Merge - Merge down
Pick tool (k)
Position X 359 - Position Y 547
Layers - Arrange - Move down 3 times
21 - Active top layer
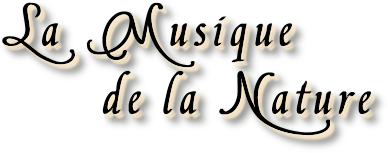
Open "WA La Musique de la Nature - Coly" - Erase the watermark
Edit - Copy
Edit - Paste as a new layer
Pick tool (k)
Position X 584 - Position Y483
Effects - 3D Effects - Drop shadow light color

Edit - Repeat Drop shadow
22 - Effects - 3D Effects - Drop shadow black color
23 - Add your watermark
Image - Add borders
1 pixel – foreground color
24 - Image – Resize 950 pixels - Resize all layers checked
Save as Jpg
If you want, you can send me your version
If you have problems, or you find a not worked link, write to me
Une autre version avec des tubes de Colybrix et Tine

Une autre version avec des mists perso

Muito obrigada Nena Silva
Thank you so much Roberta
 votre commentaire
-
Par jewelAnnie le 16 Juin 2021 à 08:00

Colybrix, thank you very much for your permission that I may translate your tutorials
Tutoriel original ici
***
***
Plugins
Graphic Plus
Mehdi
FM Tile Tools
Toadies
AAA Frames
***
Colors
Foreground #f2db68
Background #7a341e

***
1 - Sunburst gradient

2 - Open Alpha layer – Window / duplicate (Ctrl D)
We work on the copy
Fill with the gradient
3 - Effects - Graphic Plus - Cross Shadow (intensity 50)
4 - Effects - Mehdi - Sorting Tiles (Crossed 180)

5 - Effects - FM Tiles Tools - Blend Emboss (by default)
6 - Layers – New Raster layer
Fill with the dark color
Layers – New mask layer from image – select Coly-mask39
Adjust - Sharpness - Sharpen
Layers - Merge group
7- Layers - Duplicate
Layers - Merge - Merge down
Effects - 3D Effects - Drop shadow - dark color
8- Layers - Merge - Merge visible
Selections - Load - Save selection - Load Selection 1 from Alpha Channel
Selections -Promote selection to layer
Selections - Select none
9 - Effects - Toadies - Weaver (by default)
Effects - Edge effects - Enhance
Effects - 3D Effects - Drop shadow
Blend mode Screen
10 - Effects - Textures Effects - Weave

11 - Active the Bottom Layer (Merged)
Selections - Load - Save selection - Load Selection 2 from Alpha Channel
Selections - Promote selection to layer
Effects - Textures Effects - Blinds

Selections - Select none
Effects - 3D Effects - Drop shadow ( same settings)
12 - Selections - Load - Save selection - Load Selection 1 from Alpha Channel
Effects - 3D Effects - Drop shadow ( same settings)
Selections - Select none
13- Active the top layer
Edit - Copy "Deco 1 Solea "
Edit - Paste as a new layer
Blend mode Luminance (Legacy)
14 - Layers - New Raster Layer
Selections - Load - Save selection - Load Selection 3 from Alpha Channel
Fill with the gradient
15 - Effects - Effects3D - Inner bevel

16 - Effects - 3D Effects - Drop shadow - dark color

Effects - 3D Effects - Drop shadow (Minus)

Selections - Select none
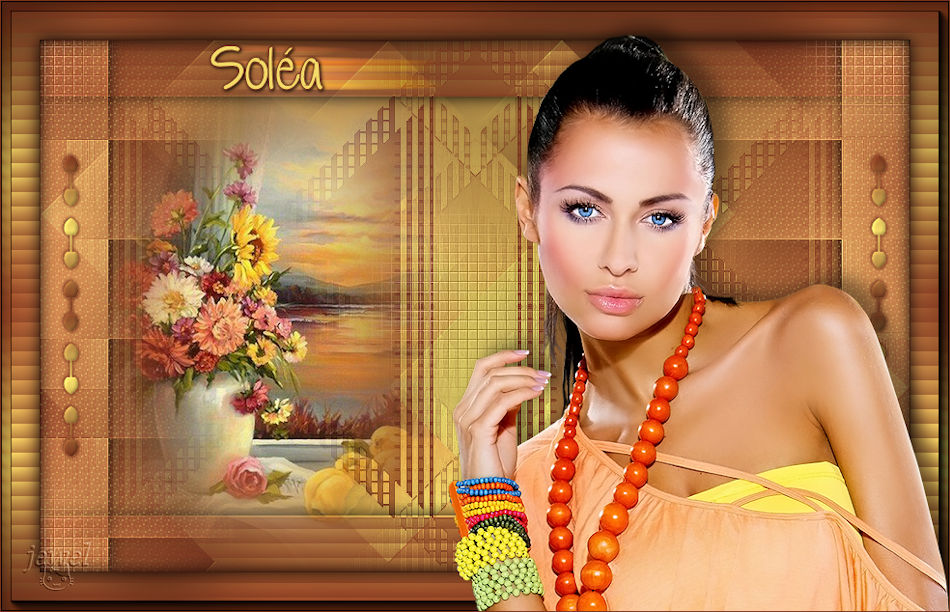
17 - Edit - Copy "paysage 140 " - Erase the watermark
Edit - Paste as a new layer
Image – Resizer 70% - resize all layers not checked
Move to the left
Adjust - Sharpness - Sharpen
18. Image – Add borders
1 pixel – Dark color
Selections - Select all
Image – Add borders
40 pixels –Dark color
19 - Selections - Invert
Fill with the linear gradient (in memory)
Adjust - Blur - Gaussian blur 20
Effects - Graphic Plus Cross shadow (same settings)
Effects - Textures Effects - Blinds (same settings)
20 - Effects 3D - Drop shadow
Selections - Invert
Effects 3D - Drop shadow
Selections - Select none
21 - Effects - AAA Frame - Foto Frame

22 - Edit - Copy "femme335-coly " - Erase the watermark
Edit - Paste as a new layer
Image - Resize 82% - resize all layers not checked
Adjust - Sharpness - Sharpen
Move to the right
Effects 3D - Drop shadow
23 -

With the provided font - Write Soléa with these settings

Place Top Left
24 - Layers – Convert to Raster Layer
Layers - Duplicate
Activate the layer below
Effects - Distorsion Effects Wind

Edit - Repeat Wind
Effects - Edge Effects - Enhance X2
Blend mode Overlay
25 - Activate the Top layer
Effects 3D - Drop shadow 1 - 1 - 100 - 5 black color
26 - Add your watermark
Image – Add borders
1 pixel - Dark color
27 - Image – Resize 950 pixels - resize all layers checked
Save Jpeg
If you want, you can send me your version
If you have problems, or you find a not worked link, write to me
Une autre version avec un tube chat de Leeloo
 votre commentaire
-
Par jewelAnnie le 15 Mai 2021 à 08:00


Colybrix, thank you very much for your permission that I may translate your tutorials
Tutoriel original ici
***
***
Plugins
Mehdi
Simple
Filters Unlimited
Graphic Plus
***
Colors

Foreground color #bdcbf1
Background color #541f72
Color 3 #e1e1c8
Color 4 #3e6344
***
1 - File - New transparent 900 x 550 pixels
Effects Mehdi Wavy Lab 1.1
Colors 2-1-3-4

2 - Adjust - Blur - Gaussian blur 30
3 - Layers - Duplicate
Image - Mirror horizontal
Blend mode Overlay - opacity 80
Layers - Merge - Merge down
4 - Layers – New Raster layer
Fill with white color
Layers – New mask layer from image – select NarahsMasks_1637
Effects - Edge effects - Enhance
Layers - Merge - Merge group
Blend mode Overlay
5 - Layers – New Raster layer
Fill with white color
Layers – New mask layer from image – select NarahsMasks_1636
Layers - Merge - Merge group
6 - Image - Resize 75% - Resize all layers – not checked
Image – Free rotate

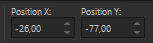
7 - Pick tool (k) Position horiz. : -26, Position vert. : -77
8 - Effects - Simple - Top Left Mirror
Blend mode Overlay - Opacity 80
9 - Open "paysg135-coly" - Erase the watermark
Edit - Copy
Layers - New raster layer
Selections - Select all
Edit - Copy into selection
Selections - Select none
10 - Layers - Duplicate
On the layer below (raster 2)
Effects - Image effects -Seamless Tiling - Side by side

11. - Adjust - Blur - Gaussian blur 10
12 - Go to the top layer ( the copy of the mist)
Pick Tool (k) Position horiz. : 85, Position vert. : 9

Adjust - Sharpness - Sharpen
13 - Move to the layer raster 1 (background)
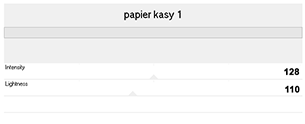
Effects - Filters Unlimited - Paper Textures - papier kasy 1 by default
If you don't have it, it is => Ici
Edit - Copy
14 - Layers - Merge - Merge all
Layers - New raster Layer
Selections - Select all
Effects - 3D Effects - Cutout
Selections - Select none
15 - Image – Add borders
1 pixel – background color
3 pixels – foreground color
16 - Selections - Select all
Image – Add borders
5 pixels – background color
Séelections - Invert
Effects - Textures Effects - Weave

17 - Effects - 3D Effects - Inner Bevel
18 - Selections - Select all
Image – Add borders
25 pixels – White color
Effects - 3D Effects - Drop shadow

Selections - Select none
19 - Image – Add borders
1 pixel – Background color
3 pixels – Foreground color
20 - Selections - Select all
Image – Add borders
5 pixels – background color
Selections - Invert
21 - Effects - Textures Effects - Weave - same settings
Effects - 3D Effects - Inner Bevel - same settings
22 - Selections - Select all
Image – Add borders
35 pixels – Background color
Selections - Invert
Edit - paste into selection (background in memory)
23 - Effects - Graphic Plus - Cross Shadow
Selections - Invert
Effects - 3D Effects - Drop shadow - same settings
Selections - Select none
24 - Open "femme818-coly" - Erase the watermark
Edit - Copy
Edit - Paste as a new layer
Image – Mirror horizontal
Image – Resize 87% - Resize all layers – not checked
Move on the left
25 - Effects - 3D Effects - Drop shadow - same settings
26 - Open wordart "laurette 13"
Edit - Copy
Edit - Paste as a new layer
Image – Resize 70% - Resize all layers – not checked
Image - Negative Image
Layers - Duplicate
Layers - Merge - Merge down
Effects - 3D Effects - Drop shadow - white color

27 - Effects - 3D Effects - Drop shadow - background color
Move bottom right
28 - Add your watermark
Image – Add borders
1 pixel – Background color
29 - Image - Resize 950 pixels -
Resize all layers checked
Save as Jpg
If you want, you can send me your version
If you have problems, or you find a not worked link, write to me
Une autre version avec un tube de Lisa T

Une autre version avec un tube femme de Colybrix
Thank you so much Roberta
 votre commentaire
 Suivre le flux RSS des articles de cette rubrique Suivre le flux RSS des commentaires de cette rubrique


|
|
|
|