-
Par jewelAnnie le 7 Octobre 2020 à 08:00


Colybrix, thank you very much for your permission that I may translate your tutorials

tuto original ici
***
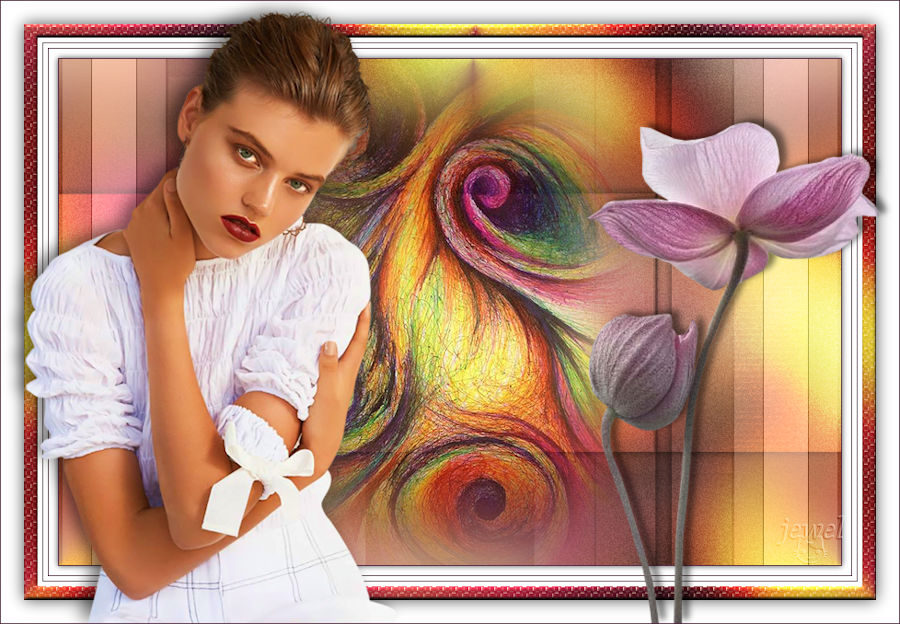
Woman tube 749 from Lily on this page
http://ma-galerie-paintshop-pro.eklablog.com/femmes-bustes-c29256934

Tine's abstract mist

***
Plugins Toadies
***
Foreground color #083370
Background color #d7fbfa

1 - Open the mask and tubes, remove signs
Open the Alpha layer provided in the material, Shift D (Window - Duplicate )
We work on the copy - this layer contains selections
2 - Fill with linear gradient 45 - 3

Adjust - Blur - Gaussian blur 15
3 - Layers - Duplicate
Image - Horizontal mirror
Change blend mode Multiply
Layers -Merge - Merge down
4 - Layers - New layer - Select all
Edit - Copy "misted abstrait Tine"
Edit - Paste in the selection
Deselect
5 - Effects - Image effects - Seamless Tiling by default
Adjust - Blur - Gaussian blur 30
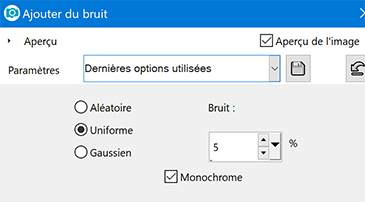
6 - Adjust - Add/Remove noise - Add noise

7 - Layers - Merge - Merge visible layers
8 - Layers - Duplicate
Change blend mode Overlay - Opacity 50%
Layers -Merge - Merge down
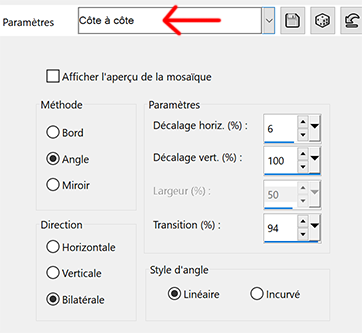
9 - Effects - Image effects - Seamless Tiling side by side

10 - Adjust - Brightness and contrast
(Adapt to your result, I wanted a darker background)

11 - Layers - New layer - fill with white color
Layers – New mask layer from image – select the mask 07 GB 2019

Merge group
Change the blend mode Overlay - Opacity 65
12 - With the eraser tool, delete the signature at the bottom right

13 - Selections – Load/Save selection – Load selection from alpha channel
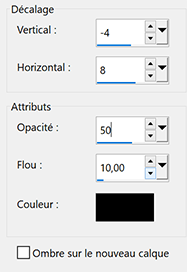
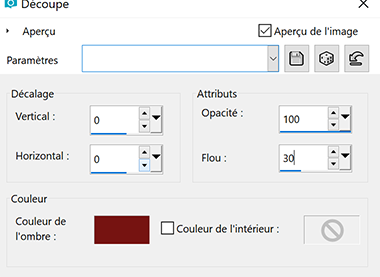
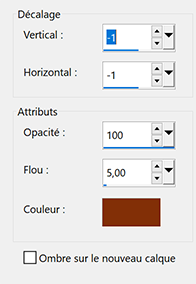
Load selection #1Effects - 3D effects - drop shadow

14 - Selections – Load/Save selection – Load selection from alpha channel
Load selection #2
Select - Invert
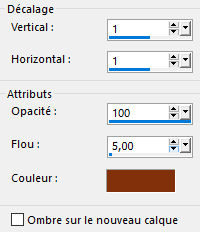
Effects - 3D effects - drop shadow (same settings)
15 - Selections – Load/Save selection – Load selection from alpha channel
Load selection #3
Effects - 3D effects - drop shadow (same settings)
Deselect
16 - Copy and paste as a new layer "Tine's abstract mist"
resize to 50% - resize all layers not checked
Opacity 85%
Adjust - Sharpen - Sharpen
17 - Layers - new layer
Selections – Load/Save selection – Load selection from alpha channel
Load selection #4
Flood fill tool - opacity 50%
Fill with white color
Deselect
Effects Toadies - What are you

Effects - Edge effects - Enhance
Change the blend mode Luminance (Legacy)
18 - Layer - Duplicate
Image - Horizontal mirror
Flood fill tool 100%
19 - Activate the bottom layer
Edit - Copy
20 - Image - add borders 1 px dark color
21 - Select - select all
Image - Add borders 10 px white color
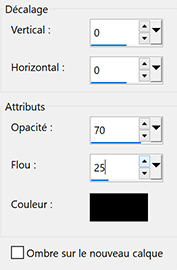
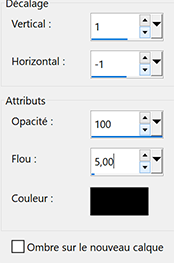
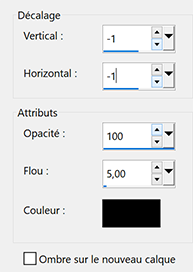
Effects - 3D effects - drop shadow

Deselect
22 - Image – Add borders
1 px dark color
5 px white color
1 px dark color
5 px white color
23 - Select - select all
Image – Add borders
15 px dark color
Select - Invert
24 - Layers- New layer
Paste in the selection background in memory)
Change blend mode Hard light
Layers - Merge - Merge down
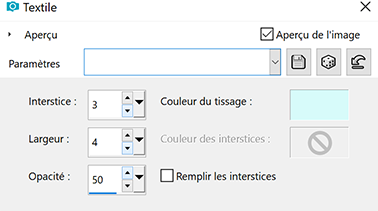
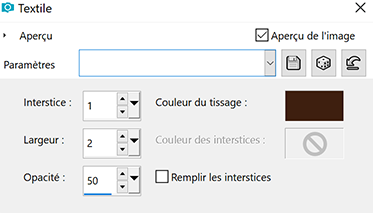
Effects - Textures effects - Weave
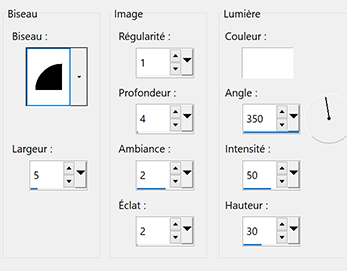
25 - Effects - 3D Effects - Inner bevel
26 - Select - select all
Image - Add borders 25 px white color
Effects - 3D effects - drop shadow
Deselect
28 - Copy and paste Meguy's flowers tube
Image - Horizontal mirror
Move on the right
Effects - 3D effects - drop shadow
29 - Copy and paste Woman tube
Image - Hizontal mirror
Image - Resize to 91 % - resize all layers not checked
Move to the left
Effects - 3D effects - drop shadow

Put your watermark
Image - Add borders 1 px dark color
31 - Resize to 900 px
Save in Jpg
If you want, you can send me your version
If you have problems, or you find a not worked link, write to me

Une autre version avec un tube femme de Colybrix , tube de fleurs d'Ann
Thank you Lucia
 1 commentaire
-
Par jewelAnnie le 1 Octobre 2020 à 14:22

Colybrix, thank you very much for your permission that I may translate your tutorials
tuto original ici
***
***
Plugins
Mehdi
VM Distorsion
Carlaine et Sensibility
Graphic plus
Button et Frame (Unlimited)
***

Color 1 : #673437
Color 2 : #f9ee68
Color 3 : #de4c2b
***
1 - Open the file Alpha – Window – Duplicate (or use the shortcut keys SHIFT + D)
Close the original file, we working on the duplicate
Foreground Color 1
Background Color 2
2 - effects - Mehdi Wavy Lab 1.1 (radial 5 -50)
Color 3 and White in in the two right cases

3 - Adjust - Blur - Gaussian blur 30
4 - Layers - Duplicate
Effects – Plugin Unlimited 2.0 – VM Distorsion - Radiator
Generator 1 à 149 ….... the rest by default

5 - Reduce the opacity to 70 %
Layers - Merge - Merge down
6 - Adjust - Add/Remove noise - Add noise
7 - Selections – Load/Save selection – Load selection from alpha channel
Load selection #1Selections - Promote selection to layer
8 - Effects - Carolaine and Sensibility - CS-LDots by default

9 - Adjust - Sharpness - Sharpen
Select none
Layers - Merge - Merge down
10 - Open the tube landscape (erase the watermark)
Edit- copy - paste like a new layer
Don't move
11 - Effects - Distorsion effects - wind left 100

12 - Effects - Edge effects - Enhance
Reduce the opacity to 56 %
13 - Layers - new layer
Fill the layer with white color
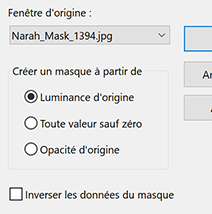
Layers – New mask layer from image – select the mask Narah _mask 1464

Effects - Edge effects - Enhance
Layers - Merge - merge group
15 - Effects - Image effects - Seamless Tiling - Side by side
Effects - Edge effects - Enhance
16 - Change blend mode to Luminance (legacy)
Layers - Arrange Move down
17 - Activate the top layer
18 - Layers - new layer
Fill the layer with white color
Layers – New mask layer from image – select the mask Narah _mask 1394
19 - Effects - Edge effects - Enhance
Layers - Merge - merge group
20- Change blend mode to Luminance (legacy)
For the next steps (21 to 28), my flowers in the material
if you use mine go to step 29
21 - Layers - new layer
Selections – Load/Save selection – Load selection from alpha channel
Load selection #2Fill with color 1
Effects - Graphic Plus - Cross shadow Intensity 100
Selections - select none

23 - Effects - 3D effects - Inner bevel

24 - Layers - new layer
Selections – Load/Save selection – Load selection from alpha channel
Load selection #3Fill with the Color 2
25 - Selections - Select none
Effects - 3D effects - Inner bevel (same settings)
26 -
Layers - new layer
Selections – Load/Save selection – Load selection from alpha channel
Load selection #4Fill with the Color 3
27 -
Selections - Select none
Effects - 3D effects - Inner bevel (same settings)
28 - Layers - merge - merge down (2 times)
Repeat here if you use my flowers (open Flower 1)
Start here is you use my flowers
Open the tube "fleur 1"
Edit - copy - paste like a new layer
29 - Layers - duplicate
Image - Resize to 60 % - resize all layers not checked
30 - Effects - Image effects - Seamless Tiling

31 - Tool select (K)

32 - Resize the original and place it where you want
I resized to 70% and placed in the bottom left corner
33 - (If you wish, you can do the steps again with other colours to decorate your creation).
I put another flower in the material ... I resized it to 70% and moved it on the right side.
I have duplicated and resized the flowers 3 times and moved
34 - Activate the bottom layer (raster 1)
Edit - Copy
35 - Image – Add borders
1 px color 1
3 px color 2
1 px color 1
30 px color 2
36 - Select this border with the magic wand
Edit - Paste in the selection
37 - Adjust - Blur - Gaussian blur 30
38 - Effects - Graphic Plus - Quick Tile 1 (default)
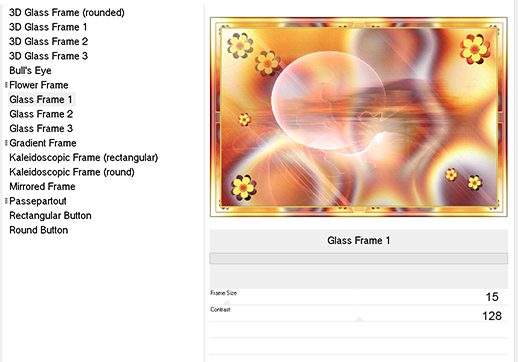
39 - Effects - Plugin Unlimited 2.0 - Buttom and Frame - Glass Frame 1
40 - Selections - Invert
Effects - 3D Effects - Drop Shadow

Selections - Select none
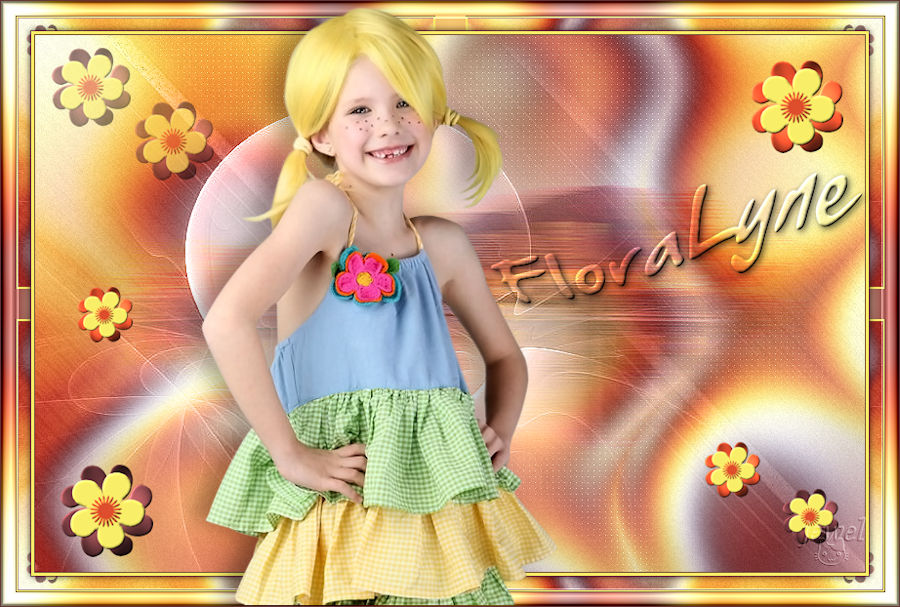
41 - Open the tube "enfant49-coly" ........ erase the watermark
copy and paste as a new layer
Image - Resize to 95 % - resize all layers not checked
42 - Tool select (K)

43 - Effects - 3D Effects - Drop Shadow
44 - Open the tube Title
Copy and paste as a new layer
Tool select (K)

45 - Selesctions - Select all - floating selection - static selection
46 - Activate the bottom layer (raster 1)
Promote selection to layer
Select none
47. You can delete the white text layer (Raster 3).
At this stage we don't see the text that has the background color, it's normal.
Move back to the transformed selection layer (middle layer)
Effects - 3D effects - Inner bevel
Effects - 3D Effects - Drop Shadow
48 - Add your watermark
49 - Image – Add borders
1 px color 1
50 - Image - Resize to 900 pixels
Adjust - Sharpen
If you want, you can send me your version
If you have problems, or you find a not worked link, write to me
Une autre version
 votre commentaire
-
Par jewelAnnie le 28 Septembre 2020 à 08:41


Colybrix, thank you very much for your permission that I may translate your tutorials
Tuto original ici
***
***
Plugins
Mehdi
Graphic plus
AAA Frames
***
Colors
Foreground #21343e
Background #efb2ca
Color 3 #c85685

Gradient Linear
1 - Open a new transparent image 900 px * 500 px Fill the layer with gradient
2 - Adjust - Blur - Gaussian blur 25
3 - Layers - new raster layer - Select all
4 - Copy "mist visage 23" - Paste in the selection
Selections - Select none
5 - Effects - Image effects - Seamless Tiling (default)

6 - Adjust - Blur - Radial blur

7 - change blend mode to Luminance
Layers - Merge - Merge down
8 - Layers - Duplicate
Image - Mirror
Change blend mode to Multiply
Reduce the opacity to 70 %
9- Effects - Mehdi - Sorting Tiles

10 _ Effects - Edge effects - Enhance
Layers - Merge down
On my second version, I found the background too light,
I have made a brightness - contrast adjustment (minus 28 and 40)
11 - Layers - New raster layer
Fill the layer with white color
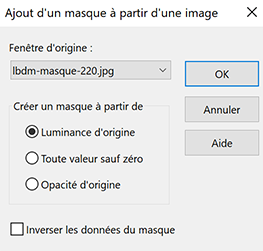
Layers – New mask layer from image – select the mask lbdm - masque 220
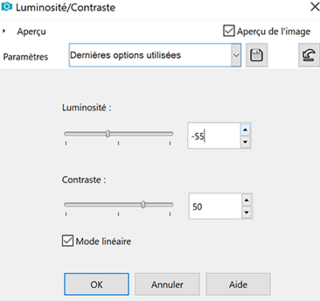
12 - Adjust - Brightness - contrast (-55 et 50)
13 - Layers - Merge group
Change blend mode to Soft Light
Reduce the opacity to 75 %
14 - Copy and Paste "mist visage 23"
Image - Mirror
15 - Image - Resize to 85 % - resize all layers not checked
16 - Object align left
(place on the left for older versions of Psp)
17 - If you use my tube - Duplicate
Change blend mode to Dodge - Reduce the opacity to 28 %
Adapt your tube... I wanted to make the face more bright
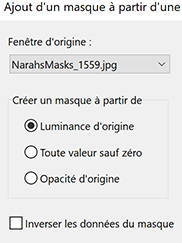
18 - Layers - New raster layer
Fill the layer with white color
Layers – New mask layer from image – select the mask Narah 1559
19 - Effects - Edge effects - Enhance
Layers - Merge group
20 - Tool select (K)

21 - Layers - Duplicate
Image - Mirror
Image - Flip
22 - Layers - Merge - Merge down
Change blend mode to Overlay
23 - Eraser tool with these settings

Erase the lines on the lower part of the face and just a small stroke of eraser on top.
Like this

24 - Layers - Duplicate
Reduce the opacity to 50 %
25 - Open the tube "fleurs"
Copy and paste
Image - Resize to 60 % - resize all layers not checked
26 – Tool select (K)
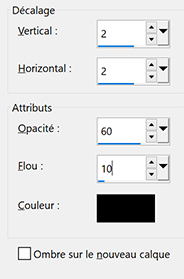
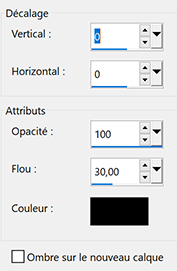
27 – Effects - 3D Effects - Drop Shadow -

28 – Layer palette – Click the bottom layer
Copy
29 - Image – Add borders
1 px foreground color
30- Selections – Select all
Image – Add borders
5 px color 3
31 – Selections – Invert
Effects - Graphic Plus - Cross Shadow (default)
32 – Effects – 3D effects – Inner bevel

Select - None
33 - Image – Add borders
1 px foreground color
15 px white color
34 - Select the white border with the magic wand
Select - Invert
Effects – 3 D Effects drop shadow

35 - Selections - Select None
36 - Image - Add borders
1 pixel – foreground color
5 pixels - white color
1 pixel – foreground color
5 pixels - white color
1 pixel –foreground color
37 - Selections - Select all
Image - Add borders
30 pixels – white color
38 - Selections - Invert
Paste the background into the selection (in memory)
39 - Adjust - Blur - Gaussian blur 3
40 - Selections - Promote selection to layer
Change blend mode to Overlay
41 - Layers - Merge - Merge down
42 - Selections - Invert
Effects - 3D effects - Drop shadow
43 - Edit - Repeat Drop shadow
Selections - Select none
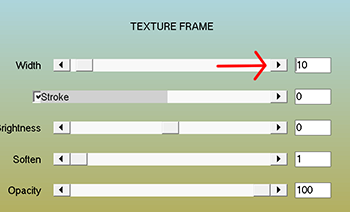
44 - Effects - AAA Frames - Texture frame
45 - Selections - Select all
Selections - Modify - Contract 10
Effects - 3D effects - Drop shadow (same settings)
Selections - Select none
46 - Add your watermark
47 - Image - Add borders
1 px foreground color
48 - Image - Resize to 900 pixels
If you want, you can send me your version
If you have problems, or you find a not worked link, write to me
Une autre version avec 2 tubes perso
 2 commentaires
-
Par jewelAnnie le 26 Septembre 2020 à 08:08

Colybrix, thank you very much for your permission that I may translate your tutorials
Tuto original ici
***
***
Plugins
Funhouse
AP (Lines)
Graphic Plus
***
Colors

Foreground #ffffff
Background #facf8a
Color 3 #82310c
***
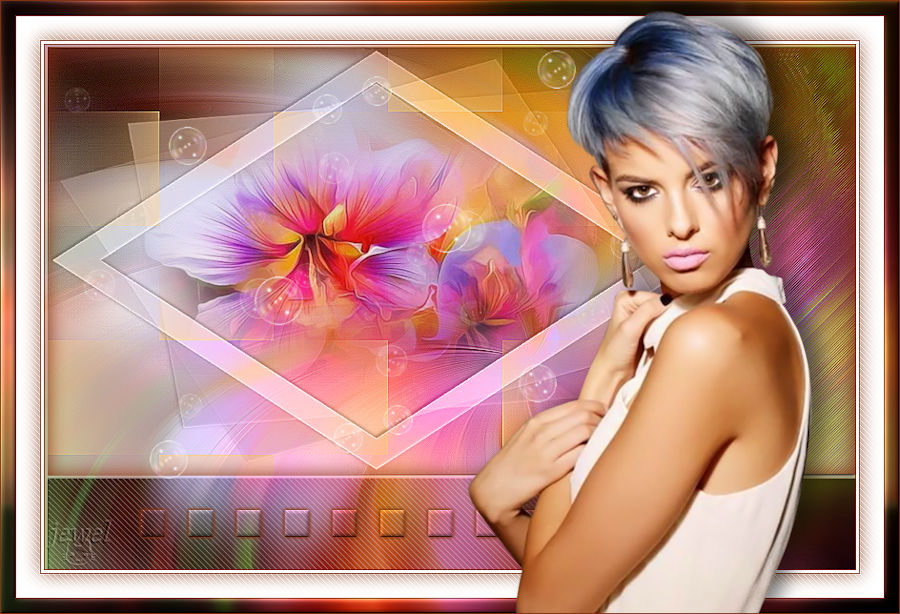
1 - Choose a nice picture of flowers with beautiful colors (or other for the background)
or take the image in the material
Edit - copy
2 - Open Alpha Delphine PSP
Window - Duplicate to make a copy
Close the original.
The copy, that will be the basis of your work, is not empty,but contains selections
3 - Select all
Paste into selection
Select none
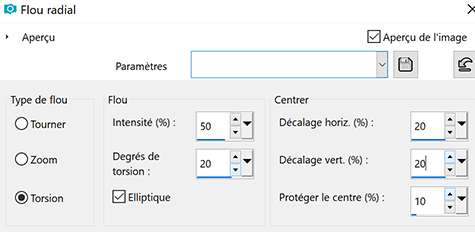
4 - Adjust - Blur -radial blur
5 - Effects – Edge effects - Enhance
6 - Layers – New raster layer
Fill the layer with white color
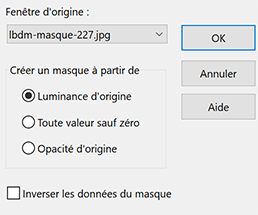
Layers – New mask layer from image – select the mask lbdm - masque 227
7 - Effects - Edge effects - Enhance
Layers – merge – merge group
8 - Change blend mode to Luminance (legacy)
Reduce the opacity to 63 %
Layers – merge – merge down
9 - Selections - Load - Save selection - Load Selection 1 from Alpha Channel
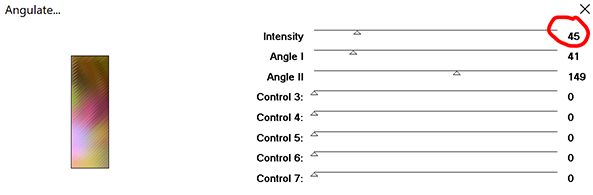
10 - Effects - Funhouse Angulate - intensity 45 - the rest by default
11 - Effects - Edge effects - Enhance
Keep the selection
12 - Layers – New raster layer
Effects - 3 D Effects - Cutout
Layers – merge – merge down
13 - Effects - 3D Effects - Drop Shadow
14 - Select none
15 - Selections - Load - Save selection - Load Selection 2 from Alpha Channel
16 - Selections - Promote selection to layer
17 - Plugins - Effects AP( Lines) - Lines - SilverLining

18 - Reduce the opacity to 35 %
19 - Effects - 3D Effects - Drop Shadow
20 - Layers - Merge down
Select none
21 - Selections - Load - Save selection - Load Selection 3 from Alpha Channel
22 - Effects - Texture Effects – weave - background color
(If your background is light, you can set the dark color )

23 - Effects - Edge effects - Enhance
24 - Layers - New raster layer
Effects - 3 D Effects - Cutout
Layers - Merge down
25 - Select none
26 - Layers - New raster layer
Fill the layer with white color
Layers – New mask layer from image – select the mask lbdm - masque 202
Invert mask checked

27 - Effects - Edge effects - Enhance
Layers - Merge - Merge group
28 - Image - Resize to 80 % - resize all layers not checked
29 - Tool select (K)
30 - Effects - 3D Effects - Drop Shadow - Color 3 #82310c
31 - Change blend mode to Luminance (legacy)
32 - Open mist flowers 97 Coly
(or make a mist with your basic image with the mask provided in the material)
Erase the watermark
copy and paste as a new layer
Image - Resize to 68 % - resize all layers not checked
33 - Tool select (K)

34 - Layer - Move down
Layer palette – Click the top layer
35 - Open tube "bulle"
copy and paste as a new layer
Keep in Screen mode
36 - Tool select (K)

37 - Activate the bottom layer raster 1
Selections - Load - Save selection - Load Selection 4 from Alpha Channel
38 - Selections – Promote selection to layer
Effects - 3D Effects - Inner bevel

39 - Effects - 3D Effects - Drop Shadow - Color 3 #82310c
40 - Effects - 3D Effects - Drop Shadow - Color 3 #82310c
( Positive settings)
Select none
41 - Activate the bottom layer raster 1 - Copy
42 - Image – Add borders
1 px color 3
3 px white color
1 px color 3
25 px white color
43 - Select the white border 25 px with the magic wand
Selections - Invert
Effects - 3D Effects - Drop Shadow - Color 3 #82310c
44 - Selections - Invert
Effects – PLugin AP (Lines) – Lines – SilverLining
Adjust - sharpness
Select none
45 -
Image – Add borders
1 px color 3
15 px white color
Select the white border with the magic wand
46 - Copy in the selection
Adjust - Blur - gaussian blur 5
47 - Selections – Promote selection to layer
Change blend mode to Multiply
Merge with the bottom layer
48 - Effects - Graphics plus - cross shadow (default)
49 - Effects - 3D Effects - Inner bevel (same settings)
Select none
50 - Open the tube "femme 748 Coly" ........ erase the watermark
copy and paste as a new layer
Image - Resize to 80 % - resize all layers not checked
Move to the right
51 -Effects - 3D Effects - Drop Shadow
52 - Image – Add borders
1 px color 3
Add your watermark
Layers - Merge - merge all
Image - Resize to 900 pixels
If you want, you can send me your version
If you have problems, or you find a not worked link, write to me
Une autre version
Köszi Klari
 votre commentaire
-
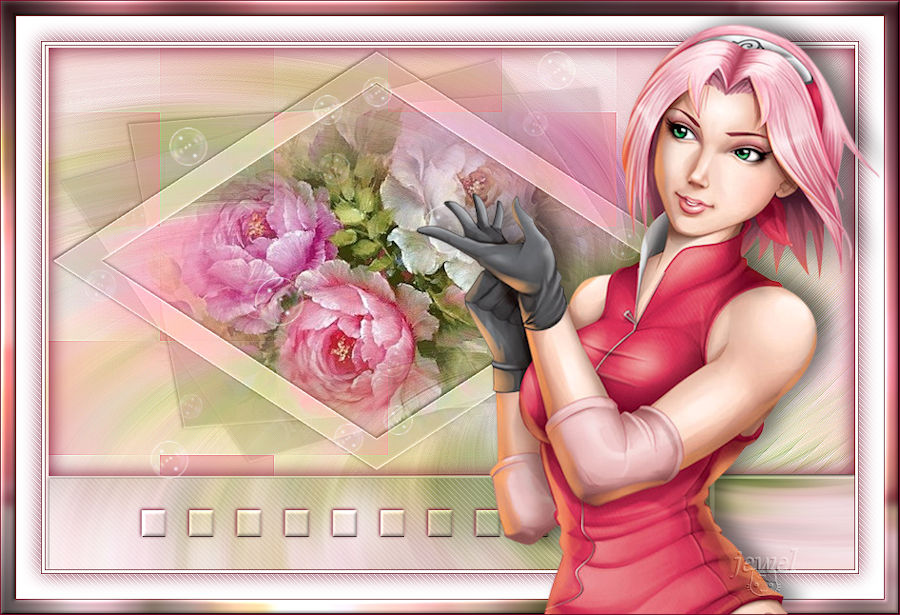
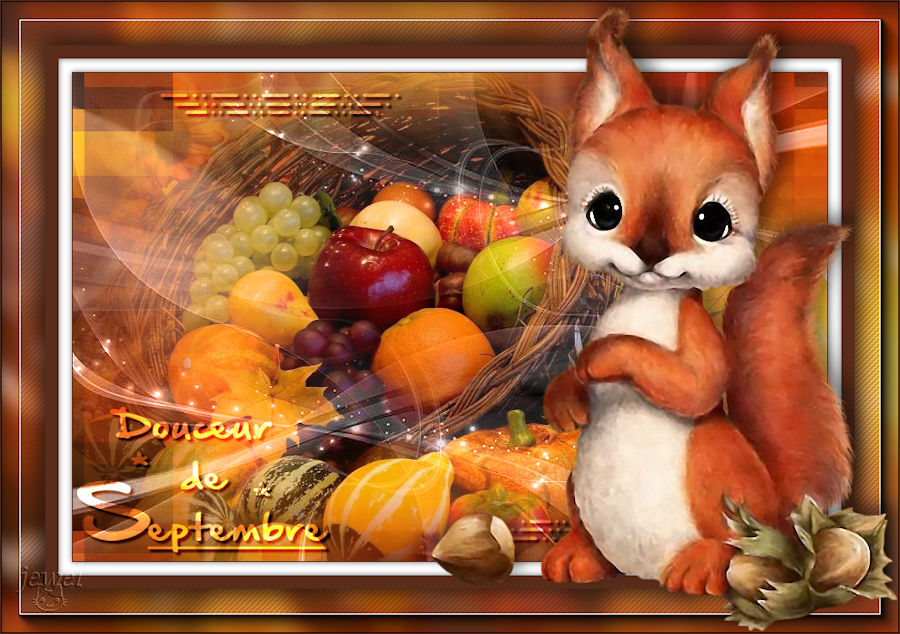
Par jewelAnnie le 24 Septembre 2020 à 15:02


Colybrix, thank you very much for your permission that I may translate your tutorials
tuto original ici
****
****
Plugins
VM Natural
AAA Frames
****
Colors
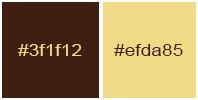
Foreground #3f1f12
Background #efda85
1 – Open a new transparent image 850 px * 550 px
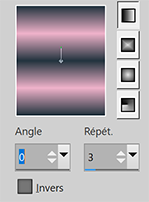
2 – Radial gradient

3 - Fill the layer with gradient
Ajust - blur - gaussian blur 30
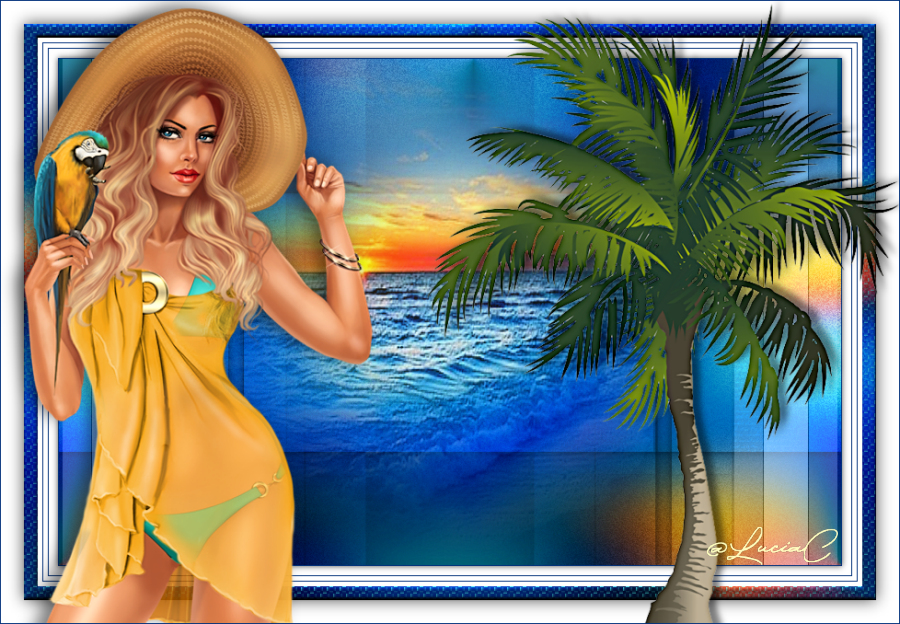
4 - Copy - paste as a new layer the landscape mist after removing the watermark
5 - Effects - Image effects - Seamless Tiling (default)
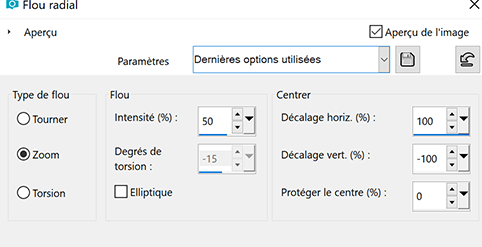
6 – Ajust – blur – radial blur
7 – Effects – Edge effects -Enhance - two times
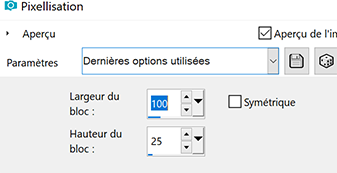
8 – Effects -Distortion Effects – Pixelate
9 – Activate the bottom layer raster 1 – Selections - Select all
Image - crop to the selection
10 – Layers - Merge visible layers
Layers duplicate
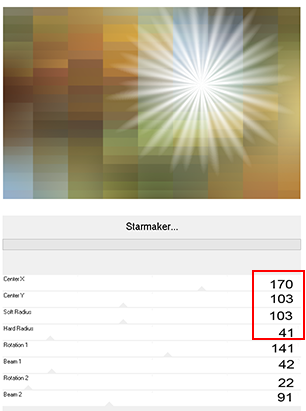
11 - Effects – Plugins Unlimited 2.0 – VM Natural – Starmaker
12 - Apply a second time with these settings
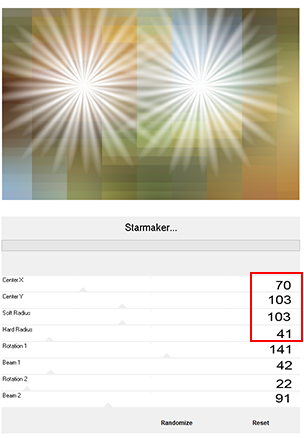
change blend mode to overlay
13 – Layers – new raster layer
Select all
Open the tube landscape
Edit copy
Paste in the selection
Selections – Select none
14 – Layers – New raster layer
Fill the layer with white color
Layers – New mask layer from image – select the mask Narah _mask1590

Effects – Edge effects -Enhance
Layers – merge – merge group
15 - Change blend mode to Luminance (legacy)
Layers – duplicate
Image – Mirror
Image – Flip
16 - Layers – merge – merge down
on this layer - erase slightly the mask on the tree

17 - Copy and paste the tube Deco Lines
Do not move it
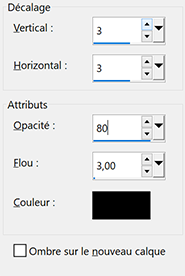
Effects – 3 D Effects - drop shadow
Change blend mode to overlay
Reduce the opacity to 85 %
19 - Layers - Merge visible layers
Edit -Copy
Image – Add borders
1 pixel - foreground color
15 pixels - white color
15 pixels - foreground color
21 - Select the white border with the magic wand
Select – invert
Effects – 3 D Effects drop shadow

Selections – Select none
23 - Image – Add borders
50 pixels - white color
24 - Select the white border with the magic wand
Edit - Paste into the selection the background in memory
Adjust - blur - gaussian blur 10
Effects - Texture Effects – weave - foreground color
select – invert
Effects – 3 D Effects drop shadow

Selections – Select none
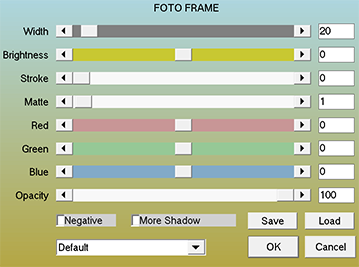
27 - Effets Plugins AAA Frames - Fotoframe
28 - Edit - Copy the woman tube as a new layer
Resize to 97 % - resize all layers not checked
Move to the right
Effects – 3 D Effects drop shadow

29 - Copy and paste the text tube after removing the watermark
Image - negative image (if you want)
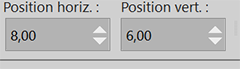
Tool select (K) 86 et 457

30 - Effects – 3 D Effects drop shadow
Change blend mode to overlay
31 - Add your watermark
Image – Add borders
1 pixel - foreground color
Resize to 900 pixels
If you want, you can send me your version
If you have problems, or you find a not worked link, write to me
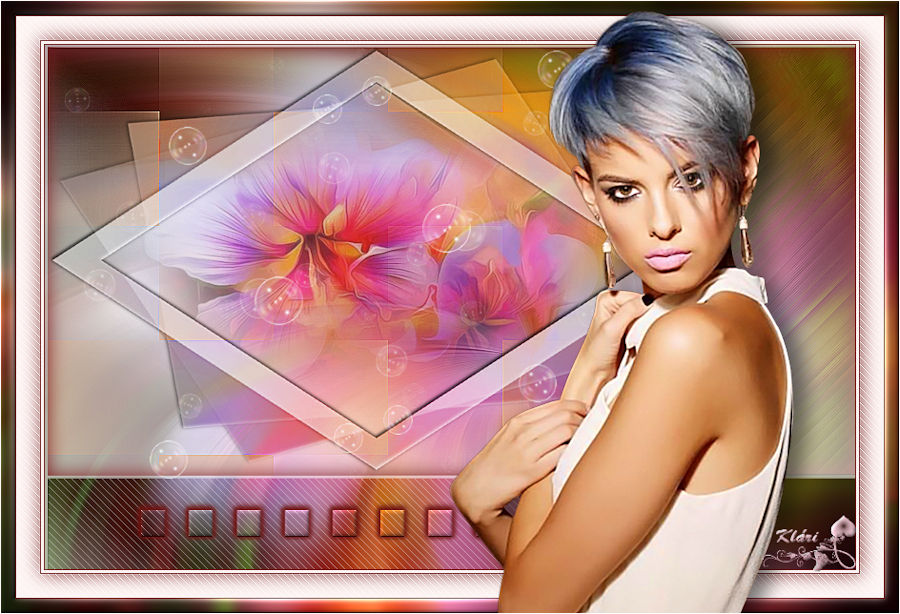
Une autre version avec un tube de Tine
 2 commentaires
 Suivre le flux RSS des articles de cette rubrique Suivre le flux RSS des commentaires de cette rubrique


|
|
|
|