-


Colybrix, thank you very much for your permission that I may translate your tutorials

Tuto original ici
***

***
Plugins
Mehdi
Graphic plus
AAA Frames
***
Colors
Foreground #21343e
Background #efb2ca
Color 3 #c85685

Gradient Linear
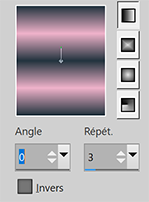
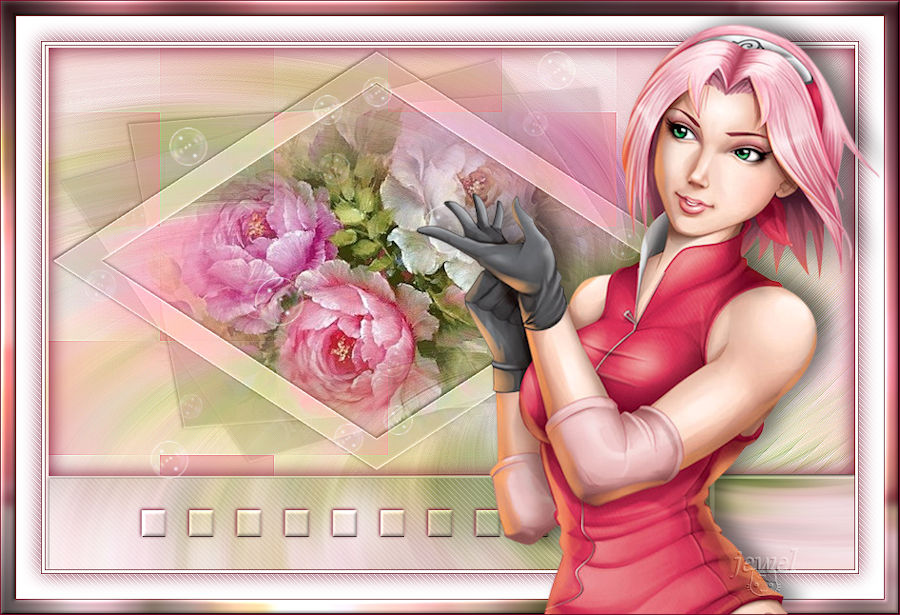
1 - Open a new transparent image 900 px * 500 px Fill the layer with gradient
2 - Adjust - Blur - Gaussian blur 25
3 - Layers - new raster layer - Select all
4 - Copy "mist visage 23" - Paste in the selection
Selections - Select none
5 - Effects - Image effects - Seamless Tiling (default)

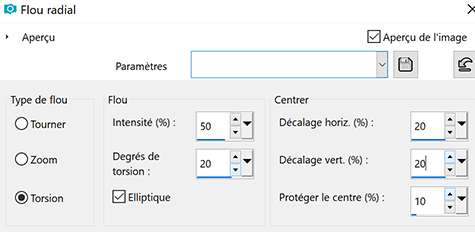
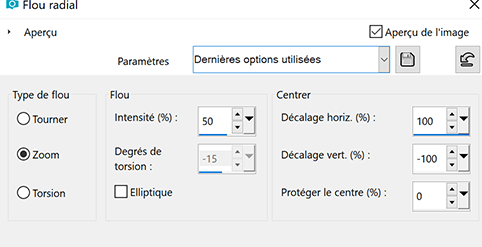
6 - Adjust - Blur - Radial blur

7 - change blend mode to Luminance
Layers - Merge - Merge down
8 - Layers - Duplicate
Image - Mirror
Change blend mode to Multiply
Reduce the opacity to 70 %
9- Effects - Mehdi - Sorting Tiles

10 _ Effects - Edge effects - Enhance
Layers - Merge down
On my second version, I found the background too light,
I have made a brightness - contrast adjustment (minus 28 and 40)
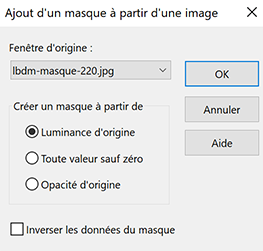
11 - Layers - New raster layer
Fill the layer with white color
Layers – New mask layer from image – select the mask lbdm - masque 220
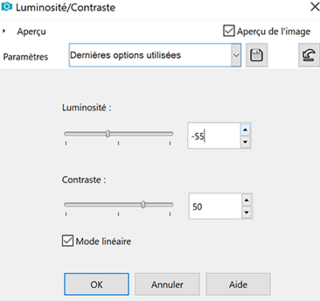
12 - Adjust - Brightness - contrast (-55 et 50)
13 - Layers - Merge group
Change blend mode to Soft Light
Reduce the opacity to 75 %
14 - Copy and Paste "mist visage 23"
Image - Mirror
15 - Image - Resize to 85 % - resize all layers not checked
16 - Object align left
(place on the left for older versions of Psp)
17 - If you use my tube - Duplicate
Change blend mode to Dodge - Reduce the opacity to 28 %
Adapt your tube... I wanted to make the face more bright
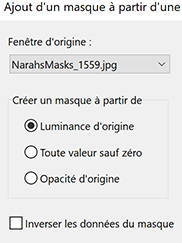
18 - Layers - New raster layer
Fill the layer with white color
Layers – New mask layer from image – select the mask Narah 1559
19 - Effects - Edge effects - Enhance
Layers - Merge group
20 - Tool select (K)

21 - Layers - Duplicate
Image - Mirror
Image - Flip
22 - Layers - Merge - Merge down
Change blend mode to Overlay
23 - Eraser tool with these settings

Erase the lines on the lower part of the face and just a small stroke of eraser on top.
Like this

24 - Layers - Duplicate
Reduce the opacity to 50 %
25 - Open the tube "fleurs"
Copy and paste
Image - Resize to 60 % - resize all layers not checked
26 – Tool select (K)
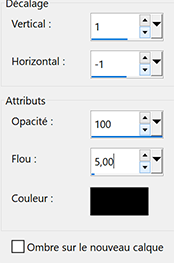
27 – Effects - 3D Effects - Drop Shadow -

28 – Layer palette – Click the bottom layer
Copy
29 - Image – Add borders
1 px foreground color
30- Selections – Select all
Image – Add borders
5 px color 3
31 – Selections – Invert
Effects - Graphic Plus - Cross Shadow (default)
32 – Effects – 3D effects – Inner bevel

Select - None
33 - Image – Add borders
1 px foreground color
15 px white color
34 - Select the white border with the magic wand
Select - Invert
Effects – 3 D Effects drop shadow

35 - Selections - Select None
36 - Image - Add borders
1 pixel – foreground color
5 pixels - white color
1 pixel – foreground color
5 pixels - white color
1 pixel –foreground color
37 - Selections - Select all
Image - Add borders
30 pixels – white color
38 - Selections - Invert
Paste the background into the selection (in memory)
39 - Adjust - Blur - Gaussian blur 3
40 - Selections - Promote selection to layer
Change blend mode to Overlay
41 - Layers - Merge - Merge down
42 - Selections - Invert
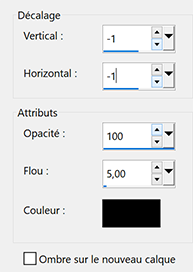
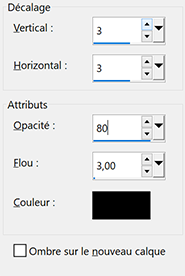
Effects - 3D effects - Drop shadow
43 - Edit - Repeat Drop shadow
Selections - Select none
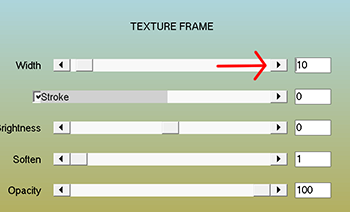
44 - Effects - AAA Frames - Texture frame
45 - Selections - Select all
Selections - Modify - Contract 10
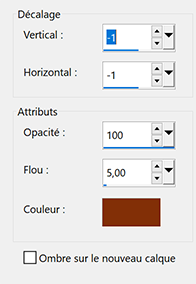
Effects - 3D effects - Drop shadow (same settings)
Selections - Select none
46 - Add your watermark
47 - Image - Add borders
1 px foreground color
48 - Image - Resize to 900 pixels
If you want, you can send me your version
If you have problems, or you find a not worked link, write to me

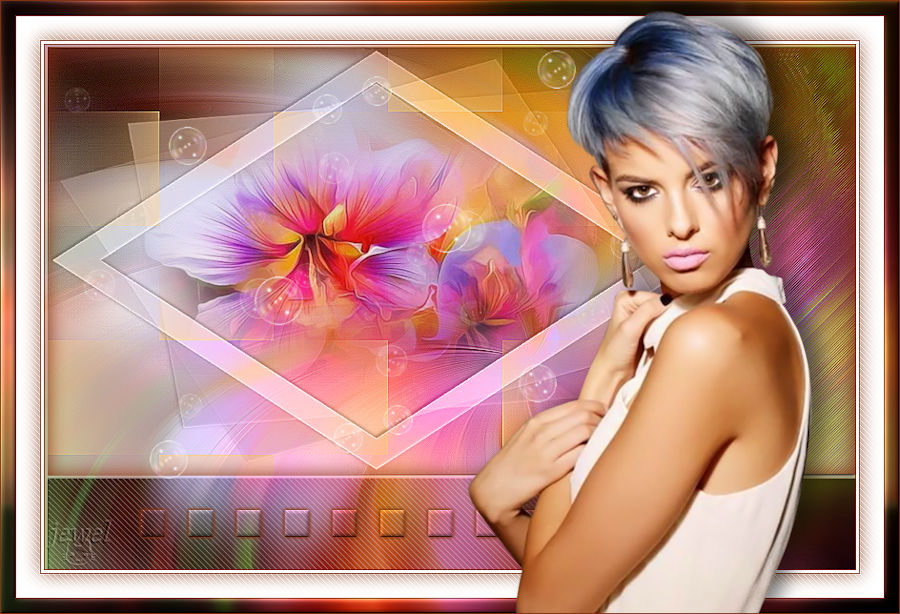
Une autre version avec 2 tubes perso

 2 commentaires
-

Colybrix, thank you very much for your permission that I may translate your tutorials
Tuto original ici
***
***
Plugins
Funhouse
AP (Lines)
Graphic Plus
***
Colors

Foreground #ffffff
Background #facf8a
Color 3 #82310c
***
1 - Choose a nice picture of flowers with beautiful colors (or other for the background)
or take the image in the material
Edit - copy
2 - Open Alpha Delphine PSP
Window - Duplicate to make a copy
Close the original.
The copy, that will be the basis of your work, is not empty,but contains selections
3 - Select all
Paste into selection
Select none
4 - Adjust - Blur -radial blur
5 - Effects – Edge effects - Enhance
6 - Layers – New raster layer
Fill the layer with white color
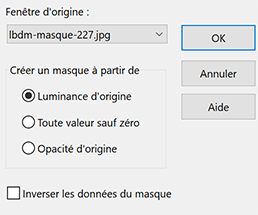
Layers – New mask layer from image – select the mask lbdm - masque 227
7 - Effects - Edge effects - Enhance
Layers – merge – merge group
8 - Change blend mode to Luminance (legacy)
Reduce the opacity to 63 %
Layers – merge – merge down
9 - Selections - Load - Save selection - Load Selection 1 from Alpha Channel
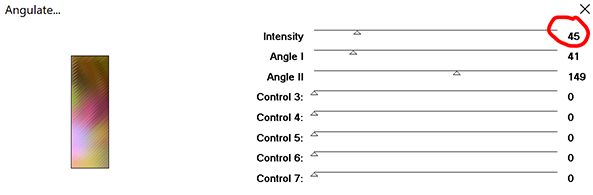
10 - Effects - Funhouse Angulate - intensity 45 - the rest by default
11 - Effects - Edge effects - Enhance
Keep the selection
12 - Layers – New raster layer
Effects - 3 D Effects - Cutout
Layers – merge – merge down
13 - Effects - 3D Effects - Drop Shadow
14 - Select none
15 - Selections - Load - Save selection - Load Selection 2 from Alpha Channel
16 - Selections - Promote selection to layer
17 - Plugins - Effects AP( Lines) - Lines - SilverLining

18 - Reduce the opacity to 35 %
19 - Effects - 3D Effects - Drop Shadow
20 - Layers - Merge down
Select none
21 - Selections - Load - Save selection - Load Selection 3 from Alpha Channel
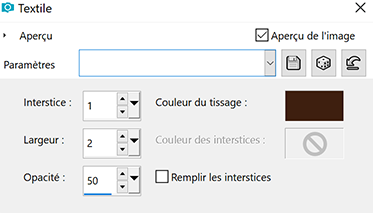
22 - Effects - Texture Effects – weave - background color
(If your background is light, you can set the dark color )

23 - Effects - Edge effects - Enhance
24 - Layers - New raster layer
Effects - 3 D Effects - Cutout
Layers - Merge down
25 - Select none
26 - Layers - New raster layer
Fill the layer with white color
Layers – New mask layer from image – select the mask lbdm - masque 202
Invert mask checked

27 - Effects - Edge effects - Enhance
Layers - Merge - Merge group
28 - Image - Resize to 80 % - resize all layers not checked
29 - Tool select (K)
30 - Effects - 3D Effects - Drop Shadow - Color 3 #82310c
31 - Change blend mode to Luminance (legacy)
32 - Open mist flowers 97 Coly
(or make a mist with your basic image with the mask provided in the material)
Erase the watermark
copy and paste as a new layer
Image - Resize to 68 % - resize all layers not checked
33 - Tool select (K)

34 - Layer - Move down
Layer palette – Click the top layer
35 - Open tube "bulle"
copy and paste as a new layer
Keep in Screen mode
36 - Tool select (K)

37 - Activate the bottom layer raster 1
Selections - Load - Save selection - Load Selection 4 from Alpha Channel
38 - Selections – Promote selection to layer
Effects - 3D Effects - Inner bevel

39 - Effects - 3D Effects - Drop Shadow - Color 3 #82310c
40 - Effects - 3D Effects - Drop Shadow - Color 3 #82310c
( Positive settings)
Select none
41 - Activate the bottom layer raster 1 - Copy
42 - Image – Add borders
1 px color 3
3 px white color
1 px color 3
25 px white color
43 - Select the white border 25 px with the magic wand
Selections - Invert
Effects - 3D Effects - Drop Shadow - Color 3 #82310c
44 - Selections - Invert
Effects – PLugin AP (Lines) – Lines – SilverLining
Adjust - sharpness
Select none
45 -
Image – Add borders
1 px color 3
15 px white color
Select the white border with the magic wand
46 - Copy in the selection
Adjust - Blur - gaussian blur 5
47 - Selections – Promote selection to layer
Change blend mode to Multiply
Merge with the bottom layer
48 - Effects - Graphics plus - cross shadow (default)
49 - Effects - 3D Effects - Inner bevel (same settings)
Select none
50 - Open the tube "femme 748 Coly" ........ erase the watermark
copy and paste as a new layer
Image - Resize to 80 % - resize all layers not checked
Move to the right
51 -Effects - 3D Effects - Drop Shadow
52 - Image – Add borders
1 px color 3
Add your watermark
Layers - Merge - merge all
Image - Resize to 900 pixels
If you want, you can send me your version
If you have problems, or you find a not worked link, write to me
Une autre version
Köszi Klari
 votre commentaire
-


Colybrix, thank you very much for your permission that I may translate your tutorials
tuto original ici
****
****
Plugins
VM Natural
AAA Frames
****
Colors
Foreground #3f1f12
Background #efda85
1 – Open a new transparent image 850 px * 550 px
2 – Radial gradient

3 - Fill the layer with gradient
Ajust - blur - gaussian blur 30
4 - Copy - paste as a new layer the landscape mist after removing the watermark
5 - Effects - Image effects - Seamless Tiling (default)
6 – Ajust – blur – radial blur
7 – Effects – Edge effects -Enhance - two times
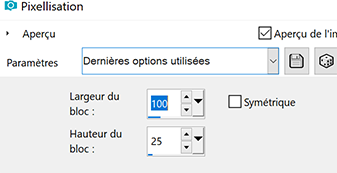
8 – Effects -Distortion Effects – Pixelate
9 – Activate the bottom layer raster 1 – Selections - Select all
Image - crop to the selection
10 – Layers - Merge visible layers
Layers duplicate
11 - Effects – Plugins Unlimited 2.0 – VM Natural – Starmaker
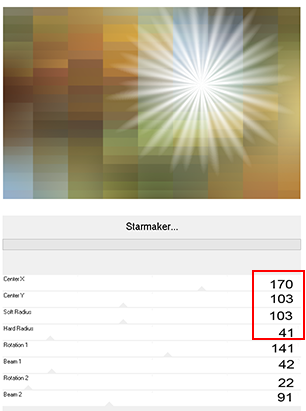
12 - Apply a second time with these settings
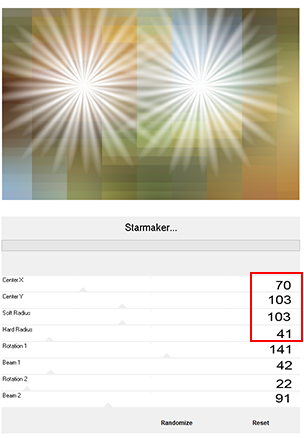
change blend mode to overlay
13 – Layers – new raster layer
Select all
Open the tube landscape
Edit copy
Paste in the selection
Selections – Select none
14 – Layers – New raster layer
Fill the layer with white color
Layers – New mask layer from image – select the mask Narah _mask1590

Effects – Edge effects -Enhance
Layers – merge – merge group
15 - Change blend mode to Luminance (legacy)
Layers – duplicate
Image – Mirror
Image – Flip
16 - Layers – merge – merge down
on this layer - erase slightly the mask on the tree

17 - Copy and paste the tube Deco Lines
Do not move it
Effects – 3 D Effects - drop shadow
Change blend mode to overlay
Reduce the opacity to 85 %
19 - Layers - Merge visible layers
Edit -Copy
Image – Add borders
1 pixel - foreground color
15 pixels - white color
15 pixels - foreground color
21 - Select the white border with the magic wand
Select – invert
Effects – 3 D Effects drop shadow

Selections – Select none
23 - Image – Add borders
50 pixels - white color
24 - Select the white border with the magic wand
Edit - Paste into the selection the background in memory
Adjust - blur - gaussian blur 10
Effects - Texture Effects – weave - foreground color
select – invert
Effects – 3 D Effects drop shadow

Selections – Select none
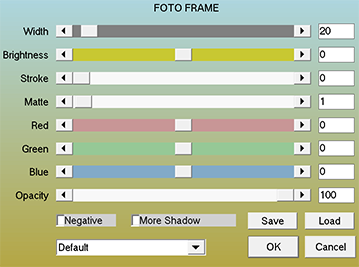
27 - Effets Plugins AAA Frames - Fotoframe
28 - Edit - Copy the woman tube as a new layer
Resize to 97 % - resize all layers not checked
Move to the right
Effects – 3 D Effects drop shadow

29 - Copy and paste the text tube after removing the watermark
Image - negative image (if you want)
Tool select (K) 86 et 457

30 - Effects – 3 D Effects drop shadow
Change blend mode to overlay
31 - Add your watermark
Image – Add borders
1 pixel - foreground color
Resize to 900 pixels
If you want, you can send me your version
If you have problems, or you find a not worked link, write to me
Une autre version avec un tube de Tine
 2 commentaires


|
|
|
|