-


Colybrix, thank you very much for your permission that I may translate your tutorials

Tutoriel original ici
***

***
Plugins
Mura Meister perspective tiling
Eye candy impact perspective shadow
***
Foreground color #99c81a
Background color #40550a

***
I advise you to do the tutorial with the image provided and the tube vase muguet34 to have the same background, then colorize according to your colors
Can be done with other images but the colors will not be the same
***
1 - Open Alpha layer – Window / duplicate
We work on the copy
Selections - Select all
2 - Open "fond muguet" - Edit - Copy
Edit - paste into selection
Selections - Select none
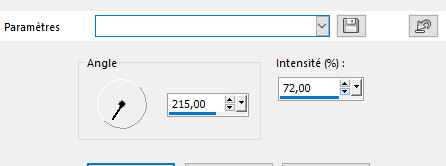
3 - Adjust - Blur - Radial blur

4 - Effects - Texture effects - Blinds - foreground color

5 - Layers - New layer
Selections - select all
Open "vasemug34-coly" – Erase the watermark - Edit - Copy
Edit - Paste into selection
Selections - Select none
6 - Adjust - Blur - Radial blur - same settings
Blend mode Overlay
Layers - Merge - Merge down
(now you can colorize according to your colors)
7 - Effects - Reflexion effects - Kaleidoscope

8 - Selections - Load - Save selection - Load Selection 1 from Alpha Channel

9 - Selections - Promote selection to layer
Effects 3D Effects - Drop shadow

Selections - Select none
10 - Layers - Duplicate
Image - Flip
Layers - Merge - Merge down
11 - Layers - Duplicate
Image Mirror
Layers - Merge - Merge down
12 - Selections - Load - Save selection - Load Selection 2 from Alpha Channel
Move on the bottom layer - raster 1
Selections - Promote selection to layer
Selections - Select none
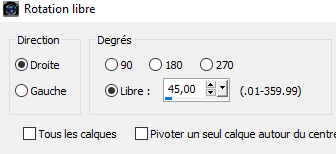
Image - Free rotate – right - free 45
13 - Move to the bottom layer - raster 1 - duplicate
Layers - Arrange - Bring to top
Effects - Mura's Meister - perspective tilling (Height à 10)

14 - Selections - Load - Save selection - Load Selection 3 from Alpha Channel
Delete (suppr) X 2
Selections - Select none
15 - Move to raster 1 (at the bottom)
Layers- New layer
Fill with white color
Layers – New mask layer from image – select Narah 1114
Effects - Edges effects - Enhance
Layers - Merge - Merge group
Blend mode Overlay - Opacity 53%
16 - Move at the top
Open "vasemug35-coly" - Erase the watermark
Edit - Copy
Edit - Paste as a new layer
Image - Resize 50% Resize all layers – not checked
Move right
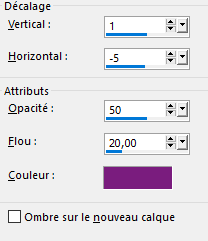
17 - Effects - Eye Candy Perspective shadow, - Settings chose Reflect Behind

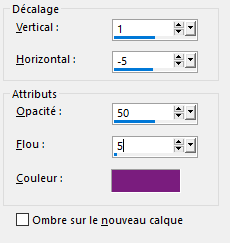
18 - Effects - 3D Effects - Drop shadow

19 - Open "LF-Flower-04042015" - Erase the watermark
Edit - Copy
Edit - Paste as a new layer
Image - Resize 50% - Don't move !
20 - Effects - 3D Effects - Drop shadow

21 - Open "butterfly 3"
Edit - Copy
Edit - Paste as a new layer
Image - Free rotate

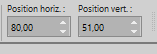
Pick Tool (K)
Position X 588
Position Y 138

22 - Layers - Dupliquer - Move to the original (raster 4)
Adjust - Blur - Motion blur
(on my version 2 - I did 2x the motion blur effect and put the layer in screen mode opacity 57%)
Your layers

23 - Image - Add borders 2 px dark color
24 - Selections - Select all
Image - Add borders 30 px white color
Drop shadow in memory
25 - Selections - Select none
26 - Open "deco cadre"
Edit - Copy
Edit - Paste as a new layer - Don't move !
27 - Open "femme323-coly" - Erase the watermark
Edit - Copy
Edit - Paste as a new layer
Image - Mirror
Image - Resize 78% Resize all layers – not checked
Move to left
28 - Effects - 3D Effects - Drop shadow

29 - With the font provided or another one of your choice, write your text
My settings

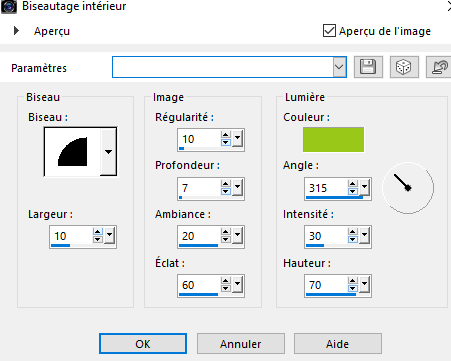
30- Effects - 3D Effects - Inner Bevel
31 - Effects - 3D Effects - Drops shadow

32 - Image - Add borders -2px dark color
Add your watermark
33 - Image – Resize 900 pixels - Resize all layers checked
Adjust - Sharpness - Sharpen
Save as Jpg
If you want, you can send me your version
If you have problems, or you find a not worked link, write to me

Une autre version avec un tube de femme de Colybrix et 2 tubes déco de Krys et Mirabelline

 votre commentaire
-


Colybrix, thank you very much for your permission that I may translate your tutorials
Tutoriel original ici
***
***
Plugins
Dsb Flux
Graphic Plus
***
Color
Foreground #613028
Background #e0d0da
Colorr 3 (Text) #f9e8ab
Color 4 (shadow text) #ed5b14

***
1 - File - New 900 * 550 pixels
2 - Linear gradient
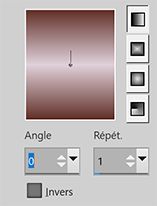
Fill the layer with the gradient
Adjust - Blur - Gaussian blur 30
3 - Layers– New layer
Selections - Select all
Open "femme811-coly" Erase the watermark
Edit - Copy
Edit - Paste into selection
Selections - Select none
4 - Effects - Image effects - Seamless Tiling by default
Adjust - Blur - Gaussian blur 30
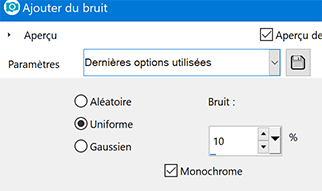
5 - Adjust - Add/Remove noise - Add noise

Layers - Merge - Merge down
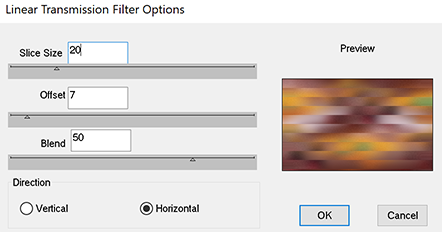
6 - Effects Dsb Flux - Linear Transmission
Adjust - Sharpness - Sharpen
7 - Selections - Load selection from disk (selection 1 Allymatou)
Selections - Promote selection to layer
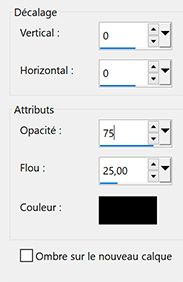
Effects - 3D Effects - Drop shadow
8 - Effets - 3D Effets - Inner bevel

Selections - Select none
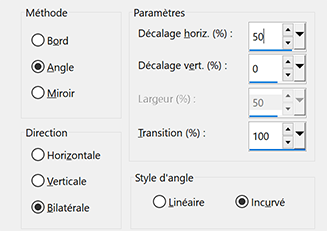
9 - Effects - Geometric effects - Skew

10 - Layers – New layer
Fill with background color
Layers – New mask layer from image – select "creation.tine_masque209"
Effects - Edge effects - Enhance
Layers - Merge - Merge group
Blend mode Overlay - opacity 80%
11 - Layers - New layer
Fill with white color
Layers – New mask layer from image – select "creation.tine_masque336"
Adjust - Sharpness - Sharpen
Layers - Merge - Merge group
12 - Blend mode Luminance (Legacy)
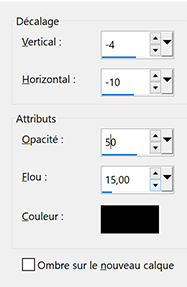
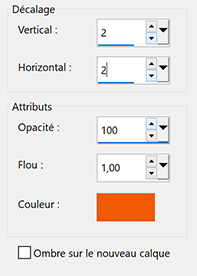
Effects - 3D Effects - Drop shadow - foreground color

13 - Open "fleur7-coly" - Edit - Copy
Edit - Paste as a new layer
Image - Resize 60 % - Resize all layers – not checked
Place at the bottom right
14 - Layers - Duplicate
Effects - Image effects - Seamless Tiling
On my second version, Vertical shift to -25 so that the flower also appears a little lower
Opacity 60%
15 - Move to the layer of the flower - raster 2
Effects - 3D Effects - Drop shadow
16 - Move to the background layer
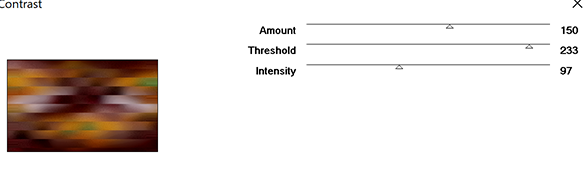
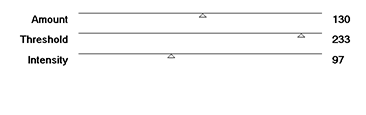
Effects - Graphic Plus - Contrast
17 - Edit - Copy
18 - Image - Add borders
2 pixels – Dark color
Selections - Select all
Image - Add borders 25 pixels same color
Selections - Invert
Edit - Paste into selection (BG in memory)
19 - Adjust - Gaussian blur same settings
Adjust - Add/Remove noise - Add noise (same settings)
20 - Edit - Copy
Selections - Promote selection to layer
Blend mode Screen
Layers - Merge - Merge down
21 - Selections - Invert
Effects - 3D Effects - Drop shadow

22 - Selections - Select all
Image – Add borders 25 pixels same color
Selections - Invert
Edit - Paste into selection
23 - Effects è Graphic Plus - Contrast
Selections - Invert
24 - Effects - 3D Effects - Drop shadow in memory
Selections - Select none
25 - Open "femme811-coly" - Edit - Copy
Edit - Paste as a new layer
Image – Mirror horizontal
Image – resize 80% - Resize all layers – not checked
Move on the left
Drop shadow of your choice
26 - Selections – Load selection from disk (selection 2 Allymatou) -
Layers - New layer
Fill with color 3
Adjust - Add/Remove noise - Add noise (same settings)
Effets - 3D Effets - Inner bevel - same settings
Selections – Select none
27 - Effects - 3D Effects - Drop shadow
Effects - 3D Effects - Drop shadow (minus)

28 - Effects - 3D Effects - Drop shadow

29 - Add your watermark
Image - Add borders 2 pixels –dark color
30 - Image – Resize 950 pixels - Resize all layers checked
Save as Jpg
If you want, you can send me your version
If you have problems, or you find a not worked link, write to me
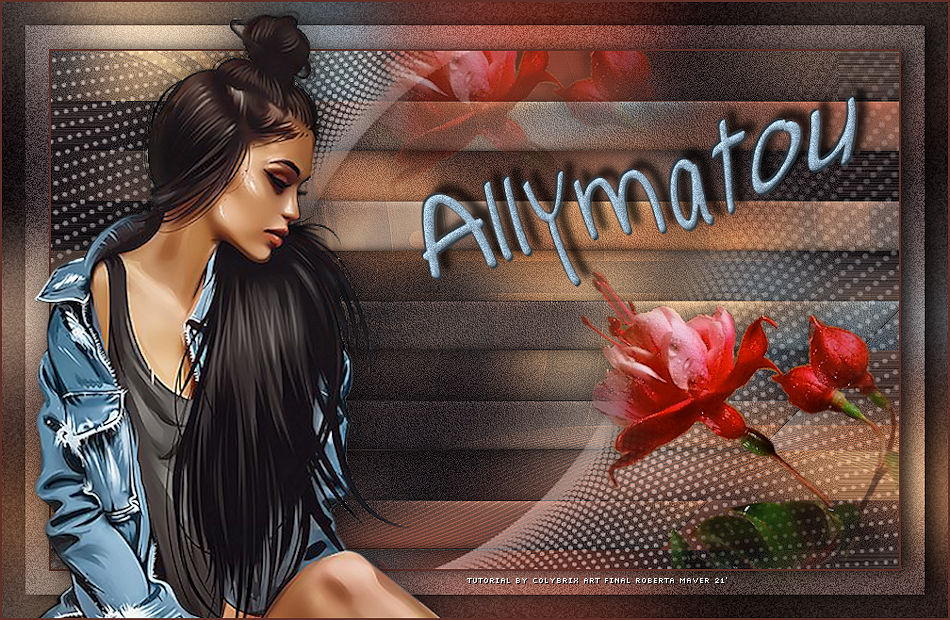
Une autre version avec un tube femme d'Alies et un tube fleurs de LB - Beatriz

Thank you so much Roberta
Thank you so much Flavia


Thank you so much Leni Diniz

Muito obrigada Joyce

Thank you so much Kika

Muito obrigada Estela

Muito obrigada Carmen
 votre commentaire
-
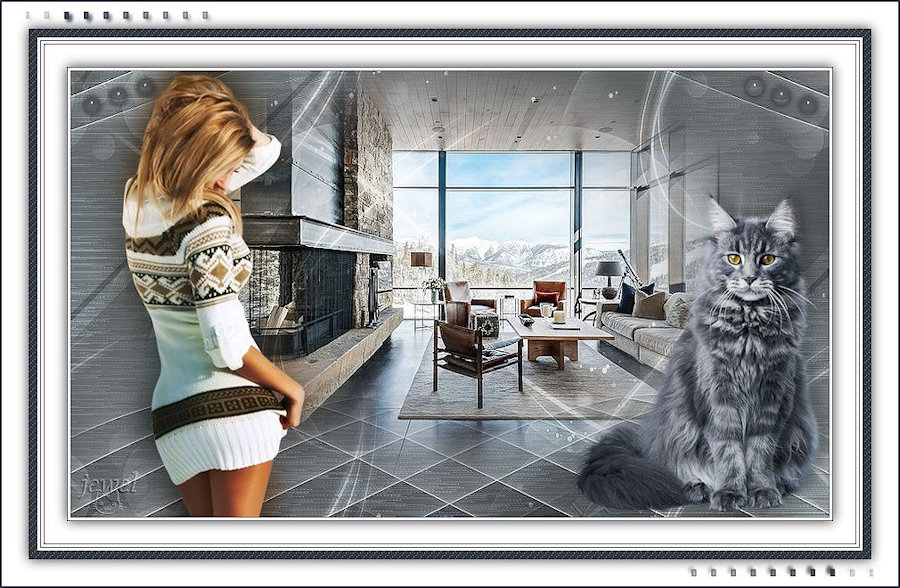
MADISON
Colybrix, thank you very much for your permission that I may translate your tutorials
Tutoriel original ici
***
***
Plugins
VM Experimental
Graphic Plus
Toadies
Effet Eye Candy Impact
***
Dark color #2e343c
Light color #cbd1d1
***
Put the script in Scripts restricted if you want to use it
***
1 - Open Alpha layer
Window / duplicate (Ctrl D)We work on the copy
2 - Fill with dark color
Effects - texture effects Weave - light color

3 - Effects - Filters Unlimited - VM Experimental – Needle and Pins by default

4 - Effects - Graphics plus - Cross shadow by default
5 - Layers - New layer
Fill with the light color
Layers – New mask layer from image – select Creation Tine masque 252

6 - Effects - Edge effects - Enhance
Layers - Merge group
7 - Open "SvB interieur 75 misted"
Erase the watermark
Edit - Copy
Edit - Paste as a new layer
8 - Tool select (K)

(adapt the size and opacity of your mist if you are making a personal version)
Layers - Merge - Merge visible
9 - Selections - Load - Save selection - Load Selection 1 from Alpha Channel
Selections - Promote selection to layer
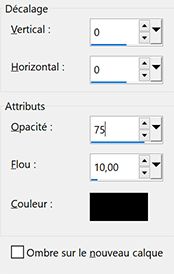
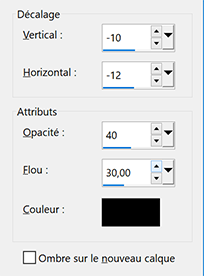
Effects - 3D Effects - drop shadow

10 - Effects - Edge effects - Enhance
Selections - Select none
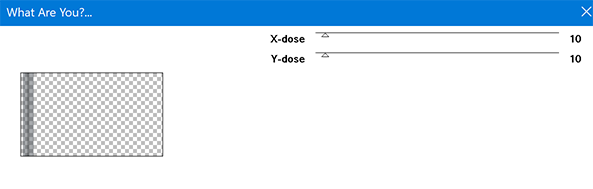
11 - Effects Toadies – What Are You ?
12 - Layers - Duplicate
Image – Miror horizontal
Layers - Merge - Merge down
13 - Effects - Geometric effects - Skew

14 - Blend mode Overlay
Layers - Merge visible
15 - Selections - Load - Save selection - Load Selection 2 from Alpha Channel
Selections - Promote selection to layer
16 - Effects - Eye Candy Impact – Glass

17 - Selections - Select none
Effects - 3D effects - Drop shadow
18 - Layers - Duplicate
Image mirror horizontal
Layers - Merge - Merge down
19 - Activate layer bottom
Layers - new layer
Fill with white color
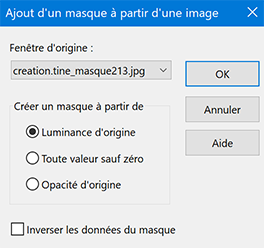
Layers – New mask layer from image – select Creation Tine masque 213

20 - Effects - Edge effects - Enhance
Layers - Merge group
21 - Effects - Image effects - Seamless Tiling by default

22 - Blend mode Overlay opacity 75%
23 - Open "Alysse_cat_5_06_11_19"
Edit - Copy
Edit - Paste as a new layer
Image - Resize 75 % - Resize all layers – not checked
Edit - Repeat Resize
Move at the bottom right
24 - Effects - 3D effects - Drop shadow

25 - Activate the top layer
Open "femme571-coly" - Erase the watermark
Edit - Copy
Edit - Paste as a new layer
Image - mirror horizontal
26 - Image - Resize 63 % - Resize all layers – not checked
Tool select (K)

27 - Layers - Duplicate
On the layer below
Adjust - Blur - Gaussian blur 20
Blend mode Multiply
28 - Save your work before running the script
29 - File – Script > Run
Choiose Madisson in the file Scripts Restricted
Choose Silently if you do it with the colors of the tutorial
Choose Interactively if you change the colors or the settings

go to step 36 after the script
If problem with the script, here are the details of the borders
30 - Image - Add borders
1 pixel - dark color
3 pixels – white color
1 pixel - dark color
31 - Selections - select all
Image – Add borders
25 pixels – white color
Effects - 3D effects - Drop shadow
Selections - Select none
32 - Image –Add borders
1 pixel - dark color
3 pixels –white color
1 pixel - dark color
3 pixels - white color
Selections - Select all
10 pixels - dark color
33 - Selections - Invert
Effects - texture effects Weave light color

34 - Selections - Select all
Image – Add borders
30 pixels – white color
35 - Effects - 3D effects - Drop shadow - same settings
Selections - Select none
After the script
36 - Open " deco bordure" - Edit - Copy
Edit - Paste as a new layer
37 - Add your watermark
38 - Image - Add borders
2 pixels – dark color
39 - Image - Resize 900 pixels - Resize all layers checked
Adjust - Sharpness - Sharpen
Save as Jpg
If you want, you can send me your version
If you have problems, or you find a not worked link, write to me
Une autre version avec des tubes de Syl - Colybrix - Thafs

Une version avec tube de Lisa T - Tine
 votre commentaire
-

Colybrix, thank you very much for your permission that I may translate your tutorials
Tutoriel original ici
***
***
Plugins
Andrew’s Filters 46 -Lines And Some Wobbly Lines
***
Foreground color #ffd4cd
Background color #7a1d7e

***
1 - File - New 900 * 550 pixels
2 - Fill with dark color
3 - Layers new layer
Selections - Select all
4 - Open "CAL-2568-031318"
Erase the watermark
Edit - Copy
Edit - paste into selection
5 - Selections - Select none
6 - Image effects– Seamless tiling by default

7 - Adjust - Blur - Radial blur

8 - Effects - Edge effects - Enhance
Edit - repeat Enhance edges
9 - Layers - Merge visible
10 - Distorsion effects – pixelate

On my 2nd version I accentuated after Pixelate
then duplicate and put Blend mode Overlay to revive the colors
then layers - merge visible
11 - Layers - New layer – Fill with white color
12 - Layers - New mask layer from image
Choose "25_Masque_ForumChezVIoline"

13 - Effects - Edge effects - Enhance
Edit - Repeat Enhance edges
14 - Layers - Merge group
Blend mode Screen Opacity 50%
15 - Layers - New layer – Fill with white color
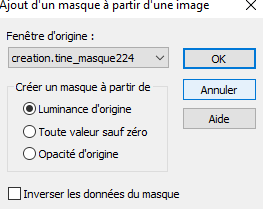
16 - Layers - New mask layer from image
Choose "creation.tine_masque224"
17 - Layers - Duplicate

18 - Layers - Merge group
19 - Layers - Duplicate
Image Mirror horizontal
Image Flip
20 - Layers - Merge - Merge down
Blend mode Soft light
21 - Copy "CAL-2568-031318"
Edit - Paste as a new layer
22 - Image - Resize 90% - resize all layers not checked
Move on the right or
Tool select (K)
23 - Layers - Duplicate and merge down
24 - Open "déco gauche" - Edit - Copy
Edit - Paste as a new layer
For your personal versions, if the tube is not suitable I put a curtain instead
I placed on the left on my 2nd version, colorize, duplicate and place in the upper right corner

Opacity 75 % for the tutorial version
Change the blend mode, opacity if necessary and / or colorize
25 - Open the tube "bulle" - Edit - Copy
Edit - Paste as a new layer
Tool select (k)
26 - Filters unlimited – Andrew’s Filters 46 -Lines And Some Wobbly Lines
Adapt the settings Red, Green et Blue in your colors

27 - Opacity 50%
28 - Image effects– Seamless tiling by default
29 - Layers - Arrange - move down - 2 times (under woman mist)
You can erase some bubles on the woman face
30 - Activate the background layer -Edit - Copy
31 - Image - Add borders
2 pixels, dark color
5 pixels, light color
32 - With the Magic Wand - select the border 5 pixels(light color)
33 - Paste into selection the BG in memory
34 - Selections - Invert
35 - Effects - 3 D Effects - Drop shadow

36 - Selections - Select none
37 - Image - Add borders 2 pixels dark color
30 pixels white color
38 - With the Magic Wand - select the border 30 pixels
39 - Selections - Invert
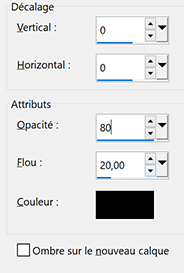
40 - Effects - 3 D Effects - Drop shadow dark color

41 - Selections - Select none
42 - Image - Add borders
2 pixels, dark color
10 pixels, light color
43 - With the Magic Wand - select the border 10 pixels
Paste into selection the BG in memory
44 - Adjust - Sharpness - Sharpen
45 - Selections - Invert
46 - Effects - 3 d Effects - Drop shadow same settings but black color

47 - Selections - select none
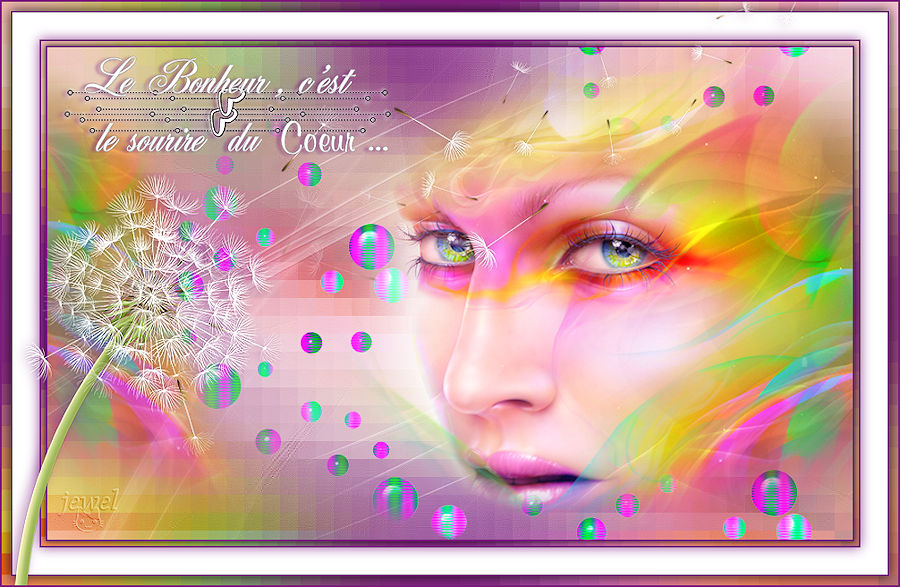
48 - Open "Dandelion1_19.01.2016- Sylvie" - Erase the watermark
Edit ' Copy
49 - Edit - Paste as a new layer
50 - Image - Mirror horizontal
51 - Image - Resize 110% - resize all layers not checked
Move on the left
52 - Effects - 3 D Effects- Drop shadow dark color
53 - Adjust - Sharpness - Sharpen
54 Open the text - Copy and paste as a new layer
55 - Image – Negative image
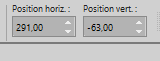
56 - Move on the top corner left
57 - Layers - Duplicate
58 - Adjust - Sharpness - Sharpen
59 - Effects - 3 D Effects- Drop shadow dark color
60 - Add your watermark
61 - Image - Add borders 2 pixels, dark color
62 - Resize 900 pixels
63 - Adjust - Sharpness - Sharpen
File - Save as JPG
If you want, you can send me your version
If you have problems, or you find a not worked link, write to me
Une autre version avec un tube perso
 votre commentaire
-


Colybrix, thank you very much for your permission that I may translate your tutorials
Tutoriel original ici
***
***
Plugins
Carolaine and Sensibility
Mura’s Meister
Graphic Plus
***
Colors
Foreground #6a9628
Background #e6e68c

***
1 - Open tubes and masks on PSP
Open Alpha layer – Window / duplicate (Ctrl D)
We work on the copy
2 - Fill with dark color
3 - Layers - New raster
Selections - Select all
Open "Femme 645 et fleurs" – Erase the watermarck
Edit - Copy
Edit - Paste into selection
Selections - Select none
4 - Effects - Image effects - Seamless tiling by default
5 - Adjust - Blur - Radial blur

6 - Effects - Edge effects - Enhance
Edit - Repeat Enhance Edges
Blend mode Luminance (Legacy)
Opacity 57
Layers - Merge - Merge down
7 - Adjust - Blur - Gaussian blur 10
8 - Adjust - Add/Remove noise / Add noise
9 - Layers - New raster
Fill with the light color
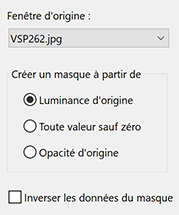
Layers - New mask layer from image
Select VSP 262
10 - Layers - Duplicate
Layers - Merge - Merge group
Layers - Duplicate
Image – Mirror (horizontal)
11 -Layers - Merge - Merge down
Effects - Edges effects - Enhance
12 - Selections - Load/Save selection - Load selection 1 from Alpha Channel
Effects - Texture effects - Weave

13 - Effects - 3D Effects - Inner Bevel

14 - Selections - Select none
15 - Selections - Load/Save selection - Load selection 2 from Alpha Channel
Effects - Carolaine and Sensibility – CS- DLines by default
16 - Effects - 3D Effects - Inner Bevel – same settings
Selections - Select none
17 - Activate layer bottom (Raster 1)
Selections - Load/Save selection - Load selection 3 from Alpha Channel
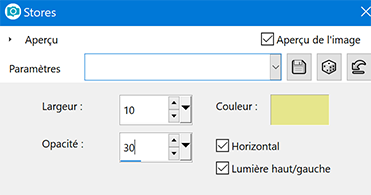
Effects - Texture effects - Blinds
18 - Selections - Promote selection to layer
Selections - Select none
Blend mode Soft Light (or other)
Layers - Merge down
19 - Effects - Image effects - Seamless tiling by default
20 - Open "Fleur70mist-coly" – Erase the watermark
Edit - Copy
Edit - Paste as a new layer
Image - Resize 125% - resize all layers not checked
21 - Effects - Image effects - Seamless tiling by default
Opacity 55
22 - Activate the top layer
Edit - Paste as a new layer the mist flower in memory
Image - Resize 50 % - resize all layers not checked
Adapt the percentage to your tube so that it is roughly the size of the space between the two lines of the mask
23 - Effects - Mura’s Meister – Copies

24 - Tool select (K)
Layers - Arrange - Move down
25 - Activate the top layer
Layers - New layer raster
Fill with white color
Layers - New mask layer from image
Select VSP253

26 - Effects - Edges effects - Enhance
Layers - Merge - Merge group
27 - Selections - Load/Save selection - Load selection 1 from Alpha Channel
Press the delete key on the keyboard
Selections - Select none
28 - Blend mode Luminance (Legacy)
29 - Text Tool (T) – Police Kristen ITC with the settings or use the text in the material

Write letter "P" Size 100
Size 60 and write "arfum"
Layers - Convert to raster layer
30 - The text written, I made a rectangle selection around "de fleurs"
Edit - Cut
Selections - Select none - paste as new layer
And replace closer and slightly shifted to the right (the D under the A)
Layers - Merge - Merge down
31 - Image - Resize 95% - resize all layers not checked
Tool select (K)

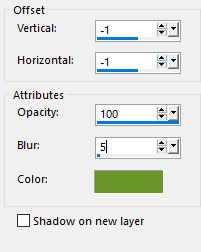
32 - Effects - 3D Effects - Drop shadow – Foregroung color

And in negative
33 - Result


34 - Layers - Merge - Merge visible
Edit - Copy
paste as a new image (as a precaution not necessary if you use the frame provided)
If you do not want to make the frame, it is in the material
In this case after merging the layers
Image – Canvas size

Open "cadre parfum Coly" - Erase the watermark
Edit - Copy paste as a new layer
Go to step 46
35 - Image – Add borders
1 pixel – dark color
3 pixels – light color
1 pixel – dark color
5 pixels – white color
1 pixel – dark color
10 pixels – white color
36 - Selections - Select all
Image – Add borders
10 pixels – dark color
Selections - Invert
Effects Graphic plus – Cross Shadow by default
37 - Selections - Select all
Selections – Modify – Contract 20 pixels
Effects - Effects 3D - Drop shadow dark color

38- Selections - Select none
39 - Image – Add borders
1 pixel – dark color
10 pixels – white color
1 pixel – dark color
25 pixels – white color
40 - With the Magic Wand, select the last border (25 px white color)
Edit - Paste the background into selection
41 - Adjust - Blur - Gaussian blur 10
42 - Effects - Texture effects - Blinds - same settings in memory
43 - Effects Graphic plus – Cross Shadow
By default except Intensity 50
44 - Selections - Invert
Effects - 3D effects - Drop shadow

45 - Selections - Select none
46 - Continue here if you used the frame provided
Open "Femme 645 et fleurs" – Erase the watermarck
Edit - Copy
Edit - Paste as a new layer
Image - Resize 90% - resize all layers not checked
Image - Mirror (Horizontal)
Move on the left
Effects - 3D effects - Drop shadow
47 - Open "Fleur70mist-coly"
Edit - Copy
Edit - Paste as a new layer
Image - Resize 60% - resize all layers not checked
48 - Tool select (K)

49 - Add your watermark
50 - Image – Add borders
1 pixel – dark color
Resize 900 pixels
File - Save as JPG
If you want, you can send me your version
If you have problems, or you find a not worked link, write to me
Une autre version avec un tube femme de Karine Dreams
 votre commentaire


|
|
|
|