-
Tuto Photoshop
Ludmila

Colybrix, thank you very much for your permission that I may translate your tutorials
Original tutorial here
No filters used
realized with CC 2021 but achievable on other older versions
Open "motif rainure" on your Photoshop (it's mall, it's normal)
Edit – Define pattern

It will go into your patterns (last in the active patterns)
Colors
Foreground e7ebed
Background 345c6b
Color 3 (borders) 14273c
Color 4 ffffff
***
1 - Open "Alpha Ludmila Ps" It contains a selection
Image - Duplicate - we are working on the copy, you can close the original
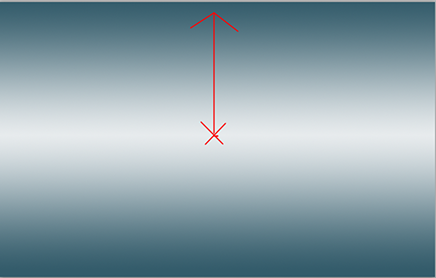
Fill with a gradient foreground / background - Reflected gradient
Pull the gradient from the middle to the top edge, holding down the shift key to go straight

2 - Open " 44_paysage_p1_animabelle"
Erase the watermark
Selection – Select all
Edit – Copy
Edit – Paste on your work
Ctrl T Settings (to adapt to your tube if necessary)

3- Layer - Duplicate
Close Top layer, activate layer 2
Filter – Blur - Motion blur
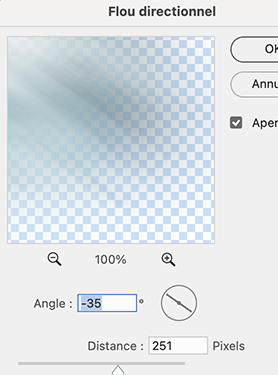
Repeat a 2nd time - Motion blur
4 - Filter – Sharpen - Unsharp mask

Layer - Duplicate
Ctrl T – Right click on your work - Flip Horizontal
Validate
Blend mode - Color burn
5 - Activate layer 1 (lbackground)
Selection – Select all
Image – Crop
Selection – Deselect
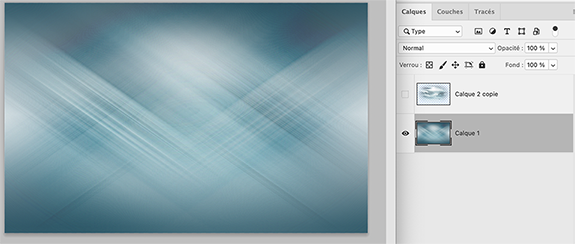
Layer – Merge visibles layers (the top layer is always unchecked)

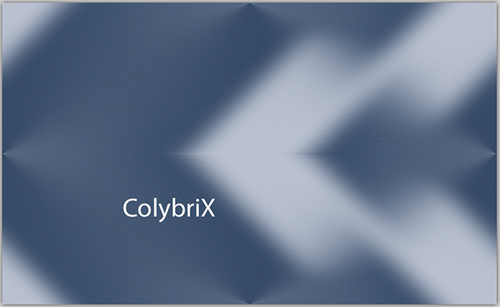
Result
6 - Filter – Sharpen - Sharpen - same settings
Layer - Duplicate
Blend mode Multiply
Layer - Merge - Merge down
7 - Activate Top layer (the mist)
Open it
Layer - Duplicate
Blend mode Overlay - Opacity 60 %
8 - Open NarahsMasks_1655
Ctrl A (select all)
Ctrl C (copy)
Layer - New layer
Fill with the light color
Add a layer mask
Press while holding the Alt key on the thumbnail of the merge mask in the layer window
The layer is white
Edit – copy (ctrl v)
The mask goes in the layer mask
Ctrl T - stretch to cover the entire surface
Selection - Deselect
Right click on the layer mask – Apply the layer mask
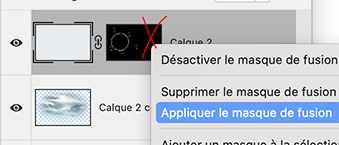
For more info on this technique for the mask, see tuto => Ici
9 - Layer - Duplicate
Merge - Merge down
Layer - Duplicate
Merge - Merge down
Layer - Duplicat again … don't merge
Activate the layer below
Layer style - Drop shadow

10 - Activate background layer
Selection – Load selection - selection 1
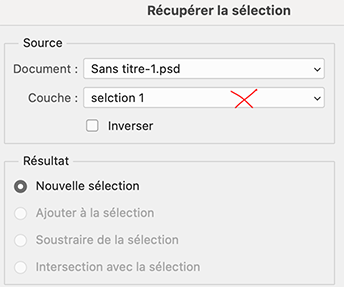
Ctrl J - a new layer is formed with the background in the selection
Move this layer above the two landscape layers
11 - Activate "44_paysage_p1_animabelle"
Selection – select all
(important : even on CC versions you have to select everything before copying to be able to paste in afterwards, otherwise it is not active)
Edit – Copy
Return to your circle layer
Selection – Load selection - sélection 1
Filter - Blur - Gaussian blur 5
Edit – Paste special - Paste into
The landscape will fit in the circle but it is too big
Ctrl T - settings (to adapt to your tube if necessary)

Validate
Right click on the layer mask – Apply the layer mask
Blend mode Hard light (or other)
Layer - Merge - Merge down
12 - Open "effet Glass1"
Edit – Copy
Edit – Paste
Ctrl T - settings

13 - Activate background layer (layer 1)
Selection - Select all - Copy
Layer - Flatten image
For security, File - new (don't change the size, it has the right size in memory
Edit – Paste
The background will be pasted on the new file (put aside for later)
Back to your work
14 - Foreground color 3 : 14273c
Background color 4 : ffffff
15 - Image – Canvas size
10 pixels L and H – foreground color

Select the border 10 px with the magic wand tool (W)

Ctrl J (layer via copy)
Layer style – Pattern Overlay
Choose pattern "motif rainure" - settings
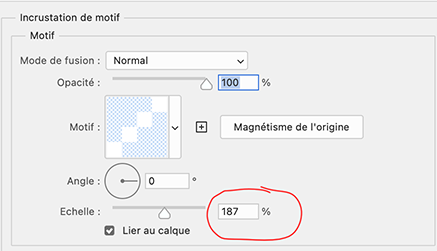
Layer - Flatten image
16 - Image – Canvas size
4 pixels White color
4 pixels background color
30 pixels white color
17 - Select the border 30 px with the magic wand tool (W)
Selection - Invert
Ctrl J (layer via copy)

Layer style - Drop shadow
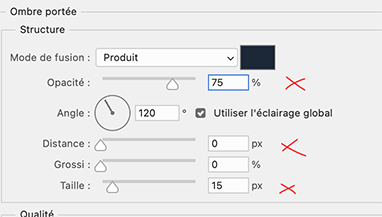
Layer - Flatten image
18 - Image – Canvas size
4 pixels foreground color
4 pixels white color
50 pixels foreground color
18 - Select the border 50 px with the magic wand tool (W)
Selection - Invert
Ctrl J (layer via copy)
19 - On this new layer - Layer style - drop shadow
same settings but opacity 100

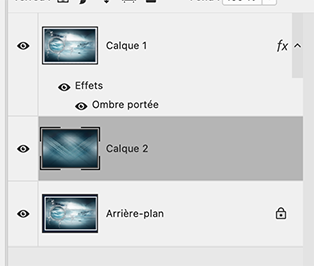
20 - Edit – Paste the previously saved background
Ctrl T (Free transform)
stretch to cover the entire surface
Layer – Arrange - bring backward (under layer 1)
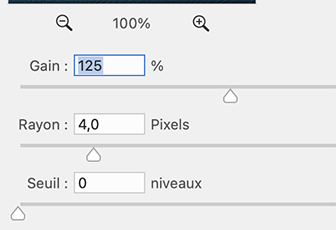
21 - Filter – Sharpen - Unsharp mask – Gain 125
22 - Activate top layer
Edit – Copy "216_femme_p5_animabelle" - Erase the watermark
Edit – Paste
Ctrl T – settings or your own according to your tube()

Layer style - Drop shadow

23 - Open"etoiles" – Copy
Paste
Layer - arrange under the woman tube
Ctrl T – Settings

24 - Layer - Duplicate
Ctrl T - Settings

Add your watermark
2 Layer - Flatten image
Image – Canvas size
4 pixels foreground color
Image – Image size – 950 pixels
If you want, you can send me your version
If you have problems, or you find a not worked link, write to me
Une autre version avec un tube de Tine
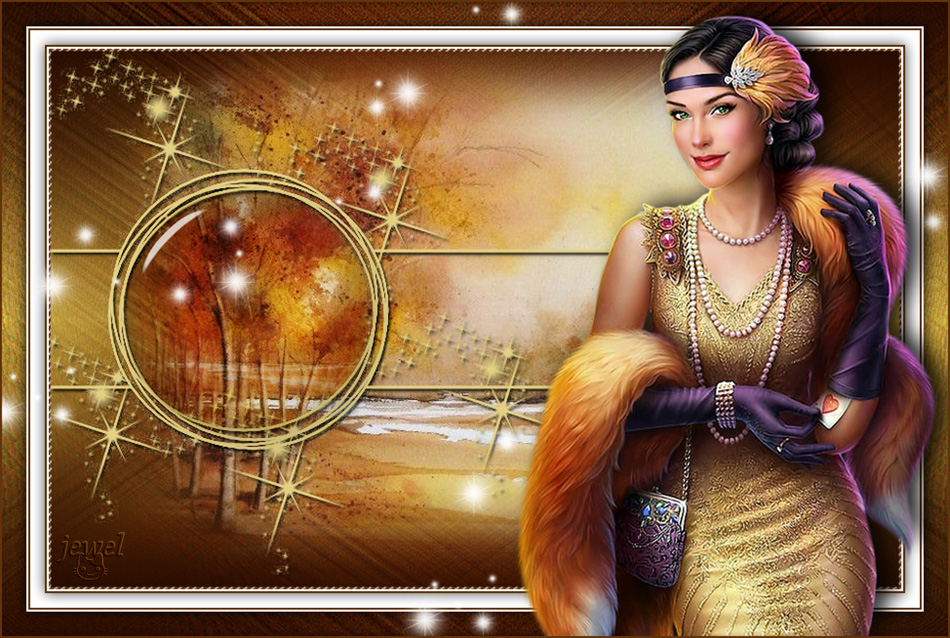
Une variante réalisée avec PSP
tube de Tine

 votre commentaire
-


Colybrix, thank you very much for your permission that I may translate your tutorials
Tutorial here
***
***
For your personal versions, choose a long landscape like mine so that it fits well in the central space
***
Plugins
Graphic Plus
AAA Frame
***
Colors

Foreground #0a3568
Background #438aba
3rd color #d8ebfd
***
1 - File - New 900 px / 550 px transparent
Fill with this gradient - Foreground color / Background color

Adjust - Blur - Gaussian blur 50
2 - Layers – New Raster layer
Selections – Select all
Open "03293_calmblue" Erase the watermark
Edit – copy
Edit – paste into selection
Selections – Select none
3 - Effects - Image effects - Seamless tiling - Side by Side

Adjust - Blur - Gaussian blur 50
Blend mode Overlay
Layers - Merge - Merge down
4 - Adjust – Add/Remove Noise - Add Noise

5 - Effects - Texture effects - Weave (foreground color)

Image – Mirror - Mirror vertical
Effects - Texture effects - Weave (foreground color) - same settings in memory
6 - Effects Graphic Plus - Cross Shadow (intensity 85)

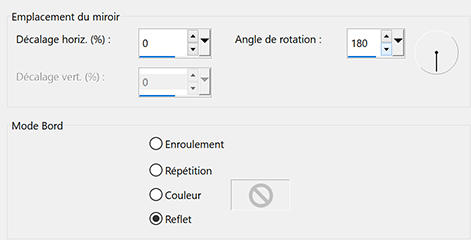
7 - Effects - Reflection effects - Rotating mirror
8 - Selection tool (S) - Selection
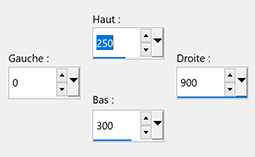
Selections – Promote selection to layer
9 - Effects - Texture effects - Weave (foreground color) - new settings

Effects - 3D Effects - Inner Bevel

Selections – Select none
10 - Objects – Align - Top
Layers - Duplicate
Image – Mirror - Mirror vertical
Layers - Merge - Merge down
11 - Effects - Distorsion effects - Wave

12 - Activate the bottom of the layer palette
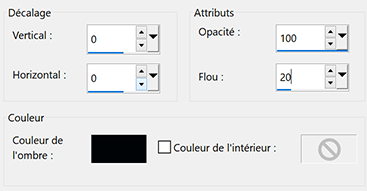
Selection tool (S) - Selection

Effects - 3D Effects - Drop shadow 0, 0, 100, 20 - black color
Selections – Select none
13 - Activate top layer
Edit – Copy "03293_calmblue"
Edit - Paste as a new layer
Effects - Image effects - Seamless tiling - Side by Side - same settings
14 - Layers – New Raster layer
Background 3rd color - #d8ebfd
Fill with background color
Layers – New mask layer from image – select NarahsMasks_1675
Effects - Edges Effects - Enhance
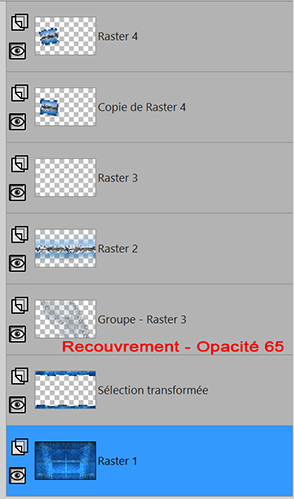
Layers - Merge - Merge group
Blend mode Overlay - Opacity 65
Layers - Arrange - Move down
Effects - 3D Effects - Drop shadow 0, 0, 100, 20 - black color
15 - Activate top layer
Edit – Copy "Deco 1 Adriana"
Edit - Paste as a new layer - Don't move
Effects - 3D Effects - Drop shadow 2 - 2 - 100 - 1 Foreground color
Effects - 3D Effects - Drop shadow -2 -2 100 - 1 Foreground color
16 - Selection tool (S) - Selection

If you wish, move the selection slightly by right clicking inside the selection, hold and move to select another part of your landscape but staying more or less in the same place
Edit – Copy Special - Copy Merged
17 - Layers – New Raster layer
Fill with foreground color
Adjust – Add/Remove Noise - Add Noise ( same settings)
Selections – Modify - Contracter de 5 pixels
Erase
Fill with 3rd color - #d8ebfd
Adjust – Add/Remove Noise - Add Noise ( same settings)
Sélections – Modifier > Contract 5 pixels
Erase
Edit – Paste into selection
Layers – New Raster layer
Effects - 3D Effects - Cutout
Layers - Merge - Merge down
Selections – Select none
18 - Image – Free Rotate
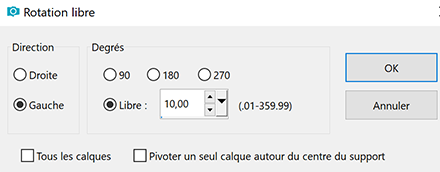
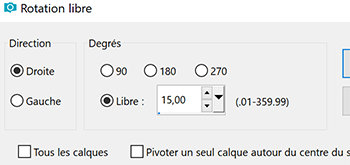
Layers - Duplicate
Image – Free rotate
Layers - Arrange - Move down
On both frame layers
Effects - 3D Effects - Drop shadow 5 - 5 - 100 - 10 foreground color
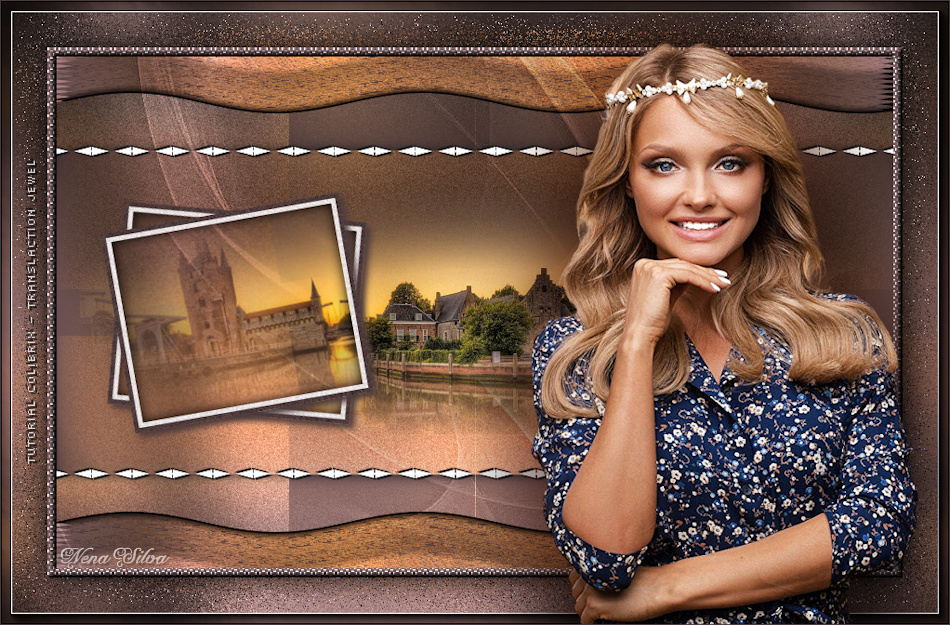
RESULT
19 Activate bottom layer
Edit – Copy
20 - Selections - Select all
Image – Add borders
10 pixels – foreground color
Selections – Invert
Effects - Texture effects - Weave (3 rd color) - new settings
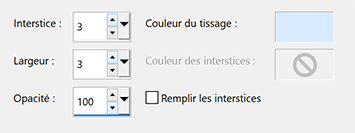
Effects - 3D Effects - Inner Bevel - Same settings in memory
21 - Selections – Selectionner all
Image – Add borders
50 pixels – Foreground color
Selections – Invert
Edit – Paste into selection (BG in memory)
22 - Effects - Graphic Plus - Cross shadow same settings
Effects Texture Effects - Mosaïc antique

Selections – Invert
Effects - 3D Effects - Drop shadow 0 - 0 - 100 - 50 Black color
Selections – Select none
23 - Effects - AAA Frames - Foto Frame

24 - Open "femme832-coly" Erase the watermark
Edit – Copy
Edit - Paste as a new layer
Image – Resize 80% all layers not checked
Move to the right
Layers - Duplicate
On the layer below (Raster 2)
Adjust - Blur - Gaussian blur 50
Blend mode Multiply
25 - Add your matermark
Image – Add borders
1 pixel – Foreground color
Image – Resize 950 pixels - resize all layers checked
Save Jpeg
If you want, you can send me your version
If you have problems, or you find a not worked link, write to me
Une autre version avec un tube de Gabry
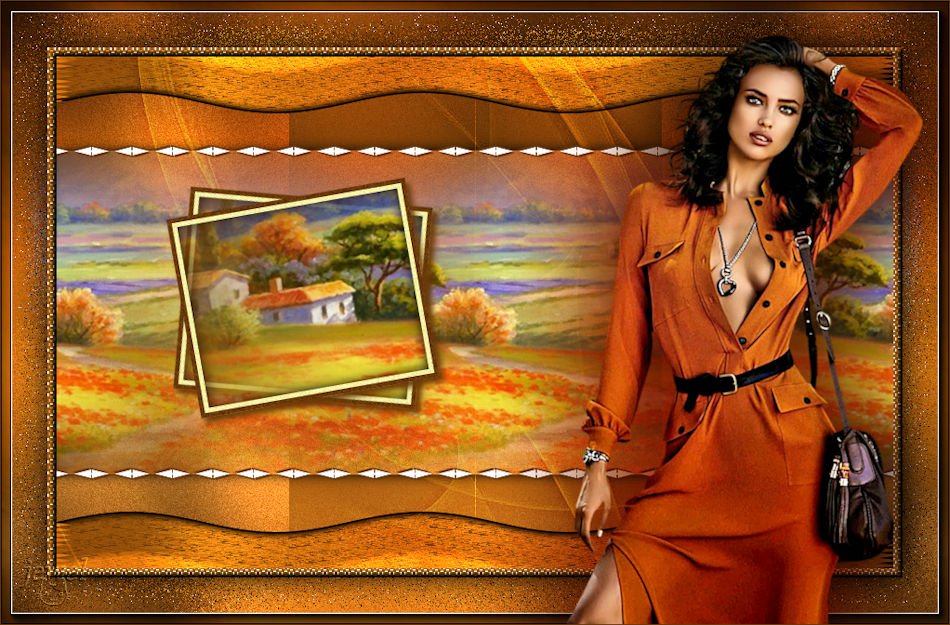
Une autre version avec un tube de Tine

Thank you so much Ladykatt

Muito obrigada Roberta

Merci beaucoup Nena
 votre commentaire
-

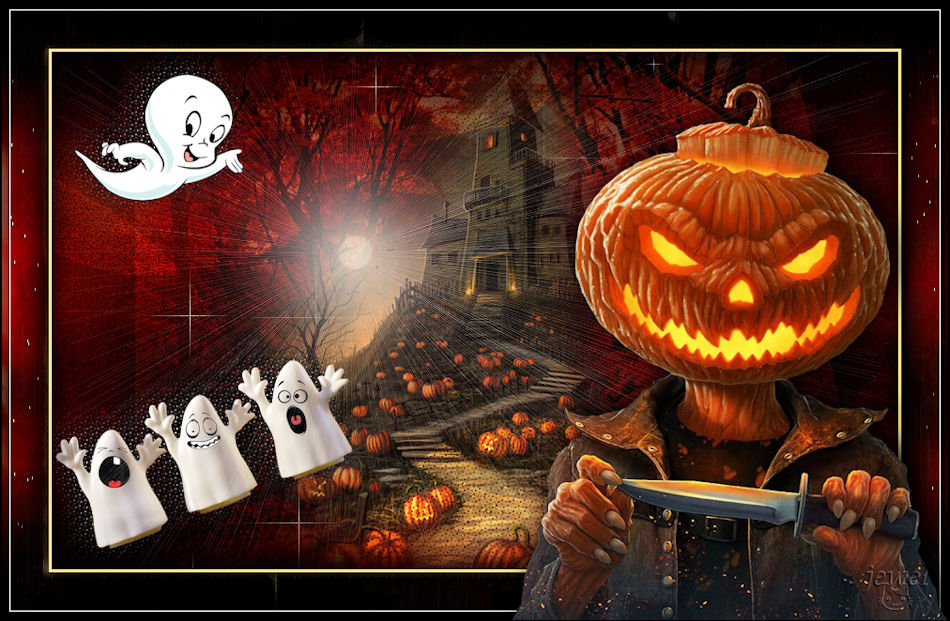
Colybrix, thank you very much for your permission that I may translate your tutorials
Tutorial here
***
***
Plugins
Filters Unlimited > VM Natural
Mock
Graphic Plus
***
Colors

Foreground : #39180f
Background : #fce796
***
1 - Open the material on your Psp, duplicate and close the originals
Erase the watermarks if necessary, minimize
2 - File - New transparent 900 px / 550 px transparent
Fill with foreground color
Selections – Select all
3 - Activate "misted_automne4_tine_10.2021-190"
Tool Change to Target - size 300 px - go over the whole layer to change the color (or colorize as you wish)

Edit - Copy
Edit – Paste in the selection on your work
Selections - Select none
4 - Effects - Image effects - Seamless tiling - Side by Side
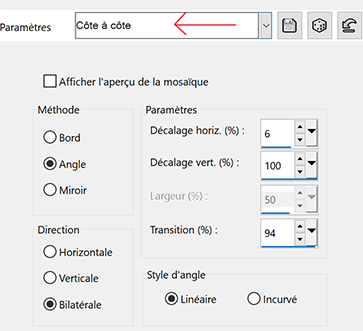
Adjust - Blur - Gaussian blur 30
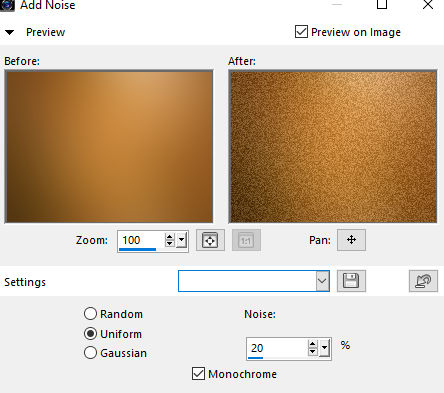
Adjust – Add/Remove Noise - Add Noise
5 - Edit – Paste as a new layer (landscape in memory)
Don't resize, Opacity 50
*Optional depending on your tube : Adjust - Brightness and Contrast
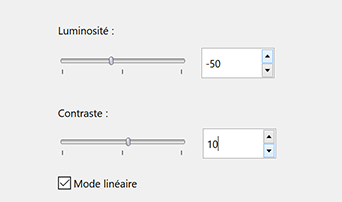
Activate Raster 1, do the same setting Brightness and Contrast
Result

6 - Activate the top layer (Raster 2)
Layers – New Raster layer
Fill with background color
Layers – New mask layer from image – select NarahsMasks_1671
Effects - Edges Effects - Enhance
Layers - Merge - Merge group
Blend Mode Overlay
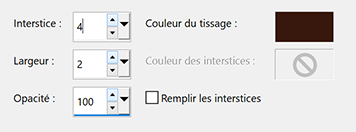
7 - Effects - Texture effects - Weave (foreground color)
8 - Edit – Copy "hallow26mist-coly"
Edit – Paste as a new layer
Image - Resize 75% resize all layers not checked
Pick tool (k) Position X 175, Position Y -69
9 - Layers – Arrange - Move down
Active the top layer
10 - Edit – Copy "Hallow39-coly"
Edit – Paste as a new layer
Image - Resize 50% resize all layers not checked
Tool Pick (k) Position X 3, Position Y 327
11 - Effects - 3D Effects - Drop shadow - Black color
Check: Shadow on a new layer
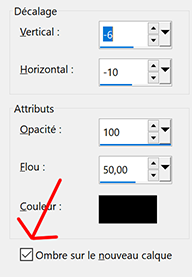
On the shadow layer
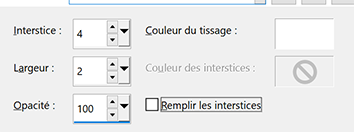
Effects - Texture effects - Weave (white color)
12 - Edit – Copy (casper2-hallow13)
Edit – Paste as a new layer
Image - Resize 35% resize all layers not checked
Pick Tool (k) Position X 23, Position Y 22
13 - Effects - 3D Effects - Drop shadow - Black color (same settings)
On the shadow layer
Effects - Texture effects - Weave (white color) same settings
14 - Activate top layer
Layers – New Raster layer
Fill with black color
Effe ts - Illumination Effects - Sunburst
*if you are using another landscape than mine, try to place the small cross on the small window on the left at the height of the moon if there is one (cancel and start again if you are not satisfied with the placement of the cross - you can also lower the opacity of the black layer a bit, to see what is underneath to help you

Effects - Edge effects - Enhance
Blend mode Screen - opacity 60
15 - Activate the bottim layer (Raster 1)
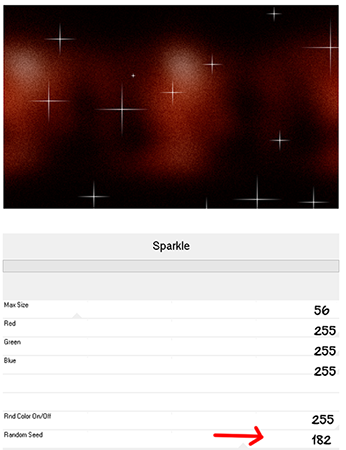
Effects Filters Unlimited - VM Natural - Sparkle
16 - Layers - Duplicate
Effects Mock - Windo by default
Opacity 50
17 - Activate the bottom layer
Edit – Copy
Layers - Merge all flatten
Selections - Select all
Effects - Effects 3D - Cutout

Selections - Select none
18 - Image – Add borders
1 pixel – black color
3 pixels – background color (#fce796)
1 pixel – black color
19 - Selections – Select all
Image – Add borders
50 pixels – black color
Selections – Invert
Edit – Paste into selection
20 - Effects - Texture effects - Straw wall
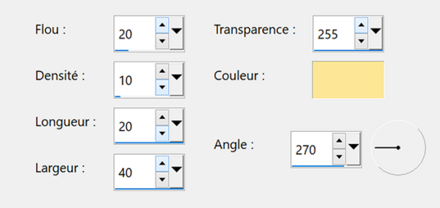
21 - Effects - Graphic Plus - Cross Shadow
by default except Intensity 80

22 - Selections – Invert
Effects - 3D Effects - Drop shadow - Black color
Uncheck shadow on new layer
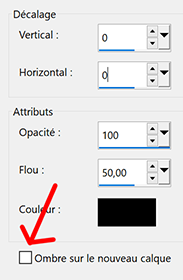
Edit – Repeat Drop shadow
Selections – Select none
23 - Effects - AAA Frames - Foto Frame

24 - Edit – Copy lthe tube (fetes_halloween13_tine)
Image - Resize 65% resize all layers not checked
Place on the right
Drop shadow of your choice
25 - Add your watermark
Image – Add borders
1 pixel – black color
26 - Image – Resize 950 pixels - resize all layers checked
Save Jpeg
If you want, you can send me your version
If you have problems, or you find a not worked link, write to me
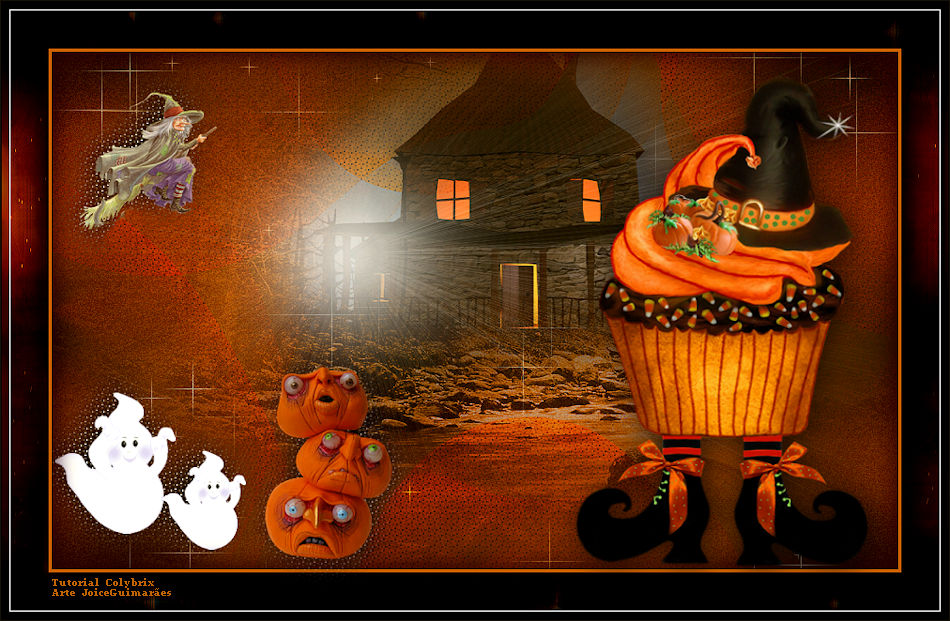
Une autre version avec des tubes de Colybrix et Tine
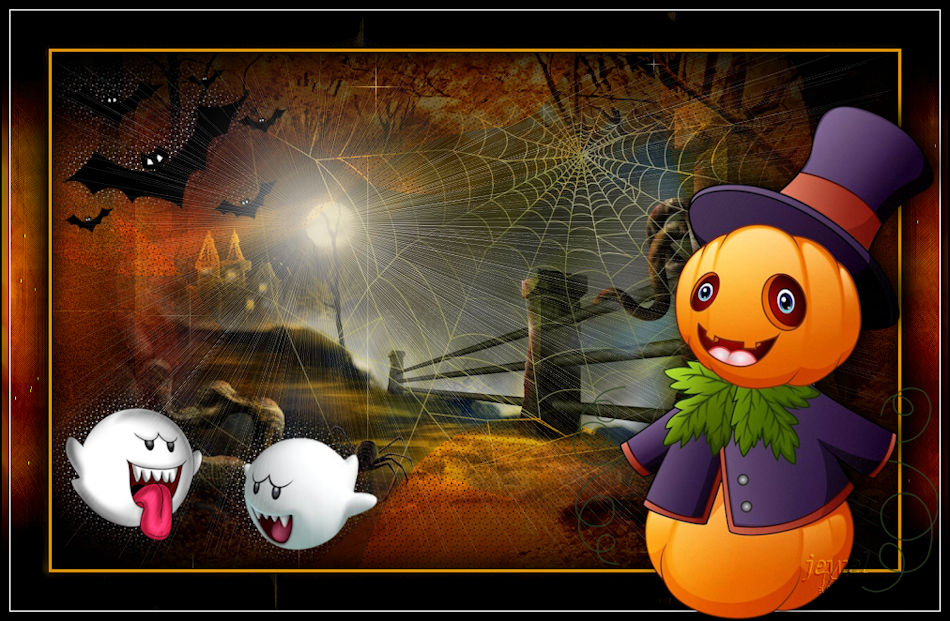
Muito obrigada Joice
 votre commentaire
-
Coucher de soleil
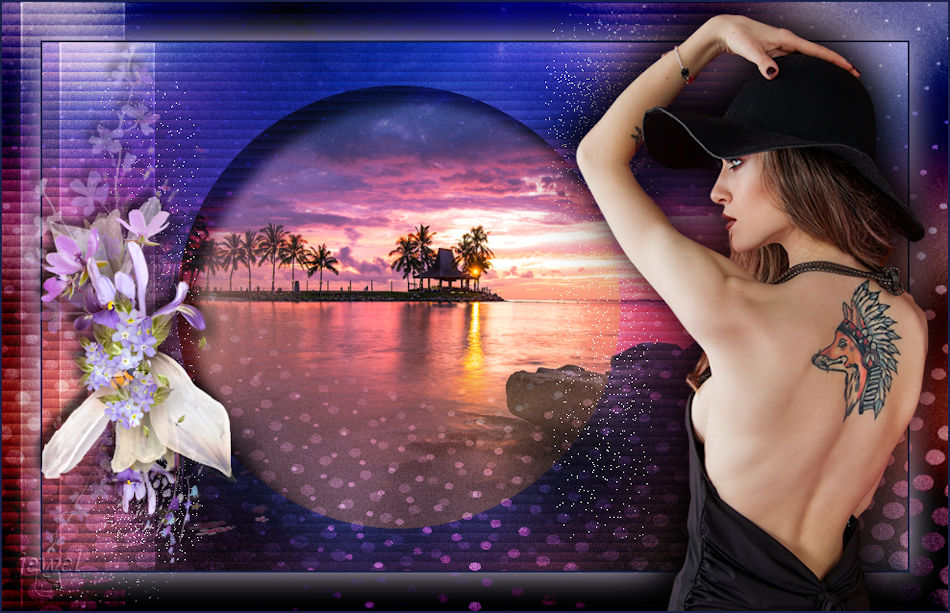
Colybrix, thank you very much for your permission that I may translate your tutorials
Tutorial here
***
***
Plugins
Mura’s Meister
Graphic Plus
***
Colors
Foreground #1a224b
Background #e1d4f1

***
1 - File - New transparent 900 x 550 pixels transparent
Selections – Select all
2 - Edit – Copy "04024_tanjungarusunset_2560x1440"
Edit – Paste into selection
Selections – Select none
3 - Layers - Duplicate
Layers – Load/Save mask - Load Mask from Disk
Choose mask 20/20

Layers - Duplicate
Layers - Merge - Merge group
4 - Close this layer
Activate Raster 1
Adjust - Blur - Gaussian blur 30
Effects - Image effects - Seamless tiling - Side by Side

5 - Adjust - Add/Remove Noise - Add Noise

6 - Layers – New Raster layer
Fill with the light color or White color
Layers – New mask layer from image – select "160_Masque_ForumChezVioline"
Effects - Edges Effects - Enhance
Layers - Merge - Merge group
Blend Mode Overlay
7. - Layers - Duplicate
Image – Mirror Horizontal
Blend Mode Overlay - Opacity 50
8 - Activate bottom Layer (Raster1)
Layers - Duplicate
Effects - Mura’s Meister - Pole Transform
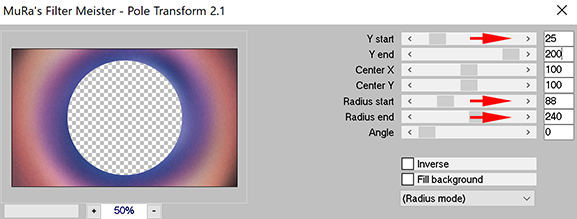
Blend mode Overlay
Effects - 3D Effects - Drop shadow - Black color

9 - Effects - Texture Effects - Blinds (Dark color)

Layers - Arrange - Bring to top
10 - Pick Tool (k)
Position X -80
Position Y 0

11 - Erase Tool - Round Brush - Settings

Click up and go down to the bottom - 3-4 times if necessary to erase the clean cut
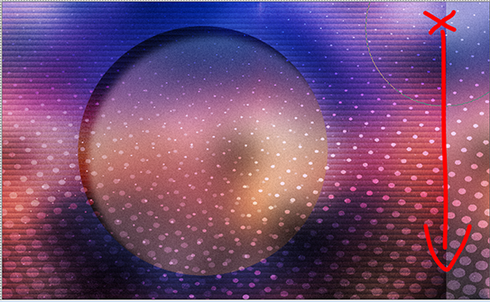
Result
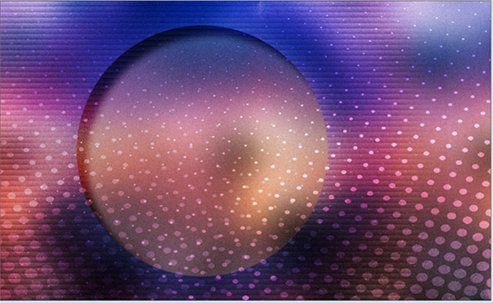
12 - Activate Group - copy of raster 1 and open it
Move to the center of the circle if necessary
For my version - Pick Tool (k)

13 - Activate Top Layer
Layers – New Raster layer
Select Tool (S) – Custom Selection
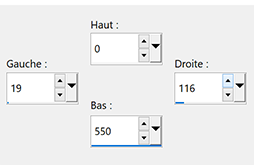
14 - Flood Fill Tool - Opacity 30
Fill with White color
Selections – Modify - Select Selections Borders
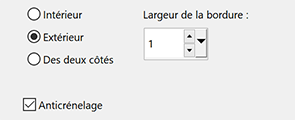
15 - Flood Fill Tool 100
Zoom in - Fill with white color
Selections – Select none
16 - Blend Mode Overlay - Opacity 75
Layers - Duplicate
Image - Resize 90% - resize all layers not checked
Adjust - Blur - Gaussian Blur 10
Blend Mode Dissolve - Opacity 20
17 - Effects - Image effects - Seamless tiling - Side by Side (same settings)
18 - Edit – Copy special - copy merged
19 - Image – Add borders
2 pixels – Foreground Color
Selections – Select all
Image – Add Borders
40 pixels –no need to change color
20 - Selections - Invert
Edit - Paste into selection
Effects - Graphic Plus - Contrast
Adapt ths first number - the higher the number, the darker the result

21 - Selections - Invert
Effects - 3D Effects - Drop shadow - Light color
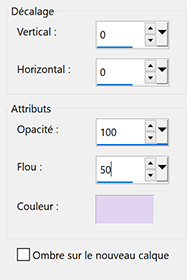
Selections - Select none
22 - Edit - Copy "femme830-coly" - Erase the watermark
Edit - Paste as a new layer
Image - Mirror horizontal
Image - Resize 77% - resize all layers not checked
Move to the right
Effects - 3D Effects - Drop shadow - Black color
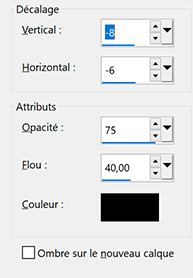
23 - Layers - Duplicate
Activate the bottom tube
Adjust - Blur - Gaussian blur 30
Blend mode Multiply - opacity 85
24 -
Edit - Copy "deco fleurs"
Edit - Paste as a new layer
Image - Resize 70% - resize all layers not checked
Pick Tool (K)
Position X 25 - Position Y 45
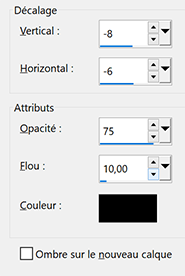
Effects - 3D Effects - Drop shadow - Black color
25 - Add your watermark
Image – Add borders
2 pixels – foreground color
Image – Resize 950 pixels - resize all layers checked
Save Jpeg
If you want, you can send me your version
If you have problems, or you find a not worked link, write to me
Une autre version avec un tube de Tine et un tube fleur de Cal

Une autre version avec un tube de Maryse
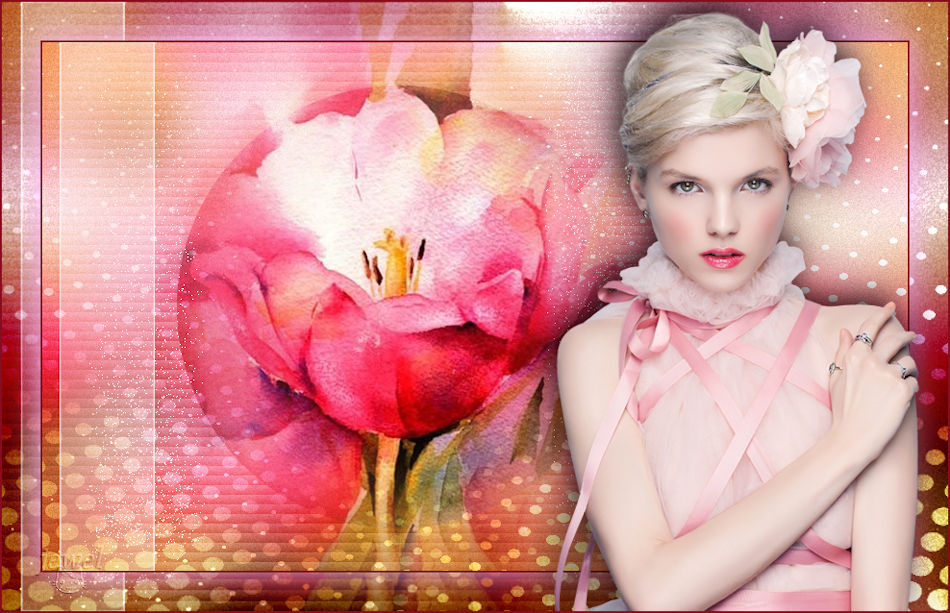
Muito obrigada Roberta

 votre commentaire
-

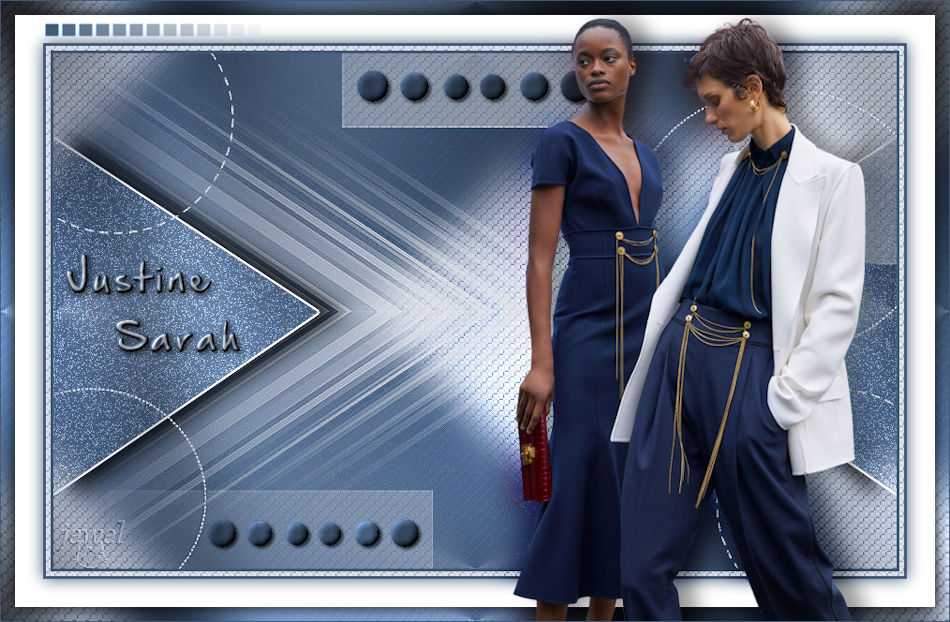
Colybrix, thank you very much for your permission that I may translate your tutorials
Tutoriel original ici
***
***
Plugins
Plugin Galaxy
Graphic Plus
***
Colors
Foreground #425976
Background #e2e5ec

***
Open all files in PSP and minimize to tray
***
1 - Open Alpha layer – Window / duplicate (Ctrl D)
We work on the copy
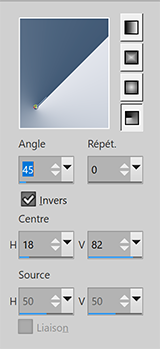
2 - Fill with the radial gradient
Adjust - Blur - Gaussian blur 20
3 - Layers - Duplicate
Image – Mirror
Image – Flip
Blend mode Multiply
Layers - Merge - Merge down
4 - Effects - Image effects - Seamless tiling by default
Effects - Reflection effects - Rotating mirror
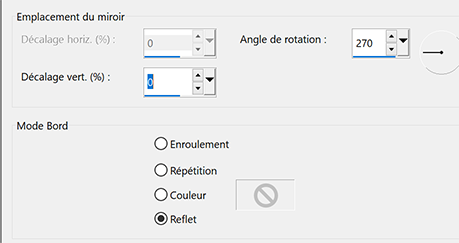
Effects - Edges effects -Enhance 2 times
Result
5 - Layers – New Raster layer
Fill with light color
Layers – New mask layer from image – select " creation.tine_masque330"
Effects - Edges effects -Enhance
Layers - Merge - Merge group
6 - Image – Mirror
Pick tool (k) Position X -100 - Position Y 0
7 - Activate the bottom layer
Effects - Texture Effects - Weave

8 - Stay on this layer
Selections - Load - Save selection - Load Selection 1 from Alpha Channel
Selections -Promote selection to layer
Effects Plugin Galaxy > Noiseee

9 - Selections – Modify - Select selection borders

Fill with light color
Selections - Select none
Effects - 3D Effects - Drop shadow 0, 24, 75, 30 - Black color
10 - Layers - Arrange - Bring to top
Layers - Duplicate
Image – Mirror
Layers - Merge - Merge down
11 - Effects Graphic Plus - Cross Shadow intensity 90

12 - Activate Raster 1
Effects Graphic Plus - Cross Shadow same settings but intensity 50
13 - Activate the top layer
Layers - New Raster layer
Fill with light color
Layers – New mask layer from image – select NarahsMasks_1639
Effects - Edges effects -Enhance
Layers - Merge - Merge group
14 - Effects - Texture Effects - Weave
Same settings but Opacity 50

15 - Layers – New Raster layer
Selections - Load - Save selection - Load Selection 2 from Alpha Channel
Fill with dark color
Effects - Graphic Plus - Cross Shadow by default but intensity 50
16 - Effects - 3D Effects - Inner bevel
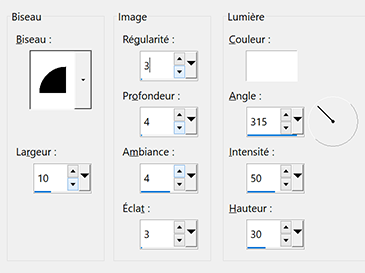
Effects - 3D Effects - Drop shadow 2, 2, 75, 5 - Black color
Selections - Select none
17 - Layers - Duplicate
Image – Resize 90% resize all layers not checked
Pick tool (k) Position X 163 - Position Y 495
Layers - Merge - Merge down
Effects - Graphic Plus - Cross Shadow by default but intensity 50
18 - Activate the bottom layer
Edit - Copy
19 - Image – Add borders
3 pixels – dark color
5 pixels – light color
3 pixels – dark color
20 - Magic Wand tool - tolerance and feather à 0
Select the border 5 pixels light color
Effects - Texture Effects - Weave - same settings
21 - Selections - Select all
Image – Add borders
30 pixels – white color
Effects - 3D Effects - Drop shadow - dark color
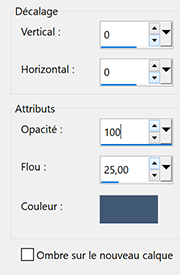
22_ Selections - Select all
Image – Add borders
15 pixels –white color
Selections – Invert
Edit – Paste into selection
23 - Effects Graphic Plus - Cross Shadow par défaut - intensity à 128
24 - Selections – Invert
Effects 3D - Drop shadow - same settings but black color
Selections – Select none
25 - Edit - Copy "Cady 2" - Erase the watermark
Edit - Paste as a new layer
Image - Resize 85% resize all layers not checked
Move on the right
Layers - Duplicate
on the layer below - Adjust - Blur - Gaussian blur 20
Blend mode Overlay
on the top layer - Effects 3D - Drop shadow -2, 18, 40, 30 - dark color
26 - Text tool (or take the text provided) Fond Hand Of Sean

Write ..... Justine (Enter key.......then push 4 times on space to make a shift to the right)
and write ...... Sarah
Right click on the layer in the layer window
Convert to Raster Layer
Effects - 3D Effects - Inner bevel same settings but width 5
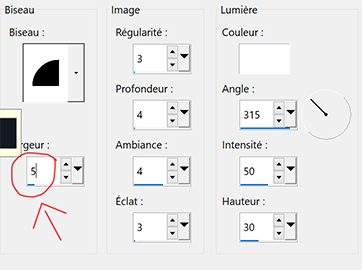
Effects - 3D effects - Drop shadow 2, 2, 75, 10 - black color
Pick tool (k) Position X 63 - Position Y 264
27 - Edit - Copy "deco bordure"
Pick Tool (k) position X 45 - position Y 18
Effects - Edges Effects - Enhance
28 - Add your watermark
Image – Add borders
1 pixel – Dark color
Image – Resize 950 pixels - resize all layers checked
Save Jpeg
If you want, you can send me your version
If you have problems, or you find a not worked link, write to me
Une autre version avec un tube de Corinne Vicaire
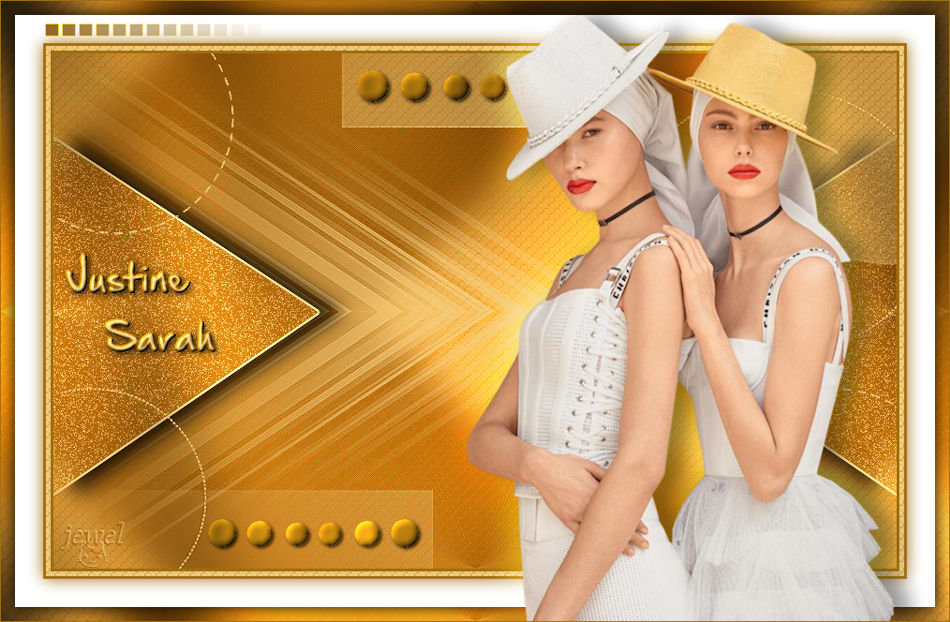
Une autre version avec un tube de Tine
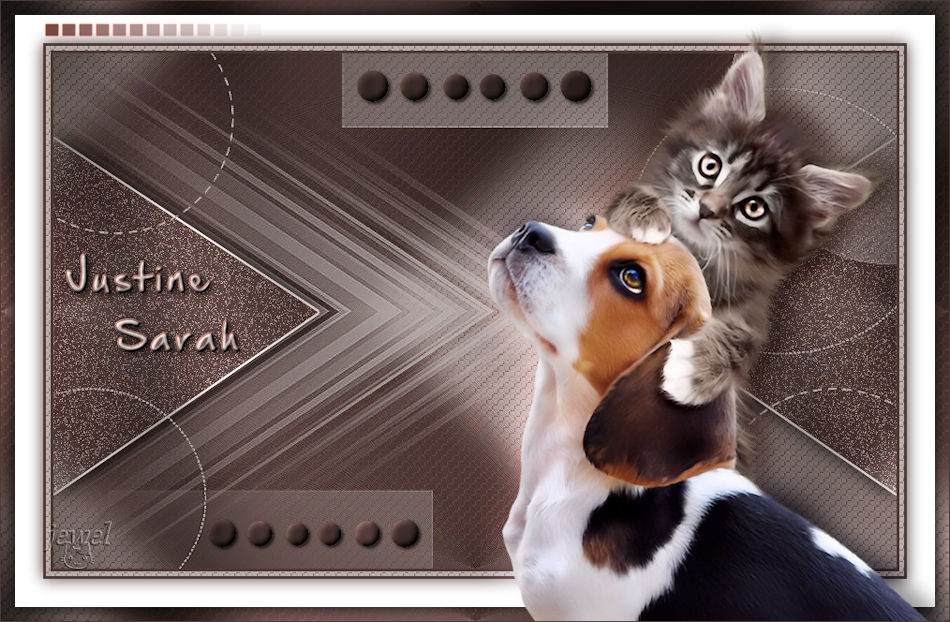
Muito obrigada Roberta

 votre commentaire


